
ROBOLOP BERYLLIUM BMW 323ci
 Nov 25, 2011 | 01:50 PM
#61

Thread Starter
| Teamspeed Member
Joined: Jan 2008
Posts: 179


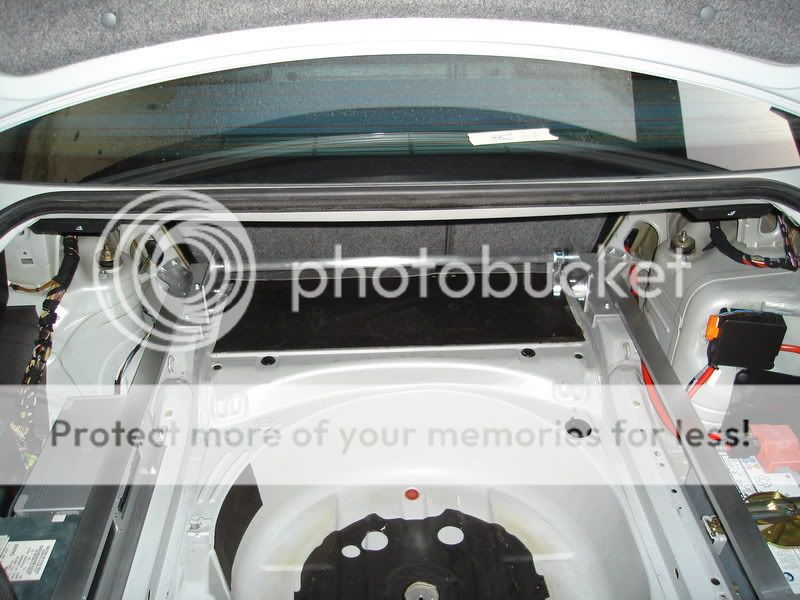
started to make the bottomplate. She will be around the BOX and rest on the chassis of the car. did it as good as possible. Leveled it with waterleveler.
Once this plate is right, you take the messurements always from this plate, so it has to be 100% correcT.

milled to upperboard


Once this plate is right, you take the messurements always from this plate, so it has to be 100% correcT.
milled to upperboard
Nov 25, 2011 | 01:51 PM
#62
Thread Starter
| Teamspeed Member
Joined: Jan 2008
Posts: 179
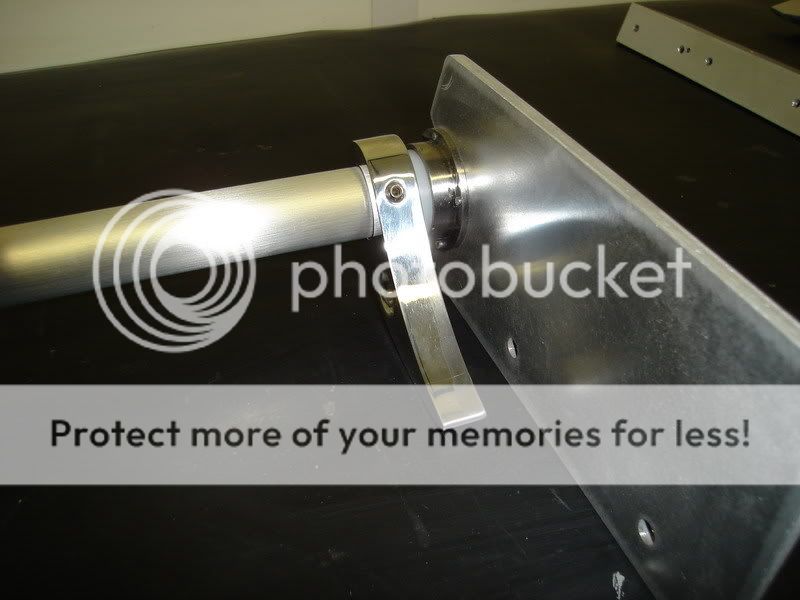
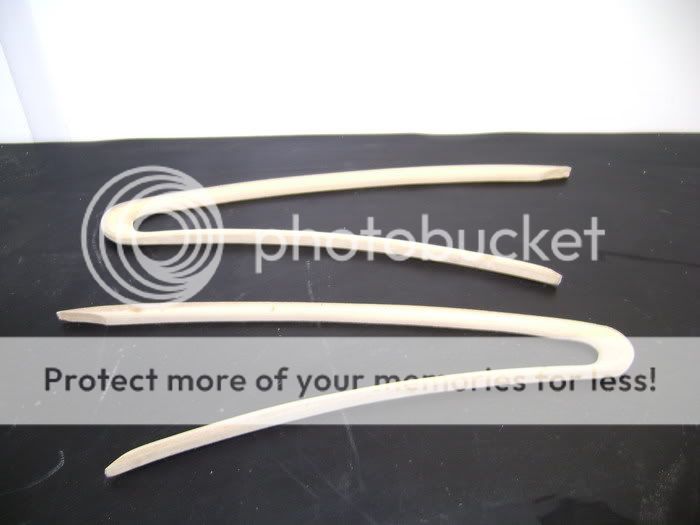
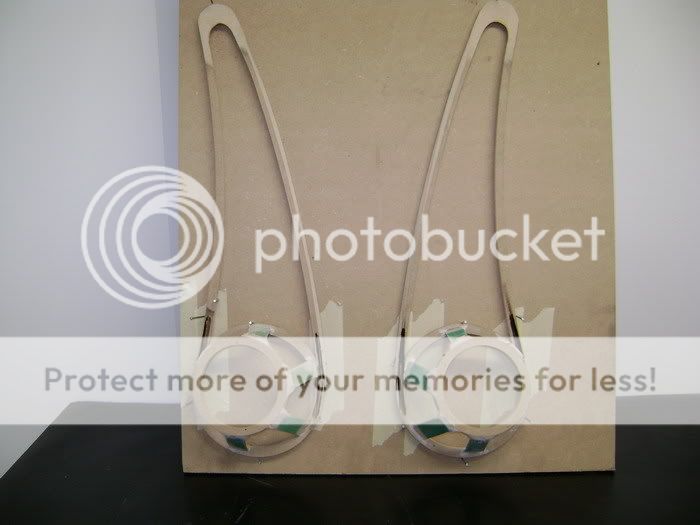
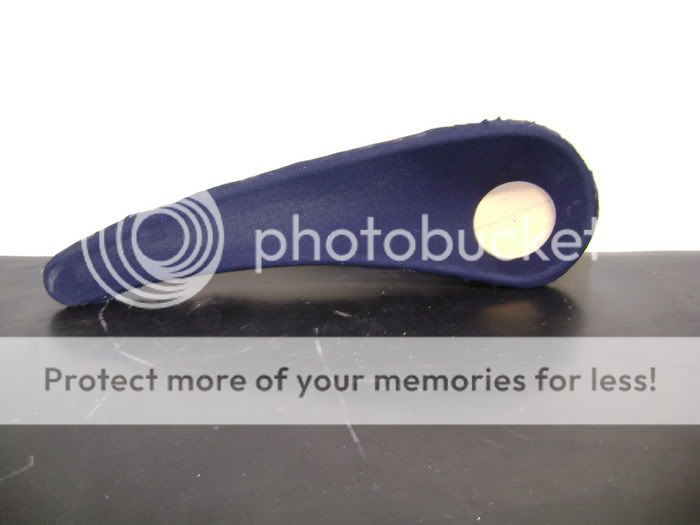
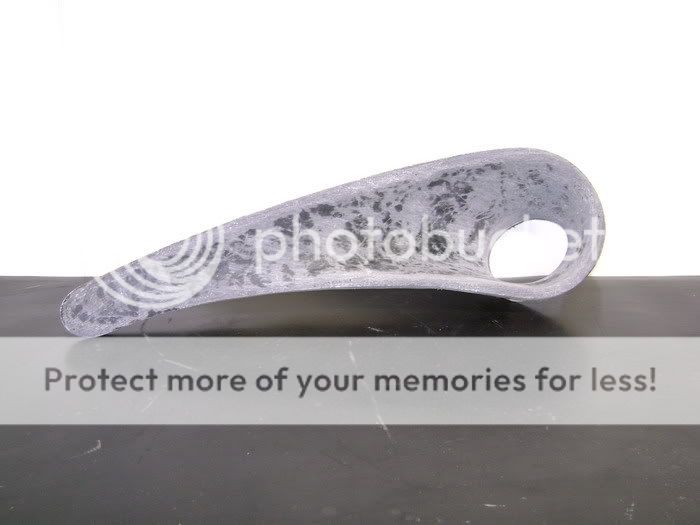
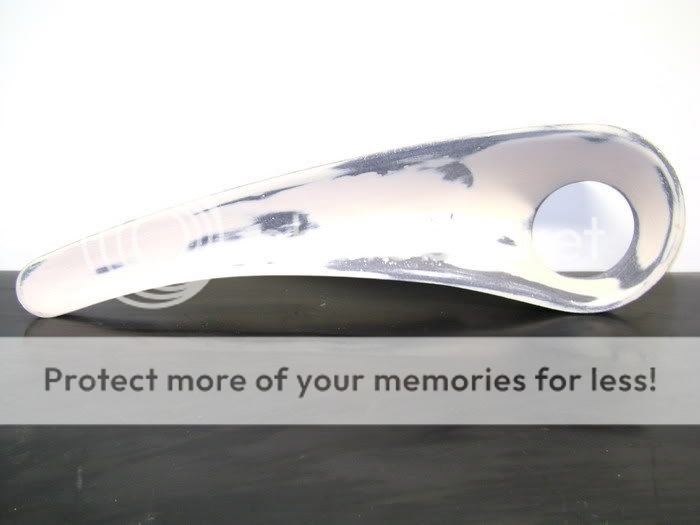
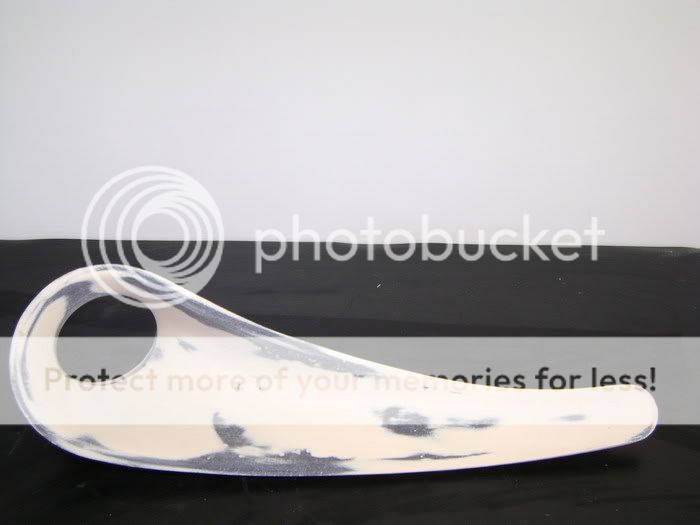
Started to make a hinge. He went to see the store, but they didn't had what he needed. So got some aluminium ..
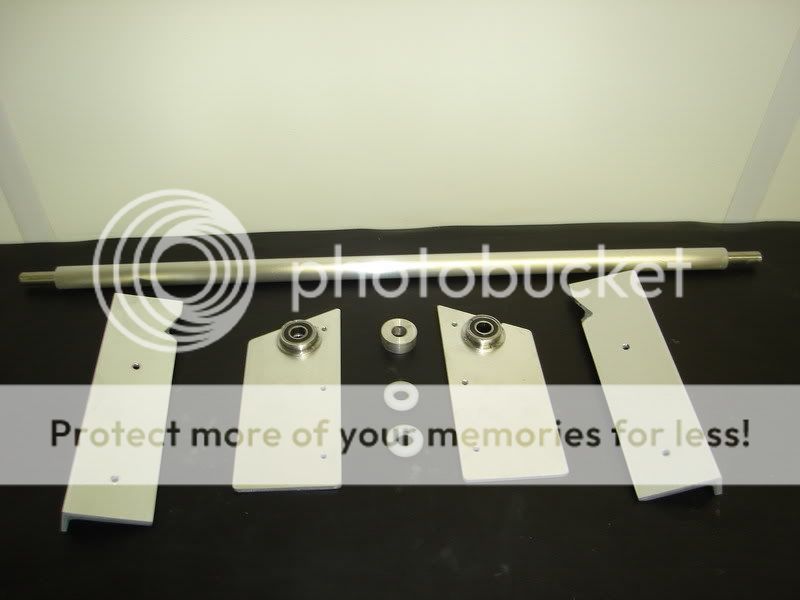
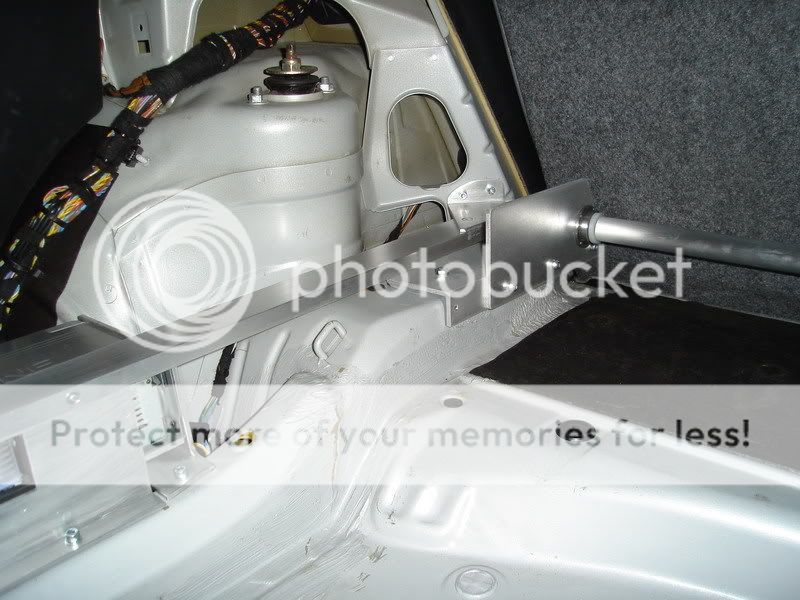
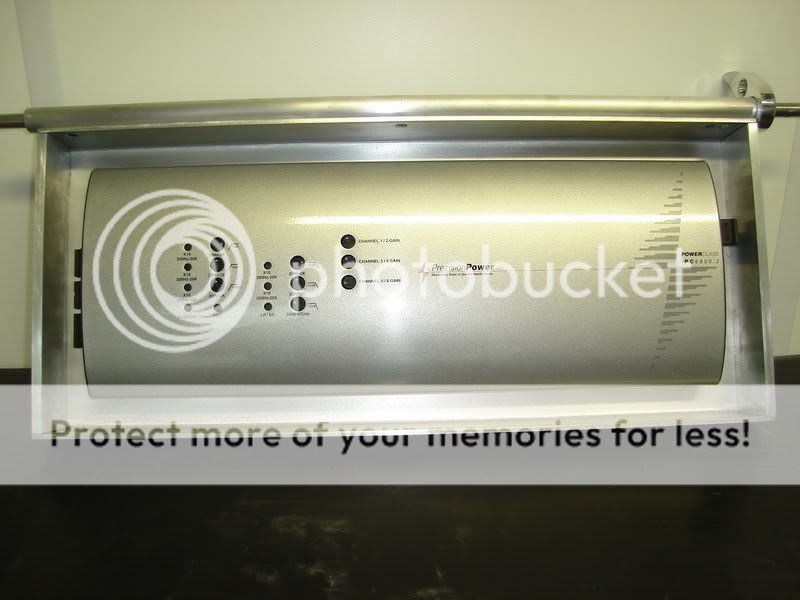
The meaning of this hinge, is that the amplifier can go up. So the crowbar needed to be something nice.
Cause the crowbar wil be very shot/small, he made it strong enought. (15mm thickness)
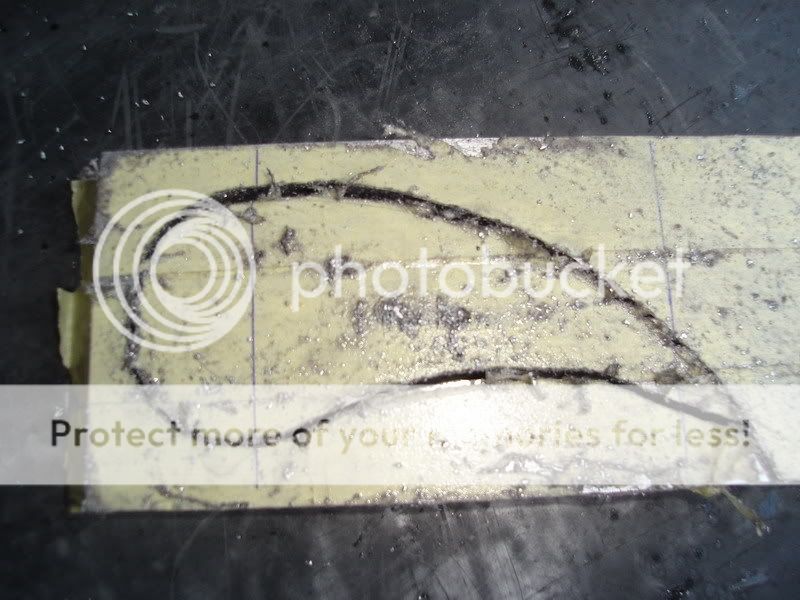
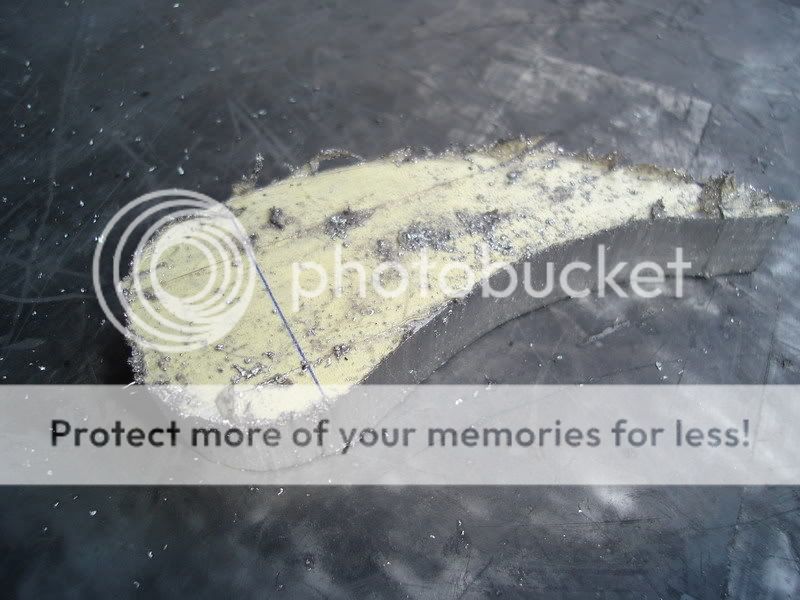
there are nicer things in life to do, but when it's finished, it was worth the work in his eyes.
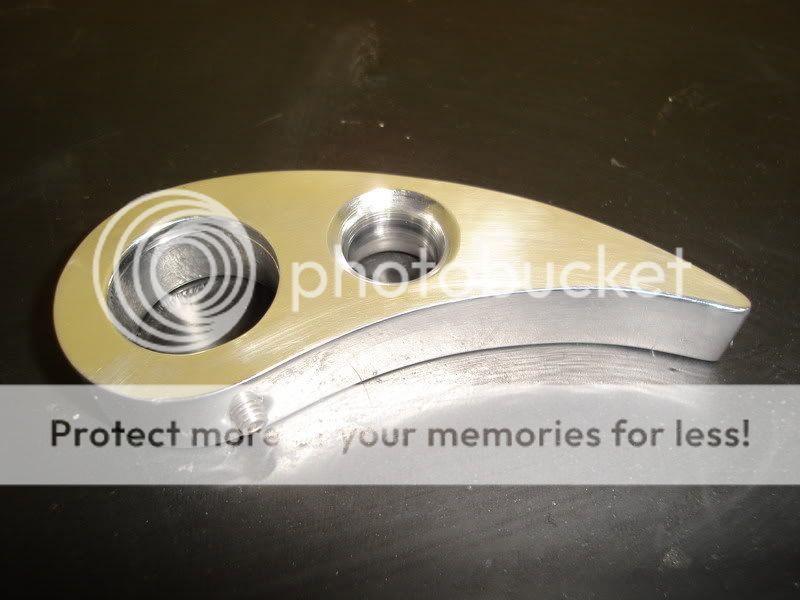
Against the alu tube, he's going to weld a piece to, where he can hook the amp on.

The meaning of this hinge, is that the amplifier can go up. So the crowbar needed to be something nice.
Cause the crowbar wil be very shot/small, he made it strong enought. (15mm thickness)
there are nicer things in life to do, but when it's finished, it was worth the work in his eyes.
Against the alu tube, he's going to weld a piece to, where he can hook the amp on.
Nov 25, 2011 | 01:52 PM
#63
Thread Starter
| Teamspeed Member
Joined: Jan 2008
Posts: 179
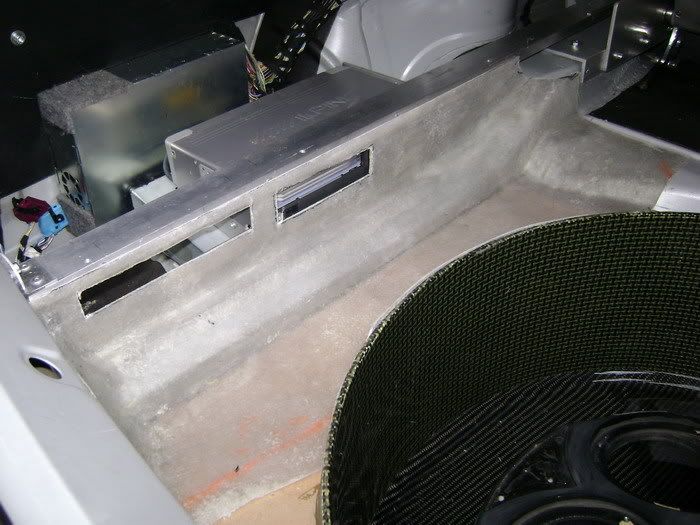
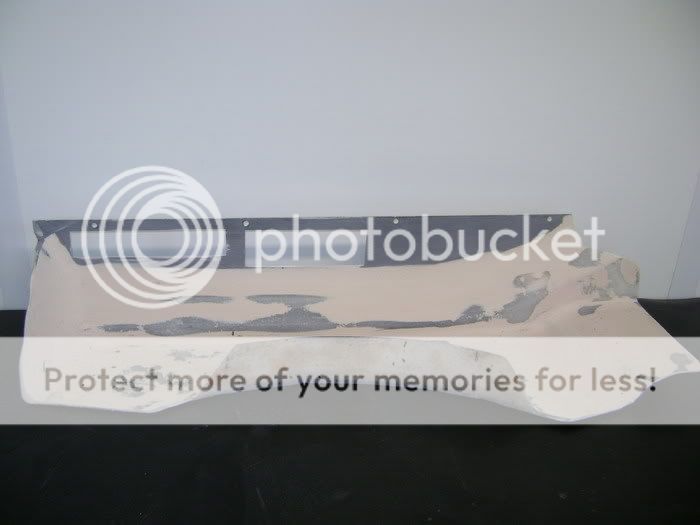
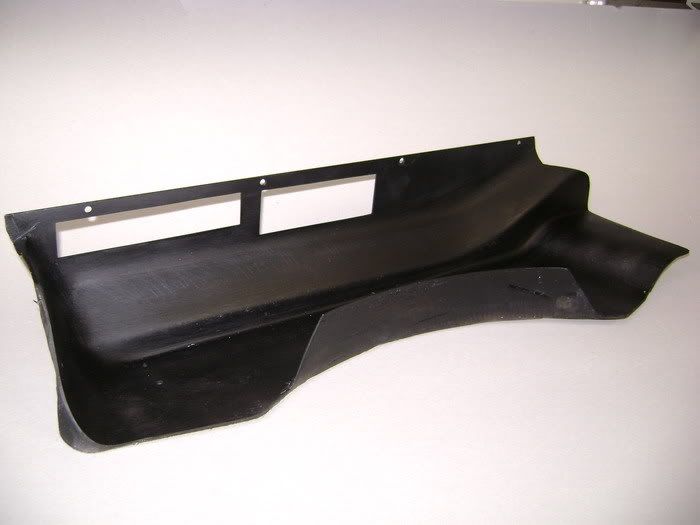
Then I started to tair apart the Alpine CD player.
Did away the front, and made some trolleys to fasten the thing.
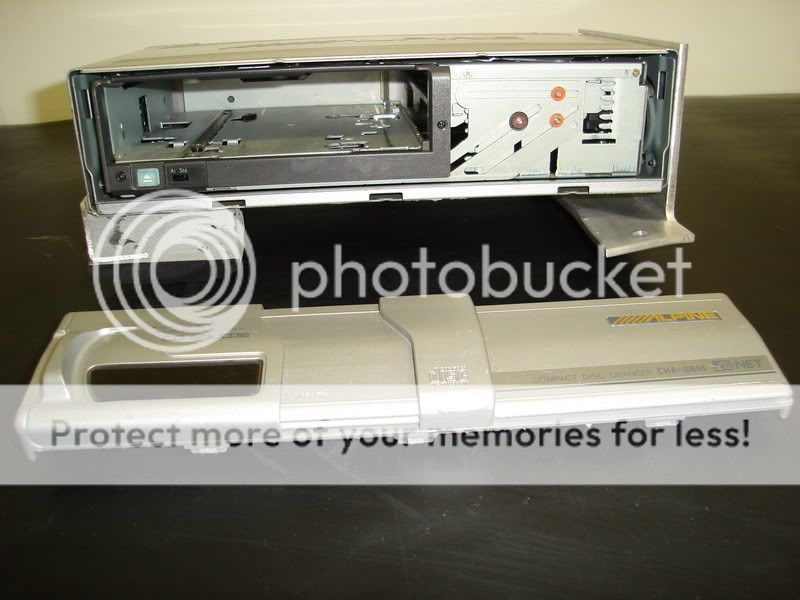
here you can see the front of the CD player

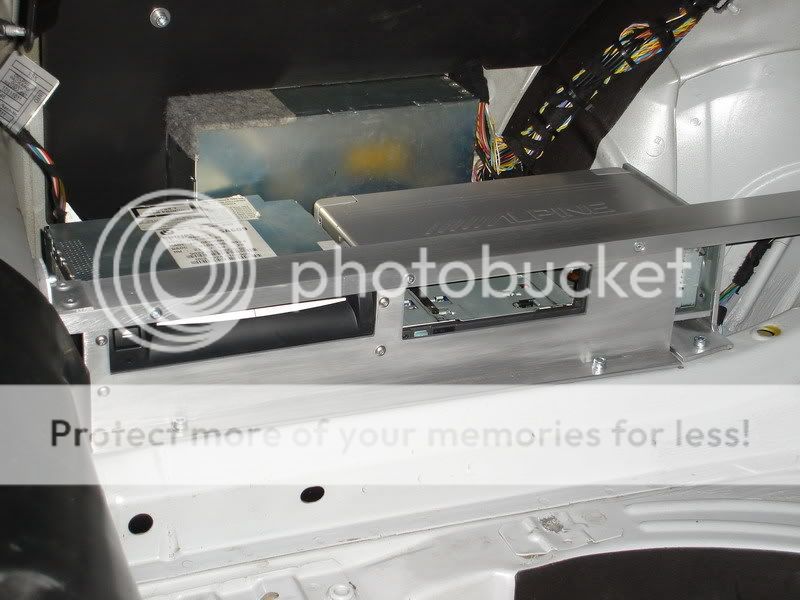
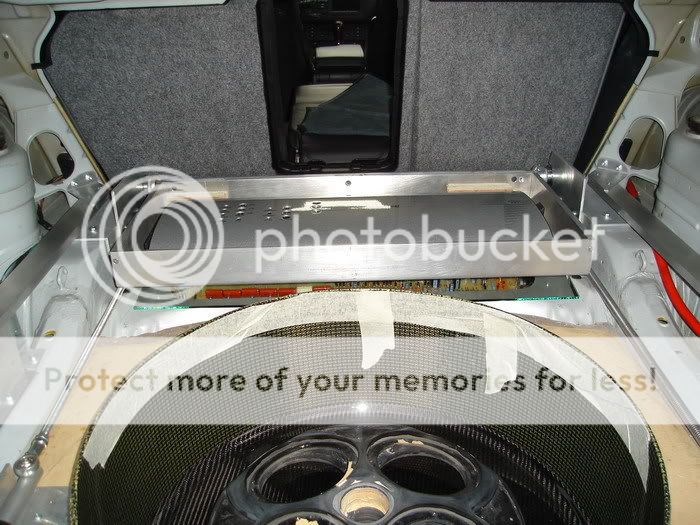
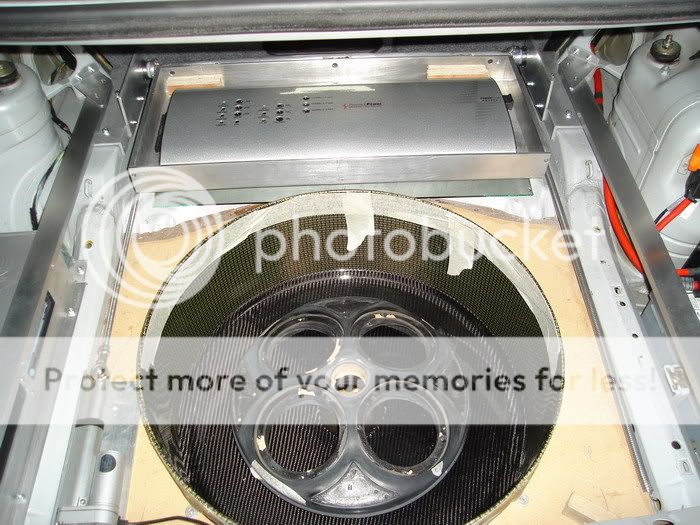
The ALU- box where the amp should come is foreseen with the hinge.
This one, he screwed on. I going to try it'l go this way.
If not, he can always weld it on...
I doesn't want to try it now, cause he's afraid it all bend of the heat.
But it's a final option...

Will look like......
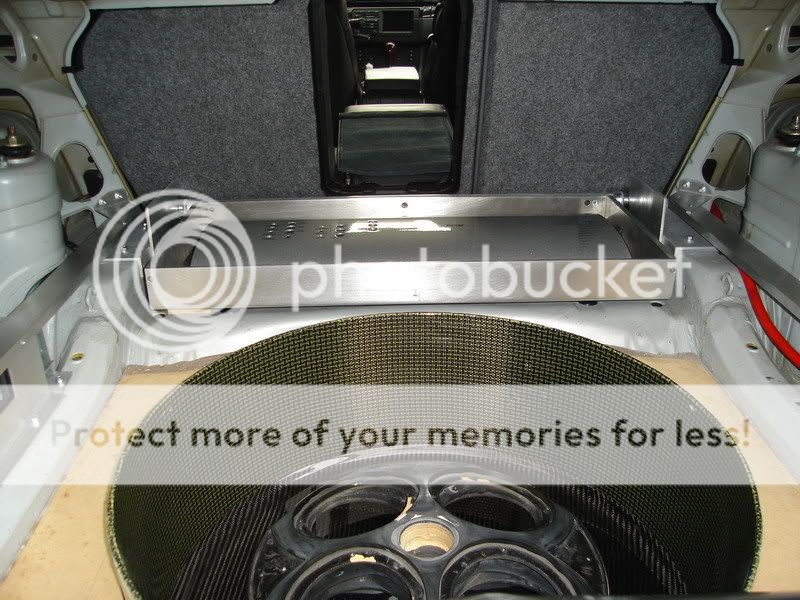
put some movement in the amp.

Made a fiberglass plate.
Here will be some change soon, but you have to start somewhere.
found some vents that you can take from each other.
These are from aluminium, but the frame they're in, goes in the bin.
There will be an -minor modded- version of it
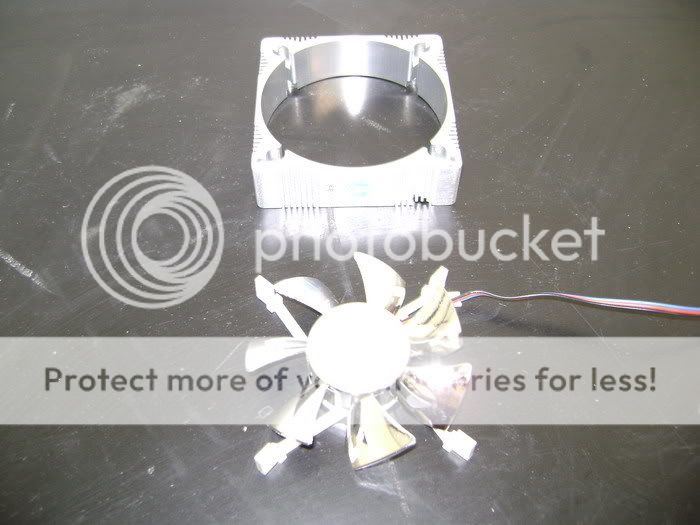
2 pieces to place in the vents, so the cooling on the amp will be better.
Did away the front, and made some trolleys to fasten the thing.
here you can see the front of the CD player
The ALU- box where the amp should come is foreseen with the hinge.
This one, he screwed on. I going to try it'l go this way.
If not, he can always weld it on...
I doesn't want to try it now, cause he's afraid it all bend of the heat.
But it's a final option...
Will look like......
put some movement in the amp.
Made a fiberglass plate.
Here will be some change soon, but you have to start somewhere.
found some vents that you can take from each other.
These are from aluminium, but the frame they're in, goes in the bin.
There will be an -minor modded- version of it
2 pieces to place in the vents, so the cooling on the amp will be better.
 Nov 25, 2011 | 01:53 PM
#65
Thread Starter
| Teamspeed Member
Joined: Jan 2008
Posts: 179
The pieces are finally done.
all that work, pppfffffff, but it was worth it .
Here's a picture from the front. You can see a V where everythings slides into.
Then he fiberglassed a little alu piece that is fastened bigtime.
In the whole those things are layed into, fiberglassed a firm alu bridge, and there the backside slides into.

These things have to come out really fast, cause his GPS and CD loader is behind it.
all that work, pppfffffff, but it was worth it .
Here's a picture from the front. You can see a V where everythings slides into.
Then he fiberglassed a little alu piece that is fastened bigtime.
In the whole those things are layed into, fiberglassed a firm alu bridge, and there the backside slides into.
These things have to come out really fast, cause his GPS and CD loader is behind it.
Nov 25, 2011 | 01:54 PM
#66
Thread Starter
| Teamspeed Member
Joined: Jan 2008
Posts: 179
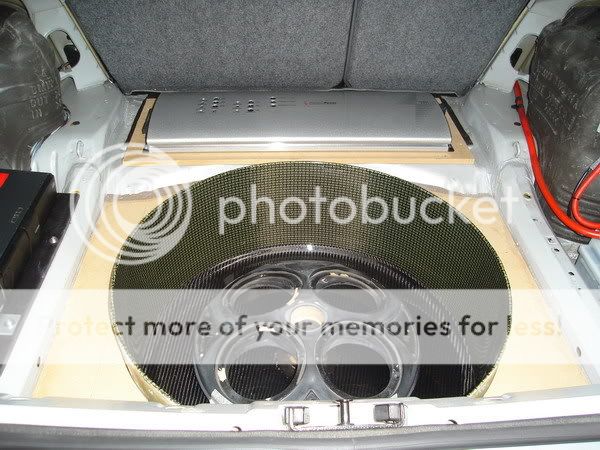
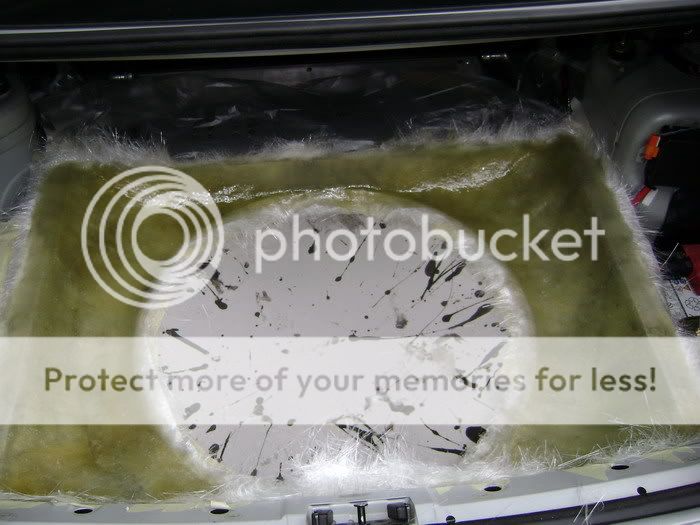
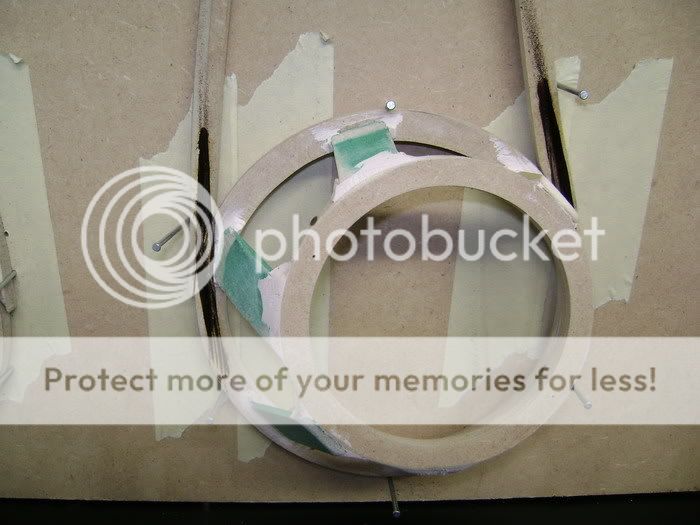
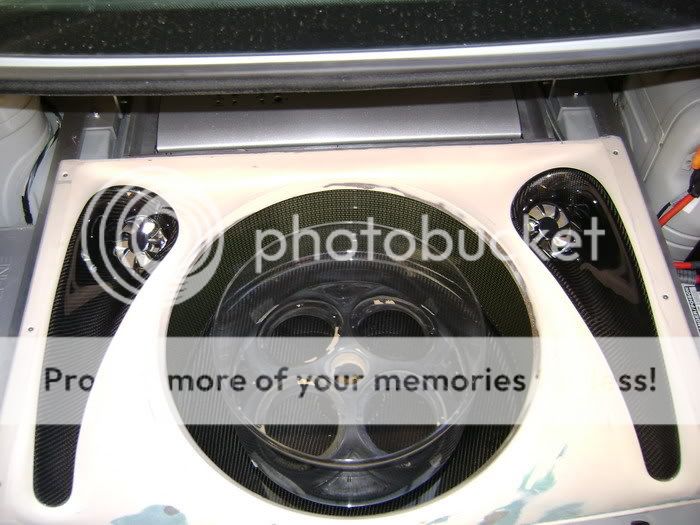
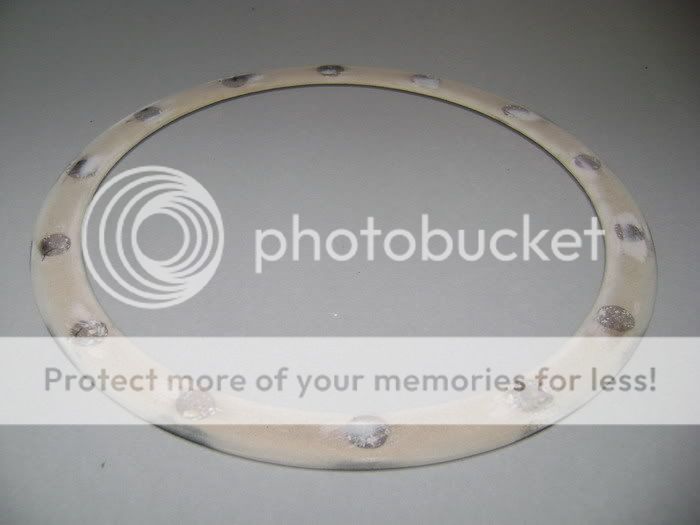
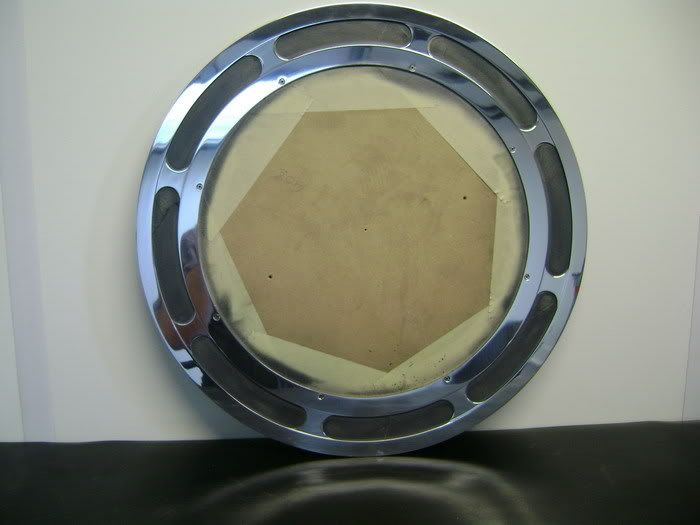
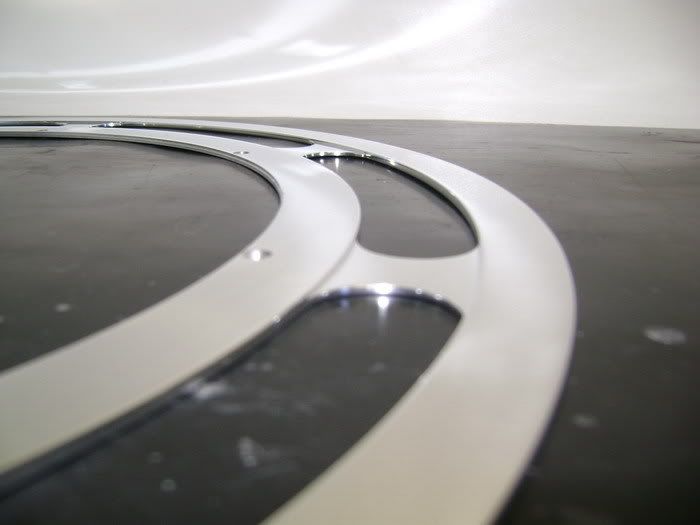
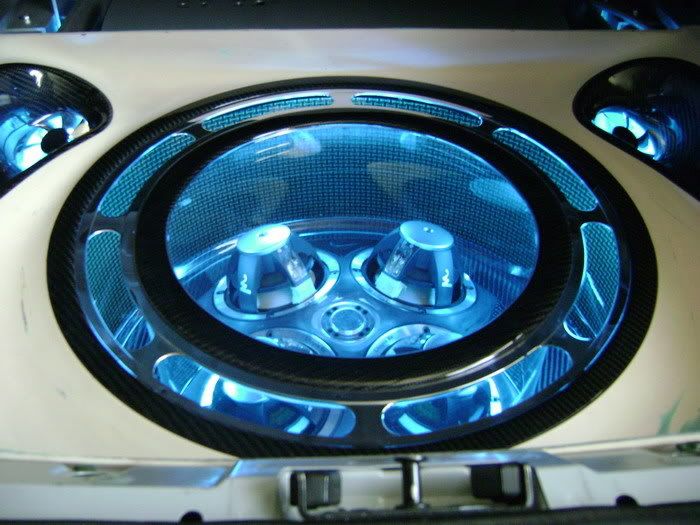
I made a grill, to cover the sub-box.
The frame es milled out of MDF wood.
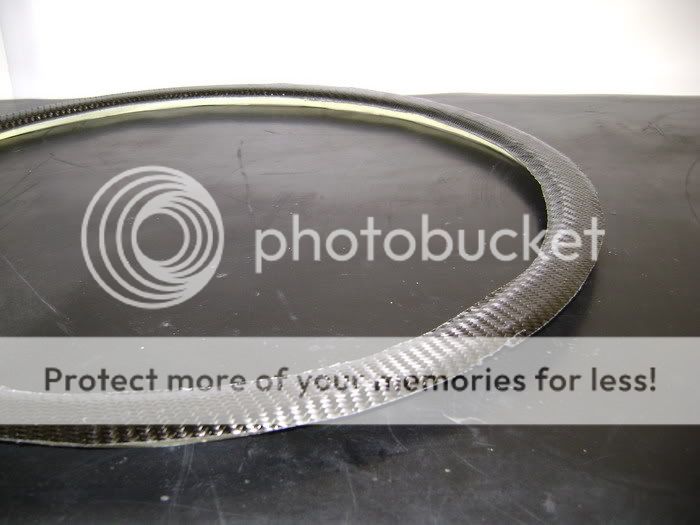
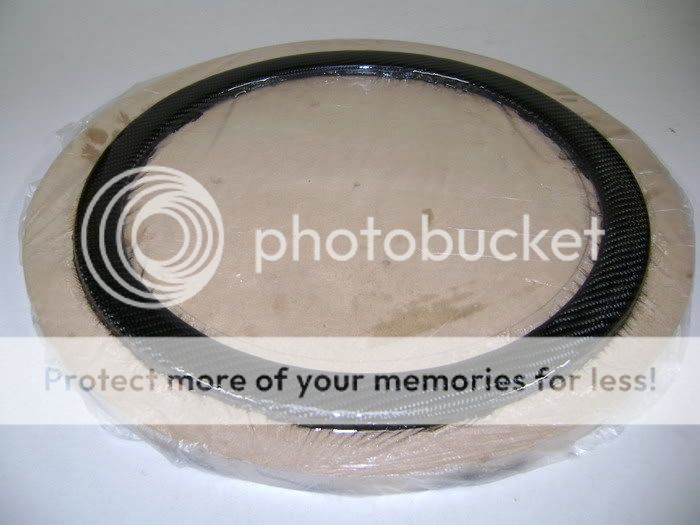
Here you can see the top of the upper ring. This one, you will see, and will be covered in Carbon

On the picture, you can see he miled a little ditch.

covering the frame in Carbon
The frame es milled out of MDF wood.
Here you can see the top of the upper ring. This one, you will see, and will be covered in Carbon
On the picture, you can see he miled a little ditch.
covering the frame in Carbon
Nov 25, 2011 | 01:54 PM
#67
Thread Starter
| Teamspeed Member
Joined: Jan 2008
Posts: 179
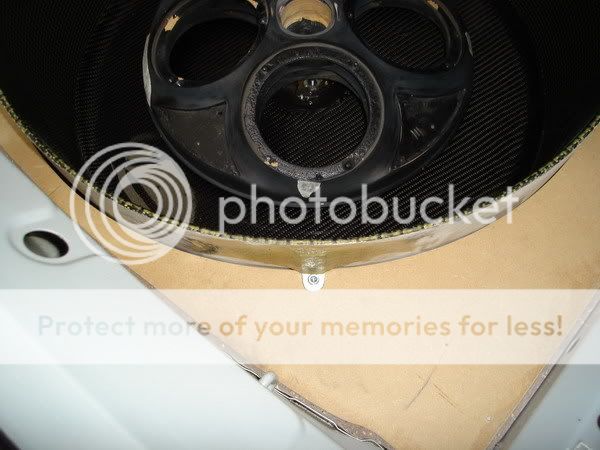
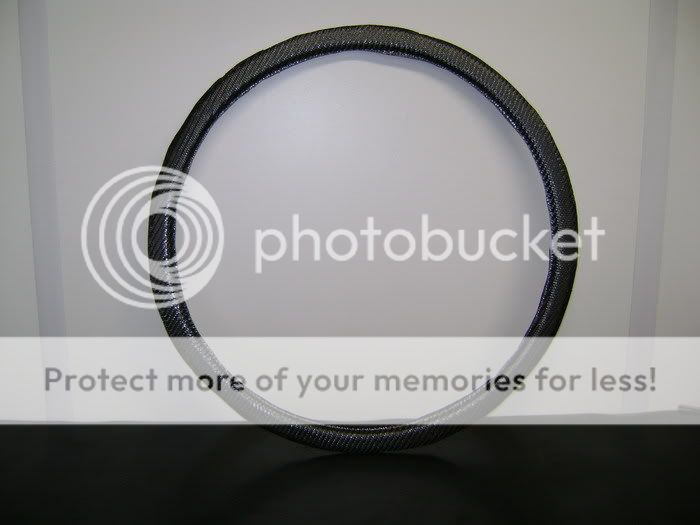
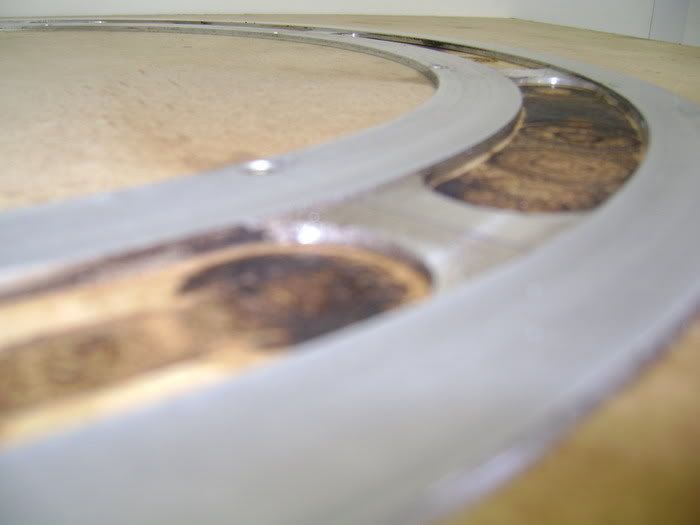
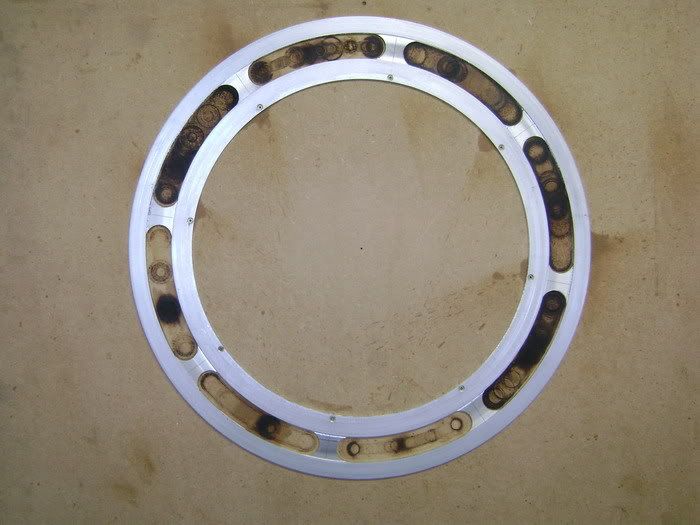
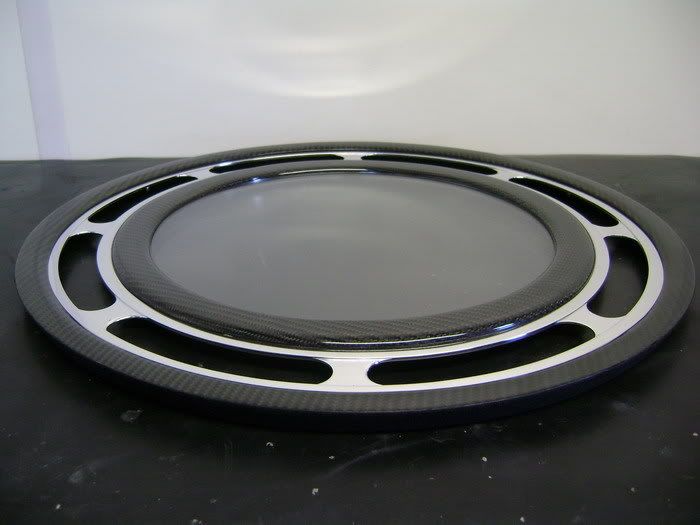
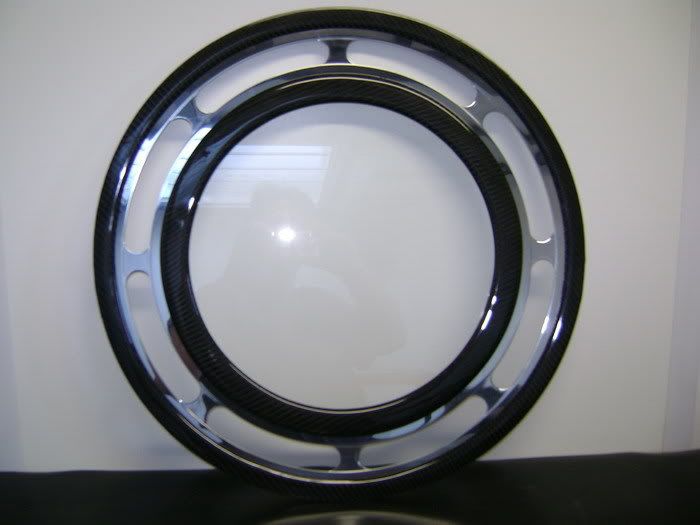
This will be the inner-ring, what goes in the grill.
First I mild a MDF wooden ring and rounded the edges. What you see now is the upperside. Comes in CF btw

this is the bottomside. You see I made some screwbusses in it.


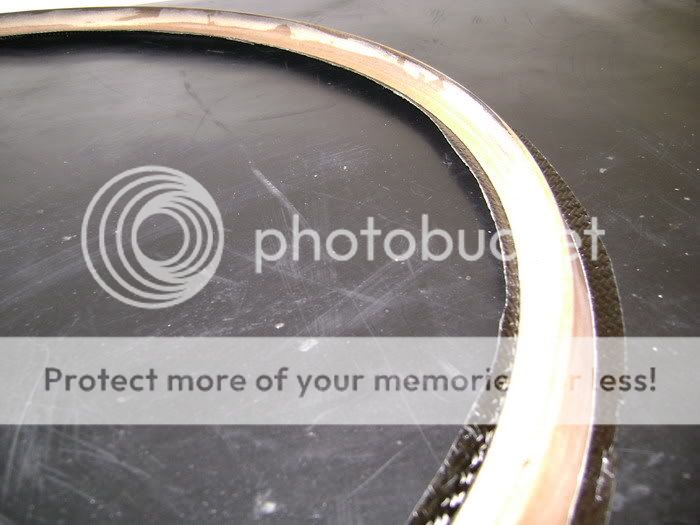
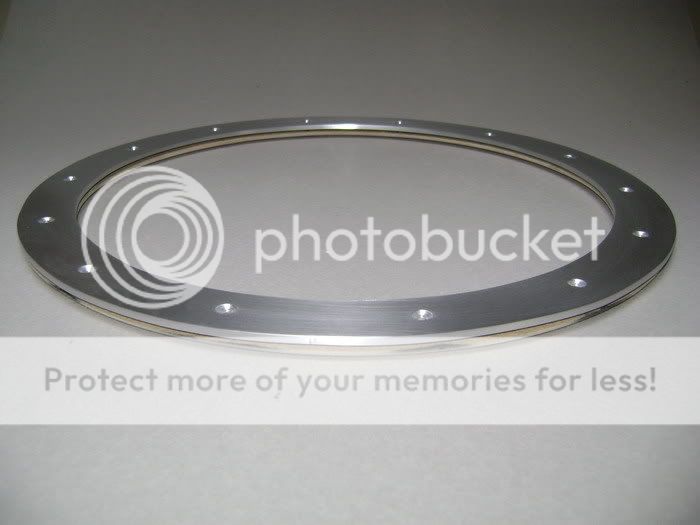
Made an alu ring of 3mm thick for on the bottomside. Must be very solid so the grill can't bend in the middle.

Here you see the 2 parts on each other. Between there's 2mm place for the innox plate on the outside, and the alu from in the centre.
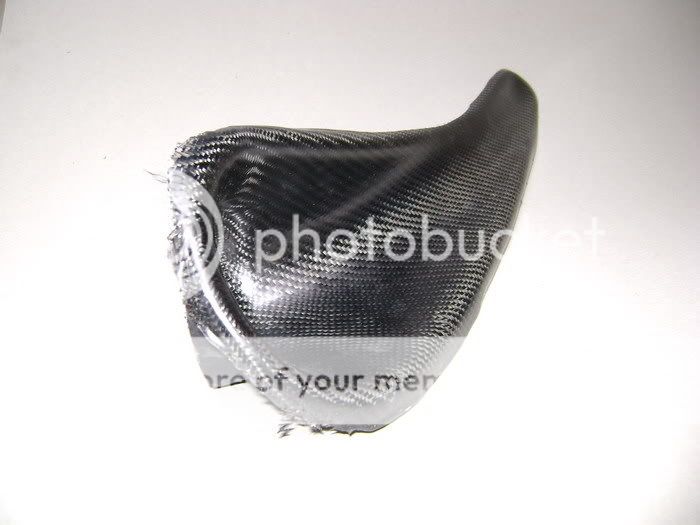
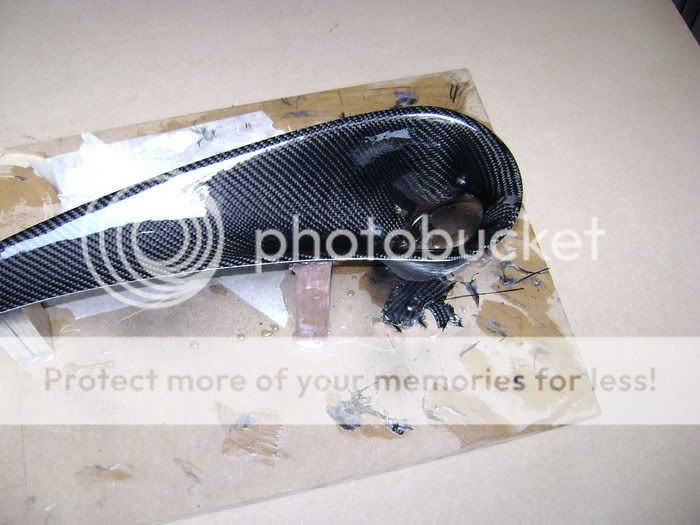
The middle ring going into Carbon Fibre. Need some more layers of epoxy though..
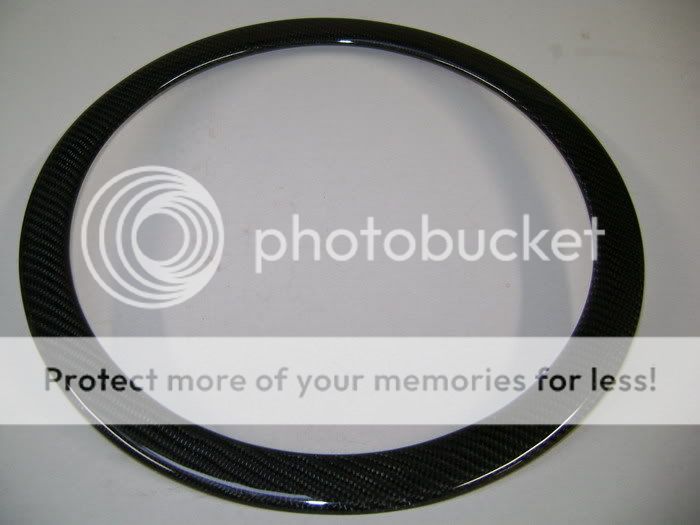
First I mild a MDF wooden ring and rounded the edges. What you see now is the upperside. Comes in CF btw
this is the bottomside. You see I made some screwbusses in it.
Made an alu ring of 3mm thick for on the bottomside. Must be very solid so the grill can't bend in the middle.
Here you see the 2 parts on each other. Between there's 2mm place for the innox plate on the outside, and the alu from in the centre.
The middle ring going into Carbon Fibre. Need some more layers of epoxy though..
Nov 25, 2011 | 01:55 PM
#68
Thread Starter
| Teamspeed Member
Joined: Jan 2008
Posts: 179
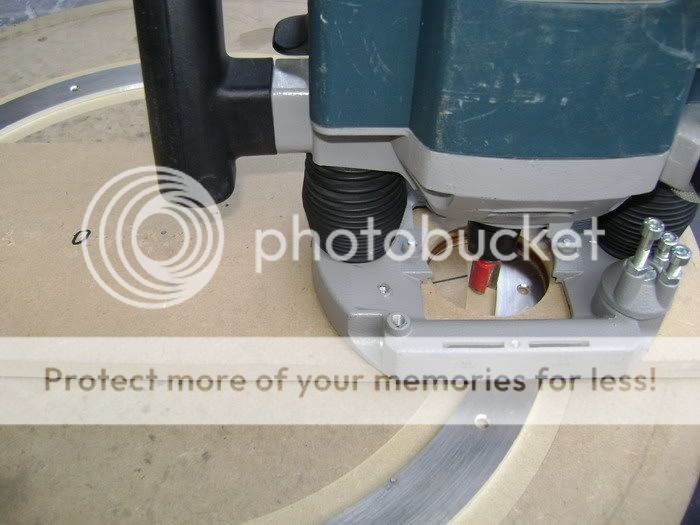
Took the uppermill and started the outer-ring.
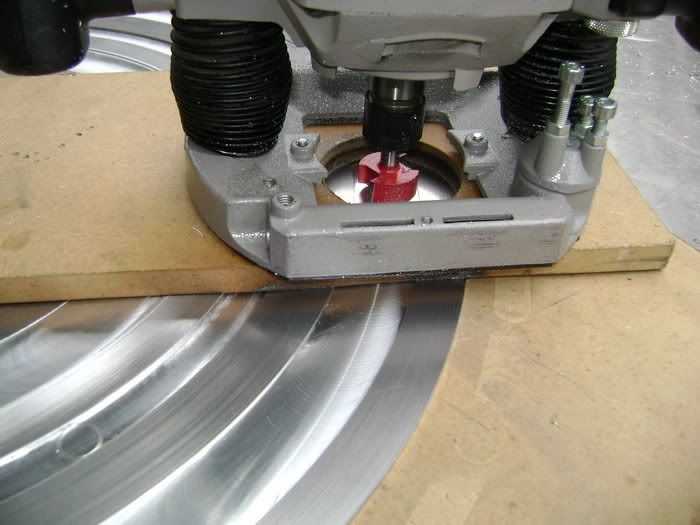

Started to begin polishing. Is a heck of a job, people who polished with heavy machinery before know...
It's kinda hard to do this without the brushes hacking into the alu..
I did this:
Screw the piece on a piece of wood that you can hold on tight.
1) you won't burn ya fingers/hands on the alu
2) the brush can't bite himself into sth
Nov 25, 2011 | 01:55 PM
#69
Thread Starter
| Teamspeed Member
Joined: Jan 2008
Posts: 179
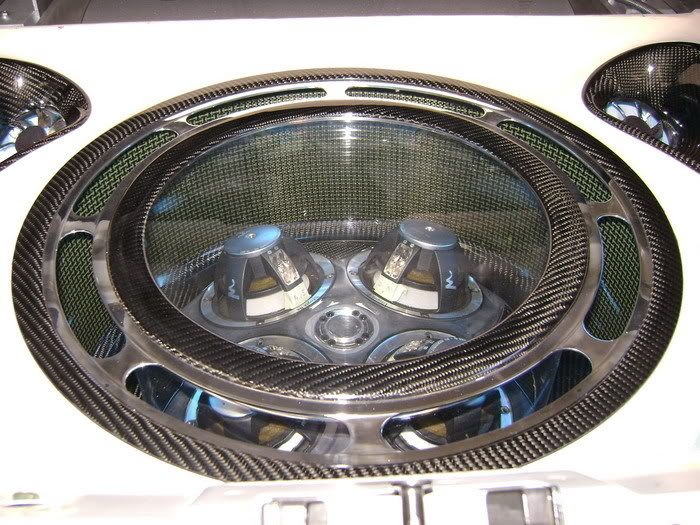
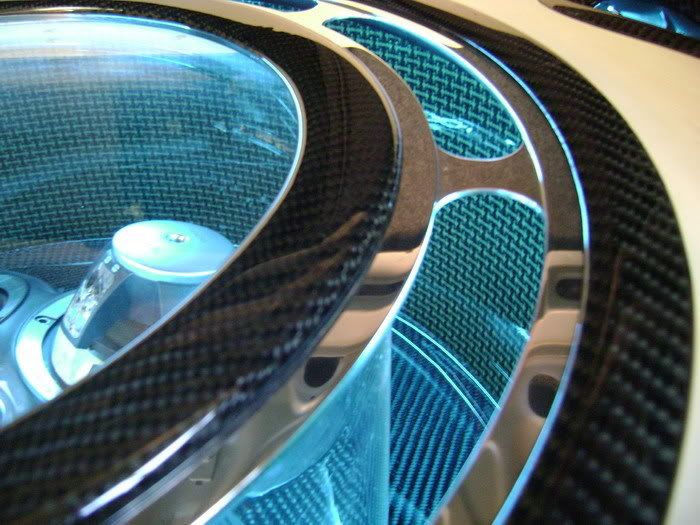


As you can see, the whoel sub part is see-able and yet, it's covered with real glass I can clean as much as he wants, without making scratches.
The nice thing about this grille, is that I made it with a simple milling tool. This is the proof everyone can make something really nice, with non-expensive equipment.
Nov 25, 2011 | 01:56 PM
#70
Thread Starter
| Teamspeed Member
Joined: Jan 2008
Posts: 179
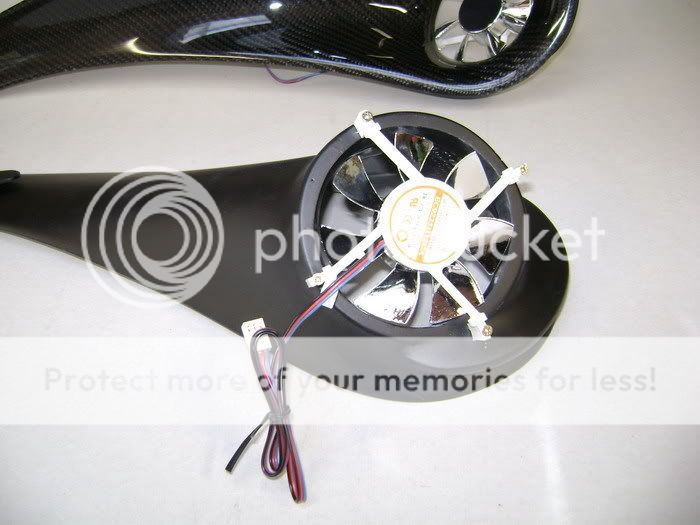
The grill is almost complete. for now, no Focal Logo's anymore
althought...
The next work on the list is for next days, maybe weeks.
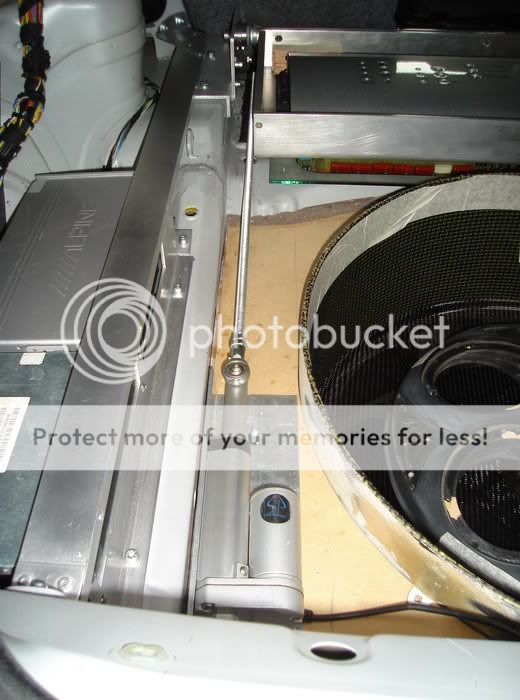
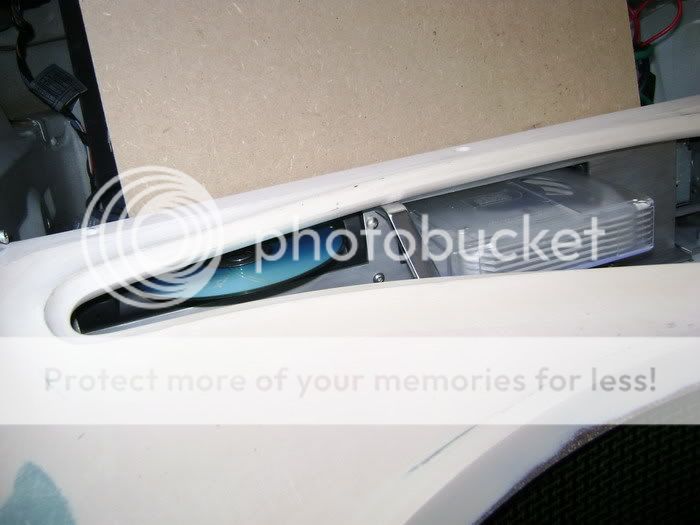
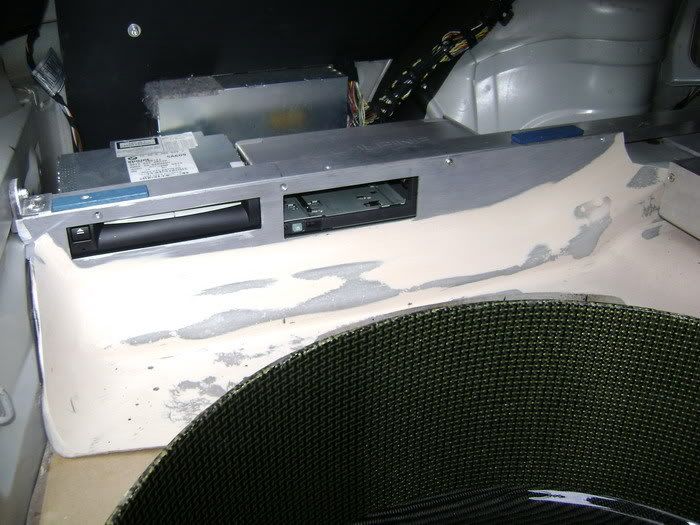
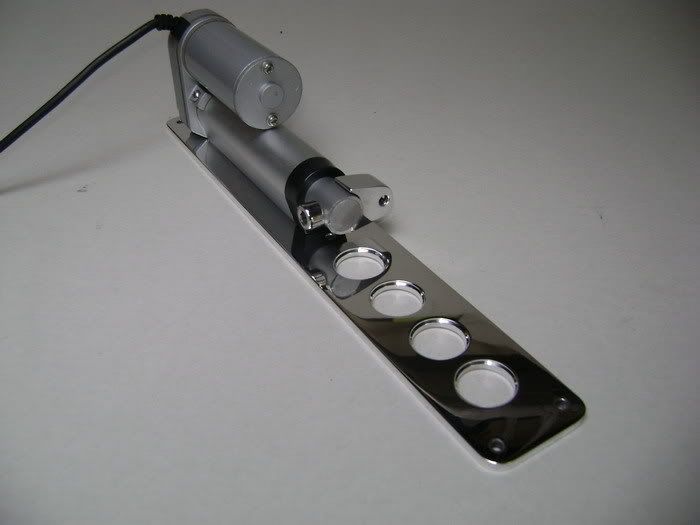
The actuator, that bringt the amplifier to life, will get a nice place.
For those who forgot, this is how the motor was placed.
This was only to see if the thing worked like I wanted.
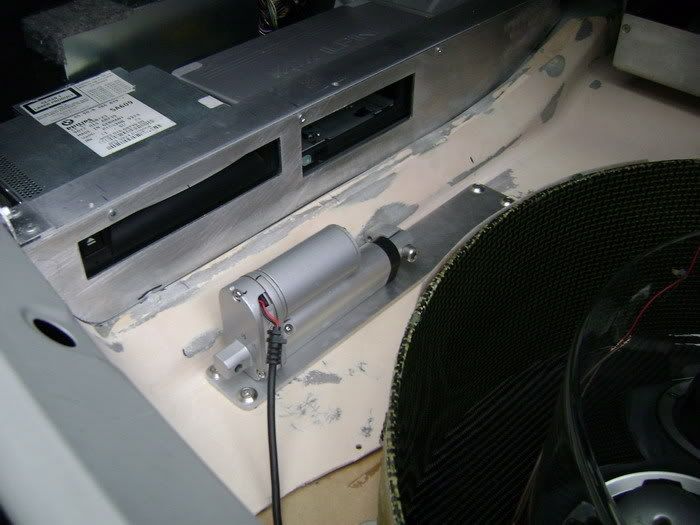
The meaning is, if you take the left carbon piece away, you see the motor and the cd-changer. If I wanted to show this, it must be made SHOWABLE
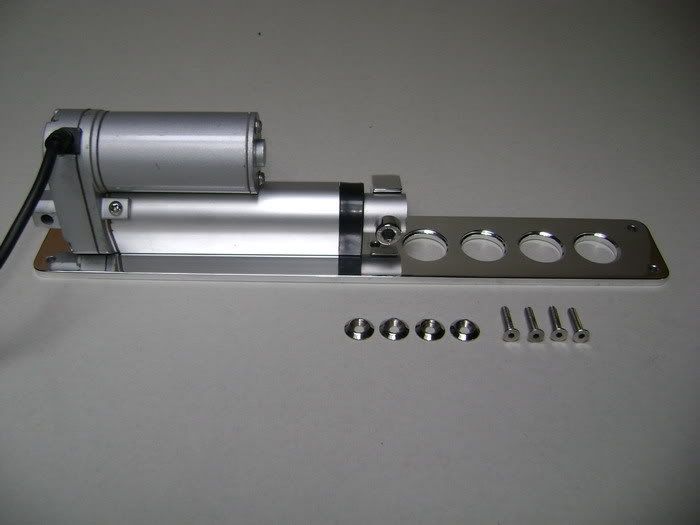
Then, I put the actuartor on a alu plate of 4mm thick.
The fiberglassed part where the motor will be put on tight, is as good as ready.
I sprayed this black. Those who read all thread, now what that means .
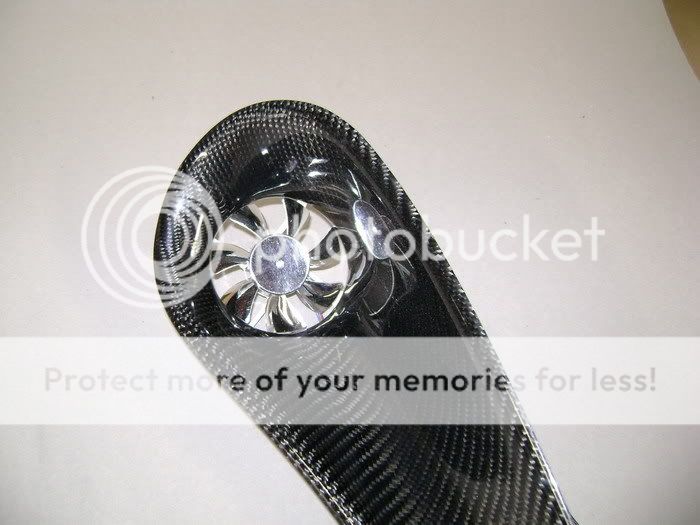
This will be the alu plated where the motor will locked on.
As you can see, I made 4 big wholes in it. Under these, put a carbonkevlar plate. The look will be a little bit better I think.
Also you can see I made a alu piece with M5 screws. Here will be a "bar" in connection with the amp.
I took everything on a trip to polish-land.
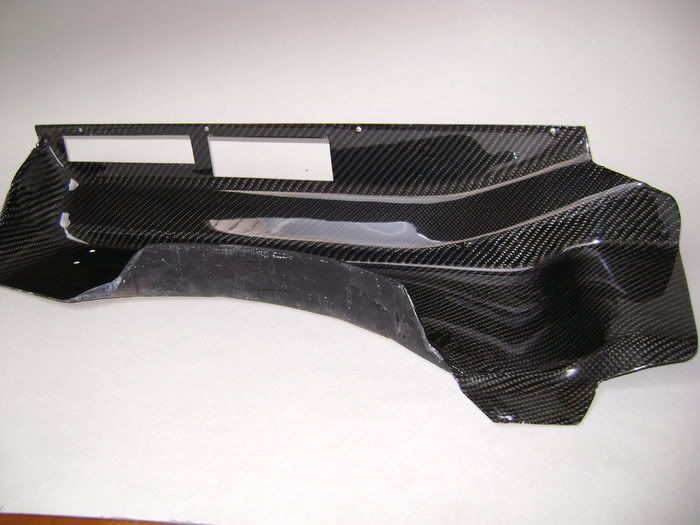
The fiberglass part that comes under the motor, is already covered in a layer of carbon... needs some more epoxy.
Not simple to cover it in carbon, but it worked.
Couple of layers of epoxy are needed, and then rubb the whole piece, while working on the sides..
Damn, this piece looks great, but you're not going to see much of it .
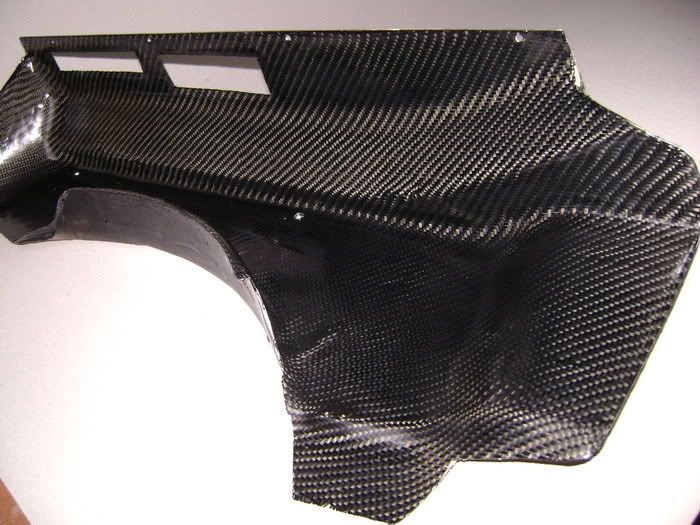
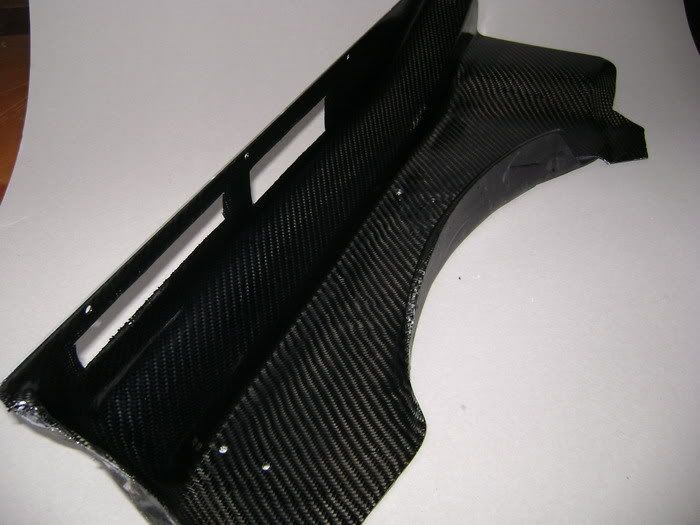
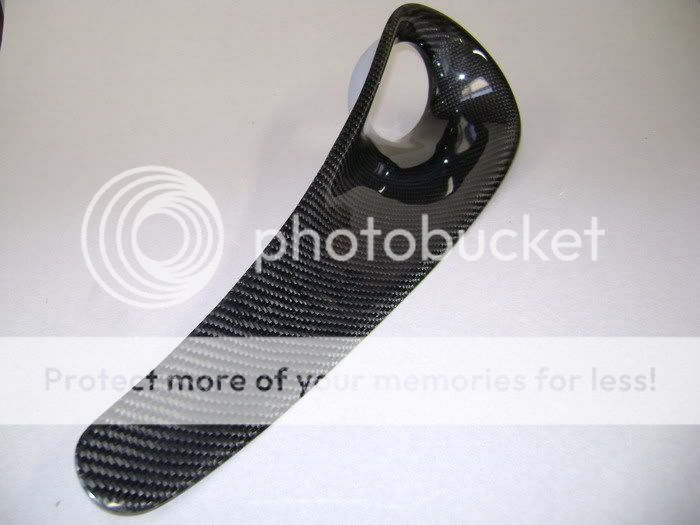
The CF piece, to put the motor on is ready... I did some long long long rubbing, but it was worth the effort.
althought...
The next work on the list is for next days, maybe weeks.
The actuator, that bringt the amplifier to life, will get a nice place.
For those who forgot, this is how the motor was placed.
This was only to see if the thing worked like I wanted.
The meaning is, if you take the left carbon piece away, you see the motor and the cd-changer. If I wanted to show this, it must be made SHOWABLE
Then, I put the actuartor on a alu plate of 4mm thick.
The fiberglassed part where the motor will be put on tight, is as good as ready.
I sprayed this black. Those who read all thread, now what that means .
This will be the alu plated where the motor will locked on.
As you can see, I made 4 big wholes in it. Under these, put a carbonkevlar plate. The look will be a little bit better I think.
Also you can see I made a alu piece with M5 screws. Here will be a "bar" in connection with the amp.
I took everything on a trip to polish-land.
The fiberglass part that comes under the motor, is already covered in a layer of carbon... needs some more epoxy.
Not simple to cover it in carbon, but it worked.
Couple of layers of epoxy are needed, and then rubb the whole piece, while working on the sides..
Damn, this piece looks great, but you're not going to see much of it .
The CF piece, to put the motor on is ready... I did some long long long rubbing, but it was worth the effort.

