
ROBOLOP BERYLLIUM BMW 323ci
 Dec 16, 2011 | 02:08 PM
#161

Thread Starter
| Teamspeed Member
Joined: Jan 2008
Posts: 179


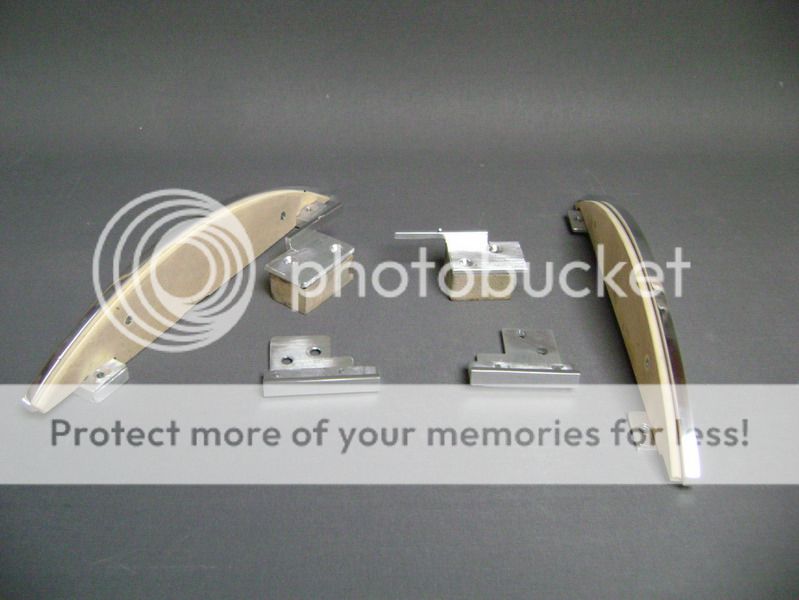
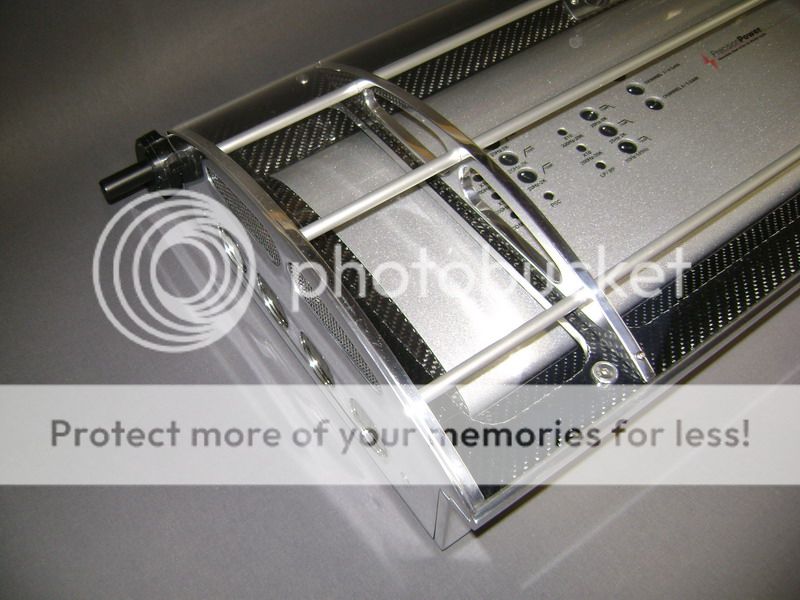
I got the chance to finish the aluminum sides of the amplifier-box.
You’ll see that I made the same wholes into the upperside, like there are in the toggles where the plexi is on.
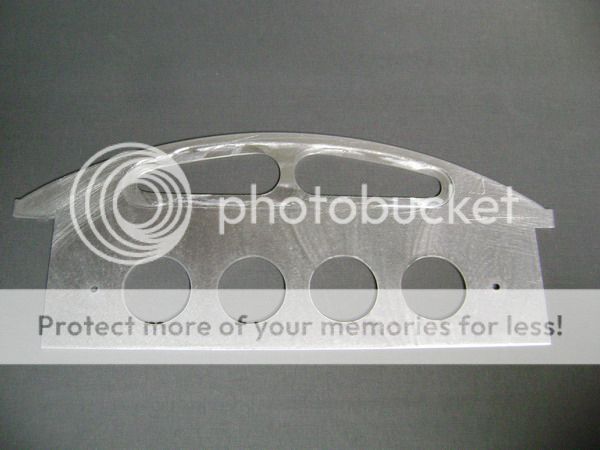

It’ll look like this on the outerside.
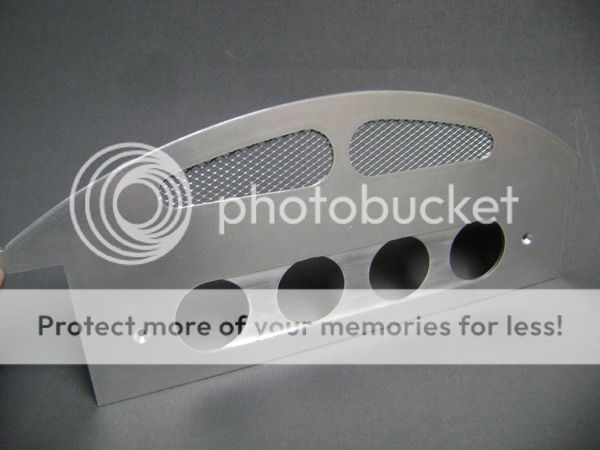
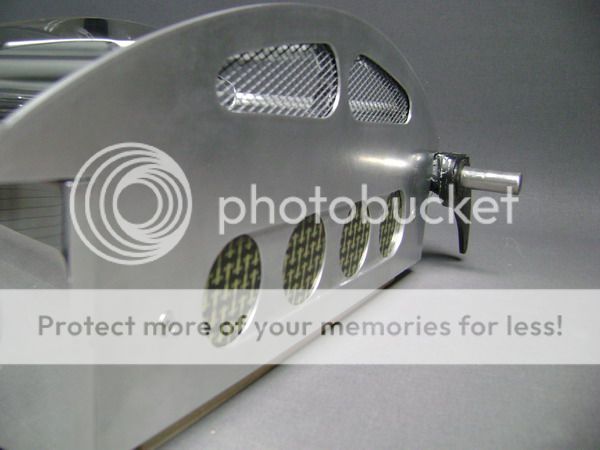
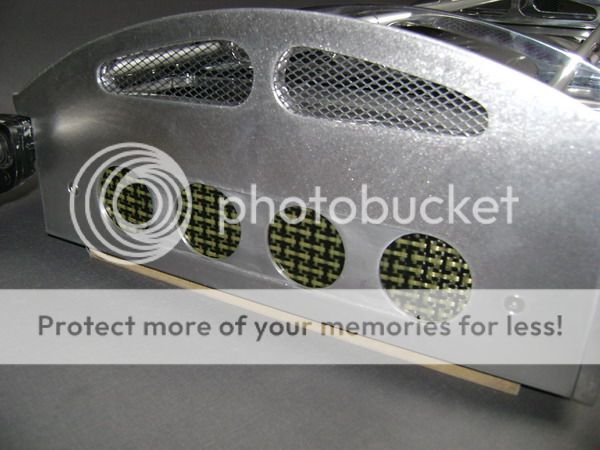
Here it’s mounted on to the box. You can see I put some fine gauze on the top. Later I’ll explane why I did this.
Behind the 5 wholes in the bottom there’s a piece of carbonkevlar.
You’ll see that I made the same wholes into the upperside, like there are in the toggles where the plexi is on.
It’ll look like this on the outerside.
Here it’s mounted on to the box. You can see I put some fine gauze on the top. Later I’ll explane why I did this.
Behind the 5 wholes in the bottom there’s a piece of carbonkevlar.
Dec 16, 2011 | 02:08 PM
#162
Thread Starter
| Teamspeed Member
Joined: Jan 2008
Posts: 179
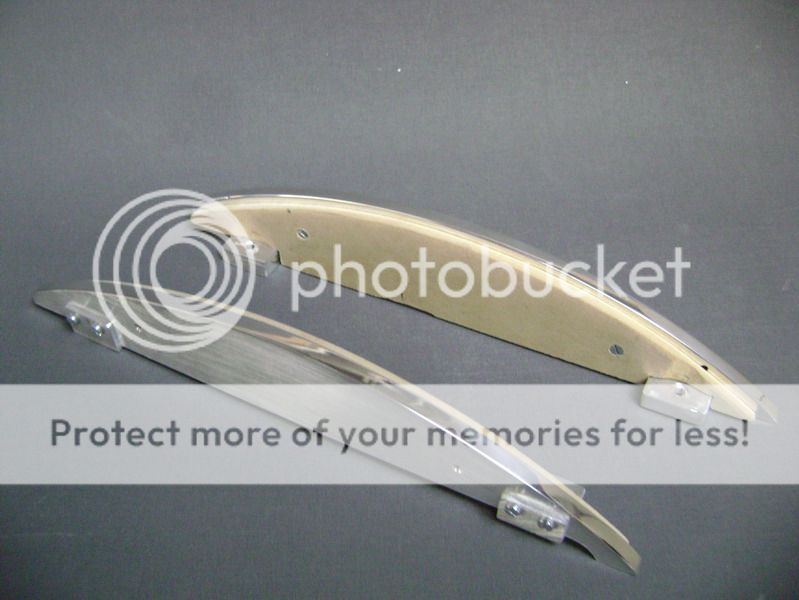
Here some pics of the aluminum toggles I made.
These come on the Left en Right of the amplifier, and serve to tighten the plexi pieces on the sides.
Remember this?

These two won’t be visible.


Of these, you’ll only see the upperside. You can also see I screwed a little piece of MDF on the inside.
That’s were the plexi will lay on to.

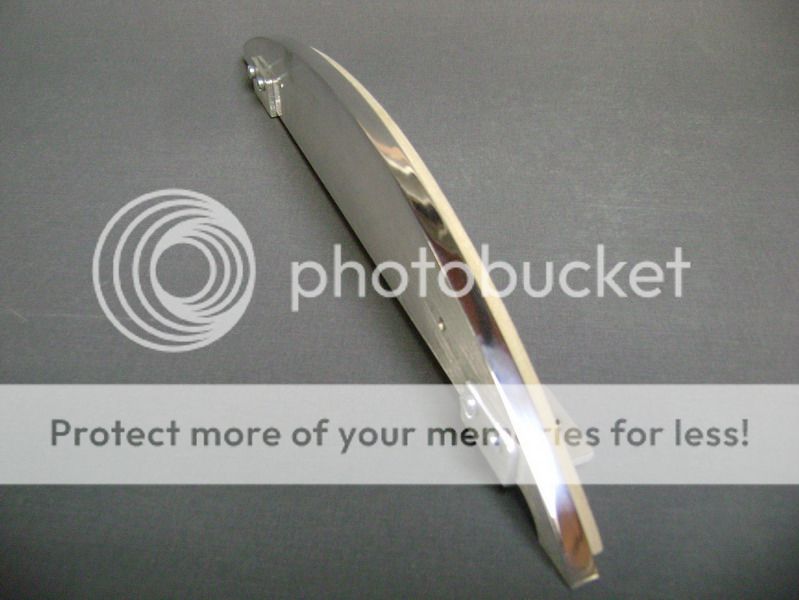
This will get into the back. Again, you will only see the upperside.
Also you can see I knocked in an aluminum nail.
This will come between the plexi, a little hard to explain really.
But you’ll see what I’m trying to say.


In total, I had a lot of work making this, specially trying to fit and finish it in a descent way.
Getting into the trunk 20x a day, for messuring and trying. I’m going to be so happy when the amplifierbox is finished.
These come on the Left en Right of the amplifier, and serve to tighten the plexi pieces on the sides.
Remember this?
These two won’t be visible.
Of these, you’ll only see the upperside. You can also see I screwed a little piece of MDF on the inside.
That’s were the plexi will lay on to.
This will get into the back. Again, you will only see the upperside.
Also you can see I knocked in an aluminum nail.
This will come between the plexi, a little hard to explain really.
But you’ll see what I’m trying to say.
In total, I had a lot of work making this, specially trying to fit and finish it in a descent way.
Getting into the trunk 20x a day, for messuring and trying. I’m going to be so happy when the amplifierbox is finished.
Dec 16, 2011 | 02:09 PM
#163
Thread Starter
| Teamspeed Member
Joined: Jan 2008
Posts: 179
This part will get underneath the amplifier.
On the bottom there’s a mirror of 4mm thick. The meaning is that you can look into the amplifier through the mirror, when the amplifier gets up.
Don’t forget I’m going to open the amplifier so you can see all of it’s components. Here a picture of how I pictured it before�.


This is the plate, finished.

The sides will get on the same level/height as those from the amplifier.


The upperside I polished, and the sides are brushed aluminum.

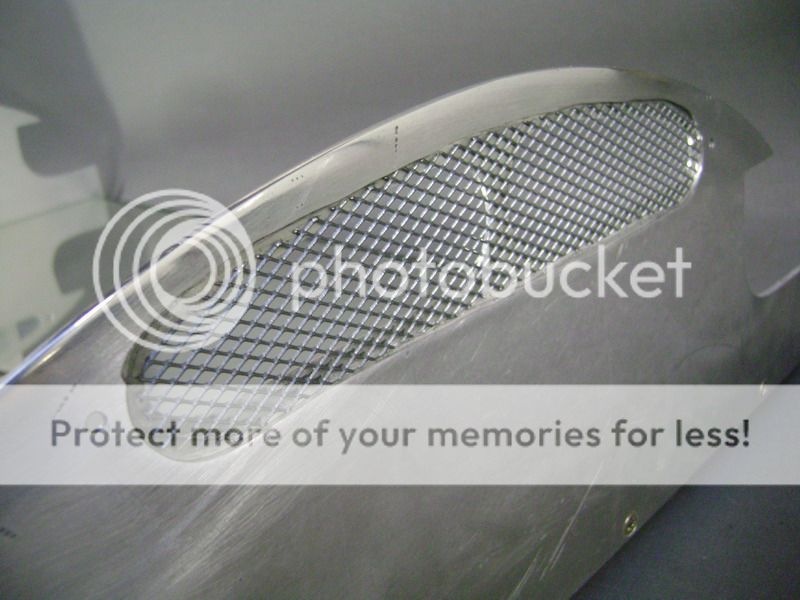
Here you can see I planned a little grill in there. This is the inside, where you won’t see anything.
On the bottom there’s a mirror of 4mm thick. The meaning is that you can look into the amplifier through the mirror, when the amplifier gets up.
Don’t forget I’m going to open the amplifier so you can see all of it’s components. Here a picture of how I pictured it before�.
This is the plate, finished.
The sides will get on the same level/height as those from the amplifier.
The upperside I polished, and the sides are brushed aluminum.
Here you can see I planned a little grill in there. This is the inside, where you won’t see anything.
 Mar 3, 2012 | 01:22 PM
#169
Thread Starter
| Teamspeed Member
Joined: Jan 2008
Posts: 179
Ok guys, the amplifierbox is finished. Did some modifications here and there.
Here and older picture of the side.
It’s especially about the front of the the little L-slat.
On this picture, it’s stops on the side. Didn’t look that good to me, and I had a join on the front.
Here you see it like I made it now. I made 2 new slats on the front and back, each 3mm langer .

I have some more join on the side, but it’s better then before. It’s much tighter on the front now.
Pictures of the side.
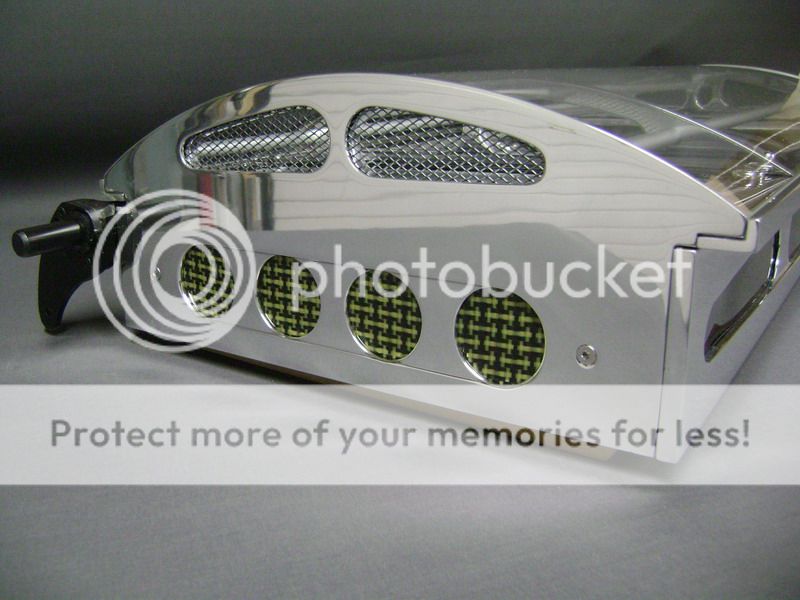
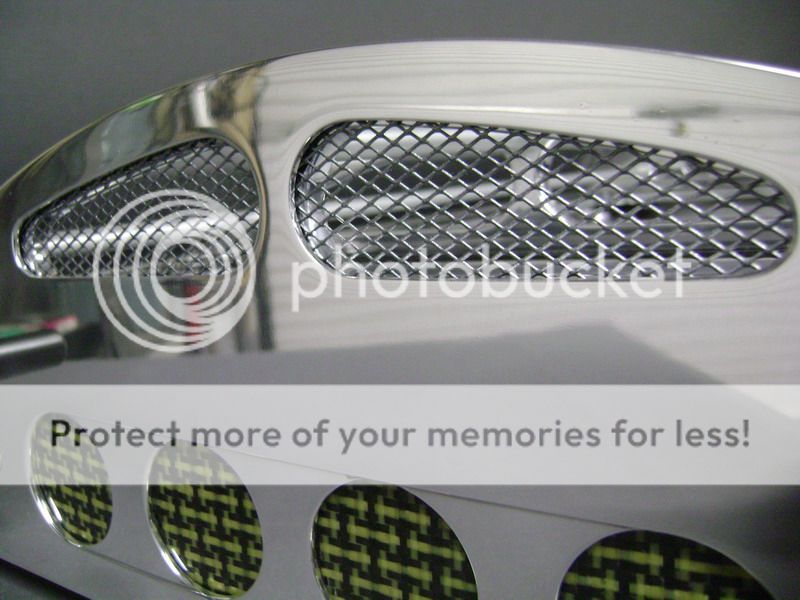
The grille on top, is the same I used in the front bumper.
Now it’s looks like I wanted it to look.
You won’t see much of the sides directly, but you know there will come a lot of glass on the side�.

Here the sides of the box will reflect into, and I think that will give a nice effect.
Here and older picture of the side.
It’s especially about the front of the the little L-slat.
On this picture, it’s stops on the side. Didn’t look that good to me, and I had a join on the front.
Here you see it like I made it now. I made 2 new slats on the front and back, each 3mm langer .
I have some more join on the side, but it’s better then before. It’s much tighter on the front now.
Pictures of the side.
The grille on top, is the same I used in the front bumper.
Now it’s looks like I wanted it to look.
You won’t see much of the sides directly, but you know there will come a lot of glass on the side�.
Here the sides of the box will reflect into, and I think that will give a nice effect.
Mar 3, 2012 | 01:26 PM
#170
Thread Starter
| Teamspeed Member
Joined: Jan 2008
Posts: 179
This is the final result of many many many hours work.
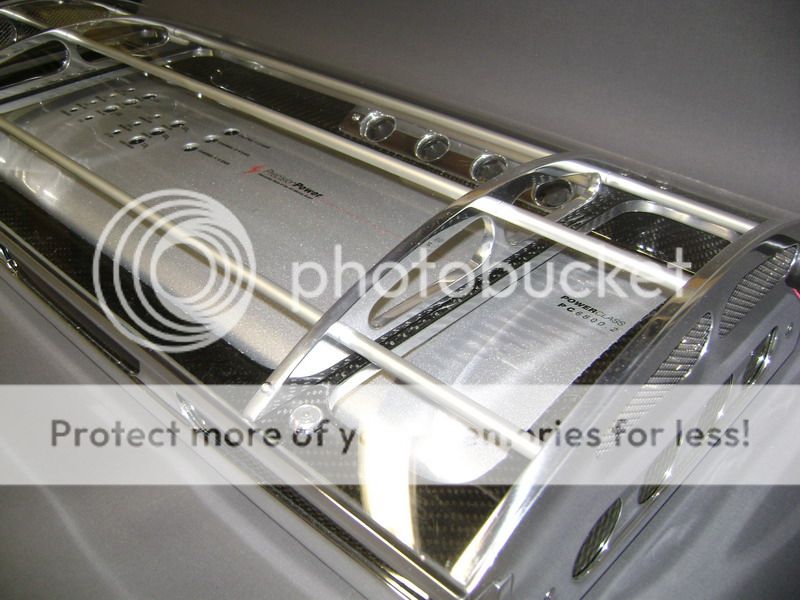

On the front I managed to work in some carbon fibre. The middle part won’t stay this way though. I want a logo in there, but since I’m not sure how I’m going to make this�it’ll have to wait some more. It has to something “WOOOOOOOOOOOOOOOW” , made in plexi and carbon fibre.


On the front I managed to work in some carbon fibre. The middle part won’t stay this way though. I want a logo in there, but since I’m not sure how I’m going to make this�it’ll have to wait some more. It has to something “WOOOOOOOOOOOOOOOW” , made in plexi and carbon fibre.