
ROBOLOP BERYLLIUM BMW 323ci
 Nov 29, 2011 | 02:37 PM
#131

Thread Starter
| Teamspeed Member
Joined: Jan 2008
Posts: 179


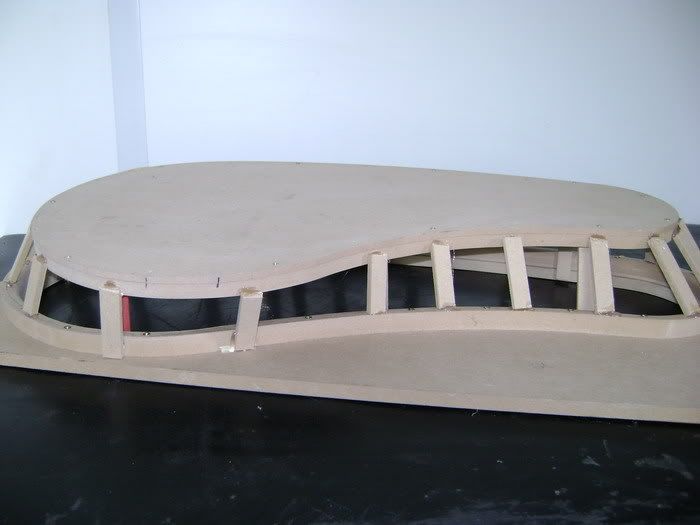
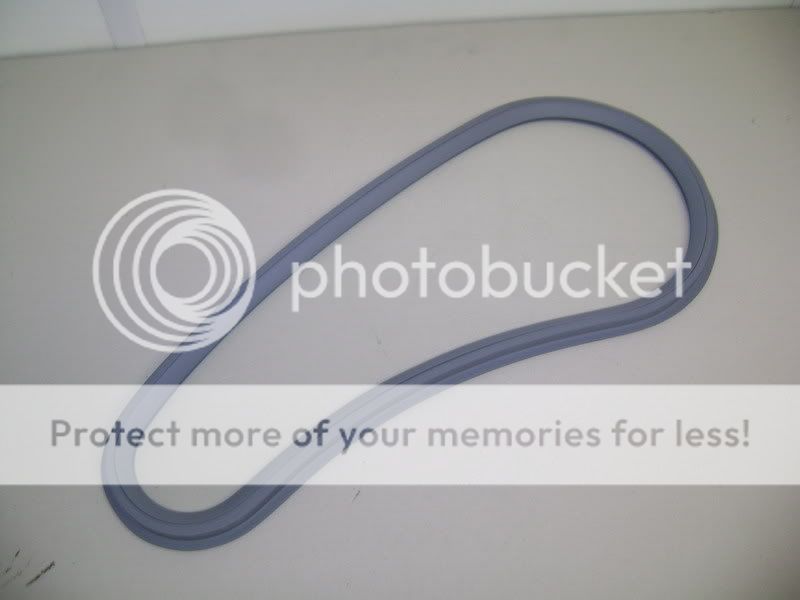
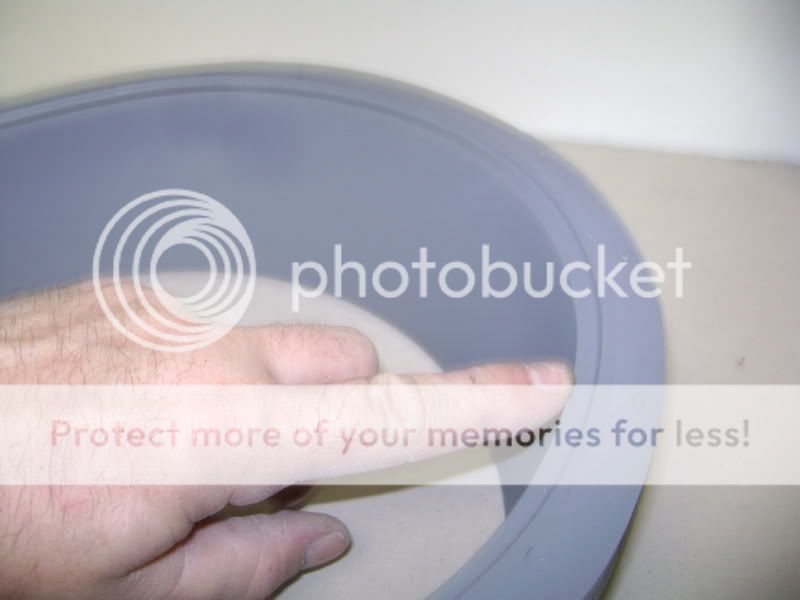
I fastened he plexi copula in the meanwhile. In the plate where the screws rest, I milled a groove of 1 centimeter and filled it up with polyester.
After that I wormed some screw-thread in, to turn the screws in.
I had some pictures of that, but can’t seem to find them anymore. You can also see I pasted a selfsticking strip on there, so the copula stretched itself up, and makes it airtight.


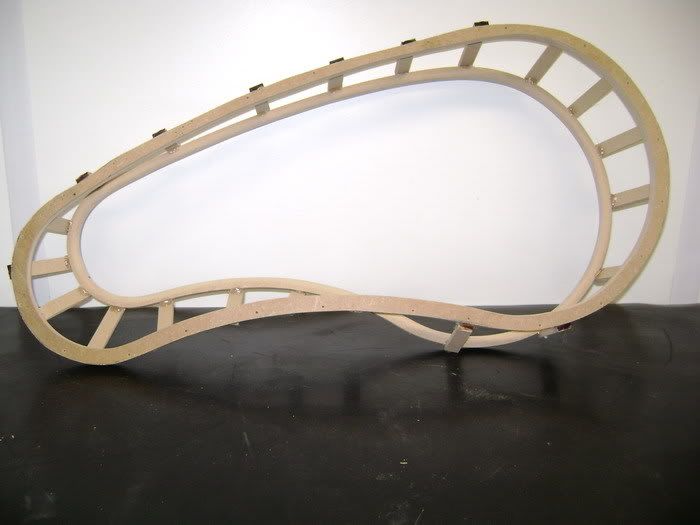
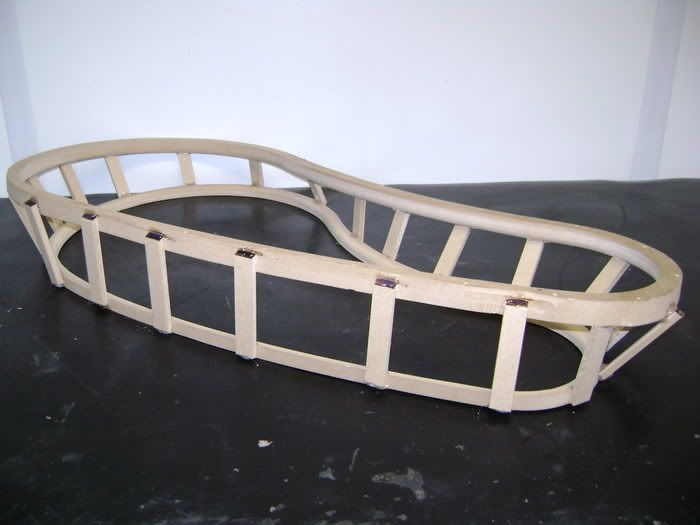
On the bottomside, I mounted a led-strip.
It’s a strip where the leds are poured into some kind of silicone. I bought this specially because I didn’t want it to snap from the pressure of the speakers


These are some pictures I took in daylight
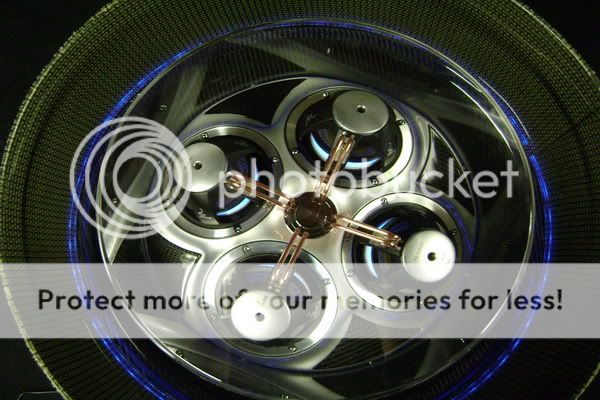
Here you can see the blue light, shining through the speakers, find it kinda cool

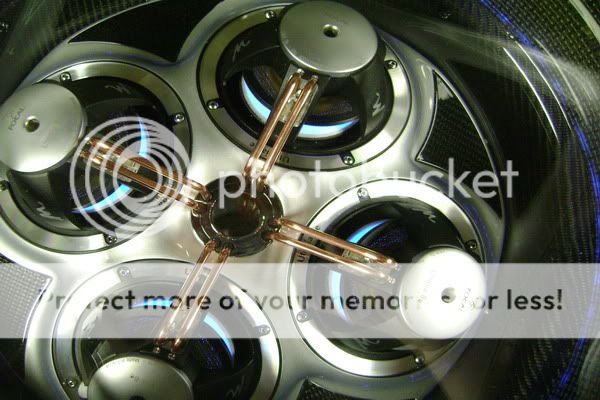


Pictures in the dark.

Look what a reflection I get with all that varnish

These are some pictures where I put on some more light from above.
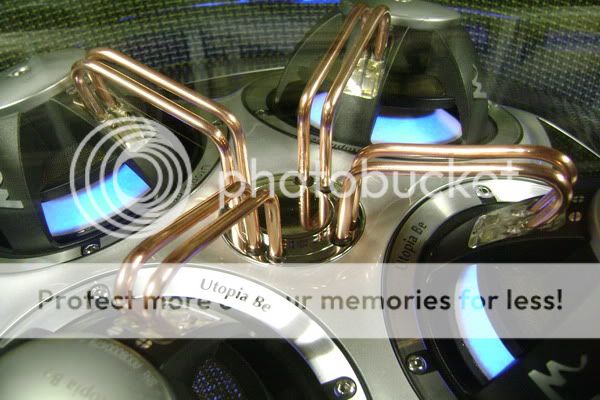
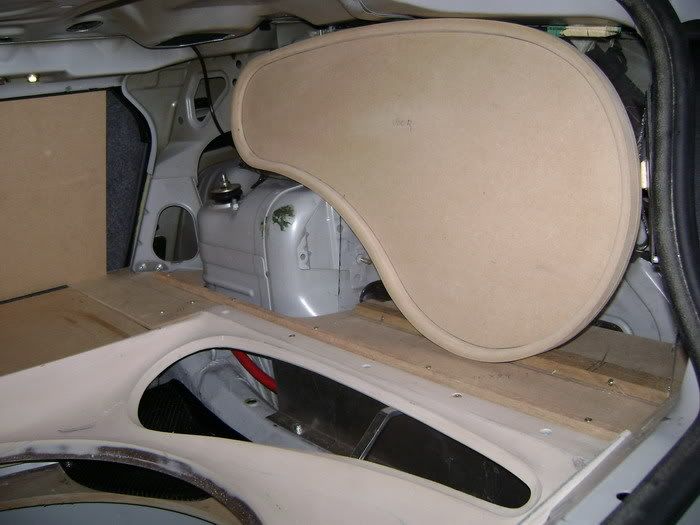
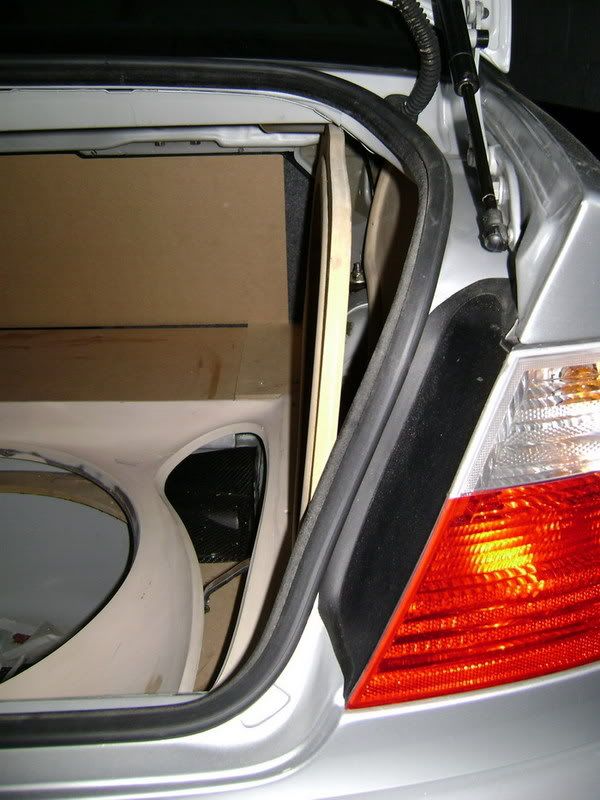
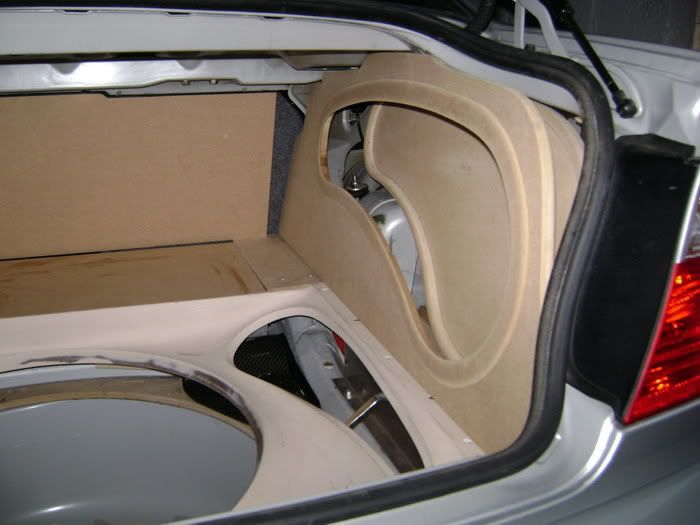
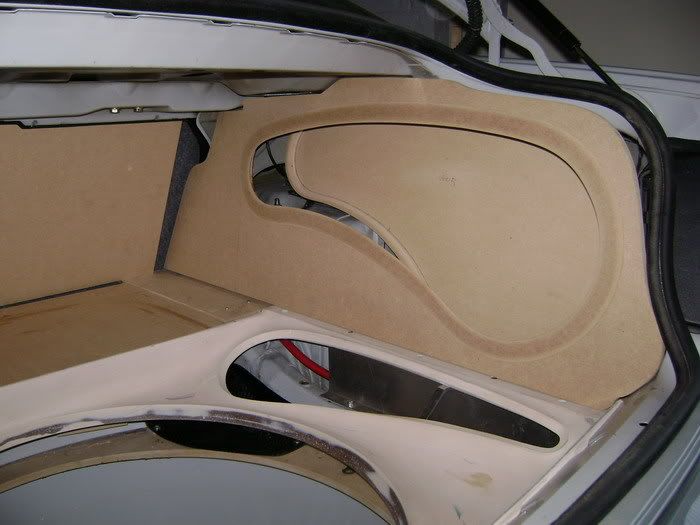
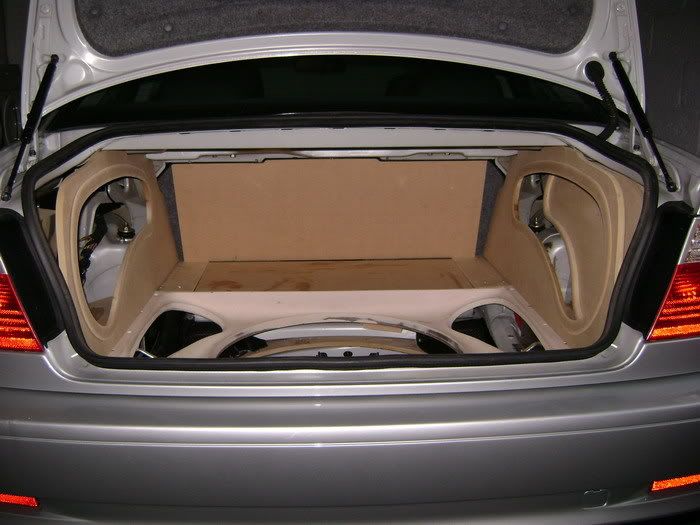
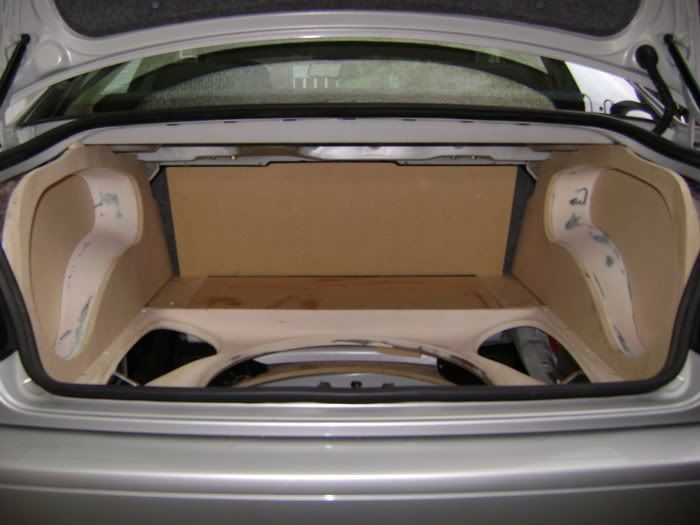
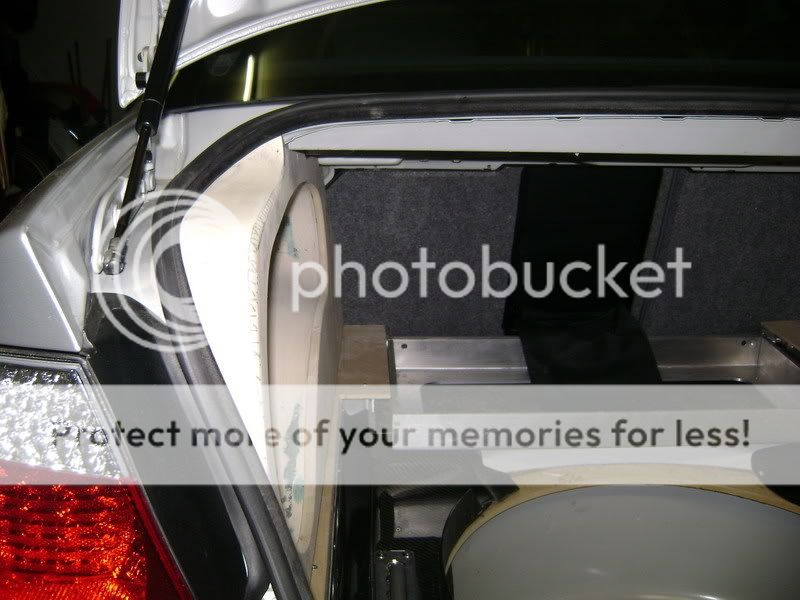
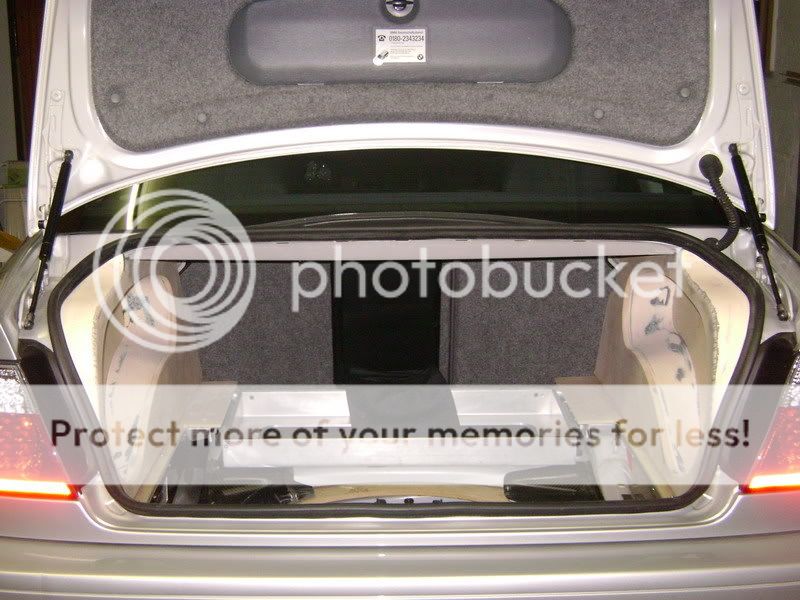
It will look like this when everything is mounted in the trunk.


This is about it for the sub-box, yep, eventually, there has come and end to it
For myself, I’m really satisfied with the result, it even looks better then I imagined.
All the hours of work it absorbed �well, I already forgot.
After that I wormed some screw-thread in, to turn the screws in.
I had some pictures of that, but can’t seem to find them anymore. You can also see I pasted a selfsticking strip on there, so the copula stretched itself up, and makes it airtight.
On the bottomside, I mounted a led-strip.
It’s a strip where the leds are poured into some kind of silicone. I bought this specially because I didn’t want it to snap from the pressure of the speakers
These are some pictures I took in daylight
Here you can see the blue light, shining through the speakers, find it kinda cool
Pictures in the dark.
Look what a reflection I get with all that varnish
These are some pictures where I put on some more light from above.
It will look like this when everything is mounted in the trunk.
This is about it for the sub-box, yep, eventually, there has come and end to it
For myself, I’m really satisfied with the result, it even looks better then I imagined.
All the hours of work it absorbed �well, I already forgot.
Dec 1, 2011 | 01:30 PM
#133
Teamspeed Senior Member
Joined: Nov 2011
Posts: 902
From: Toronto, ON
I am absolutely amazed at what your creating here, I can not wait till you finished the audio setup.
BTW I noticed that you didn't install the pedals that you created, is that somethign you plan to put on at the end?
Are you planning on having the LED's pulse with the bass of the music? and if so will you planning post a video?
After seeing this it makes me even more prouder to be a flander. :-)
BTW I noticed that you didn't install the pedals that you created, is that somethign you plan to put on at the end?
Are you planning on having the LED's pulse with the bass of the music? and if so will you planning post a video?
After seeing this it makes me even more prouder to be a flander. :-)
Dec 2, 2011 | 02:12 PM
#134
Thread Starter
| Teamspeed Member
Joined: Jan 2008
Posts: 179
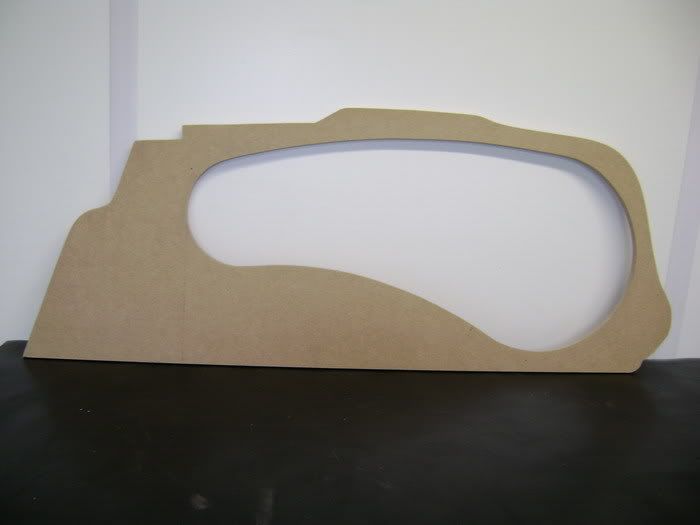
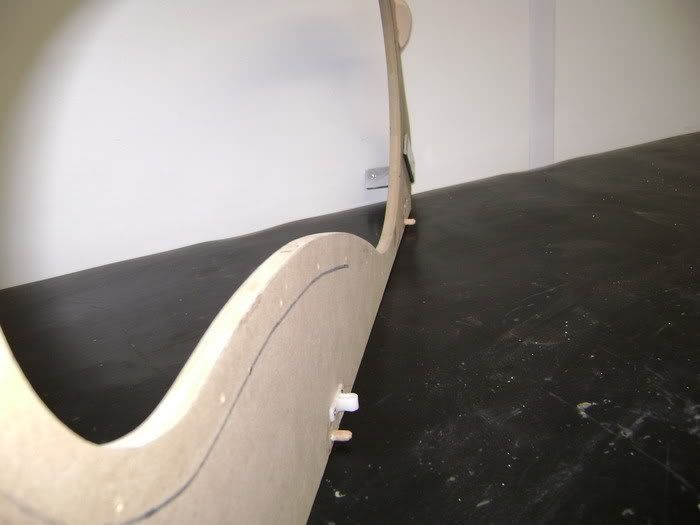
Started to make the side-panels.
Do not underestimate these things. We've seen many many great installs, but on the sidepanels mostly they get a 5/10
So I got work to do.
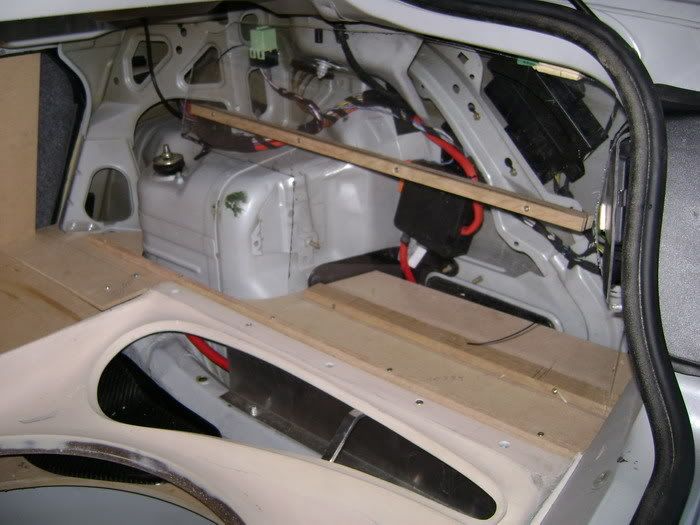
My biggest problem still, was the fueltank.
And on the left-side I hd the problem, I didn't have the same depth, cause there must come an extra amp behind it.. This amp will not be showed when its' finished
First, startin' to make a plexi plate. The meaning of this is that he can see where he's coming with the panel.
The wood on top is just for extra support
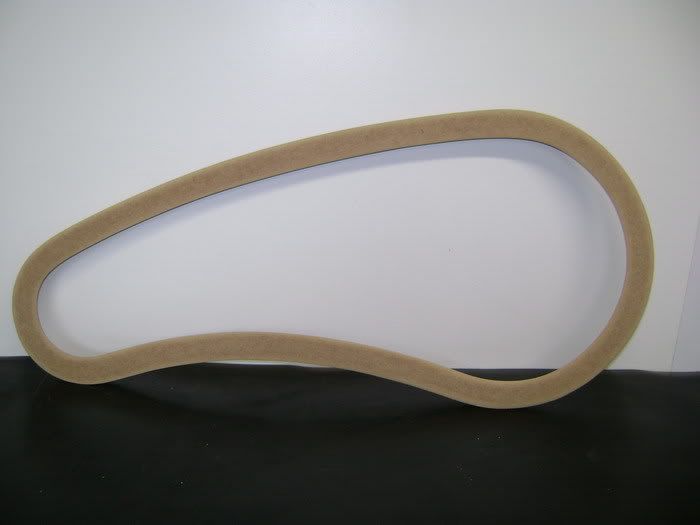
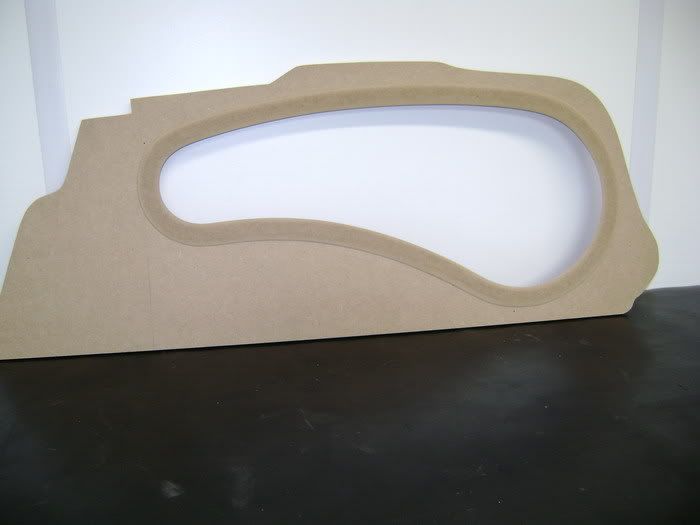
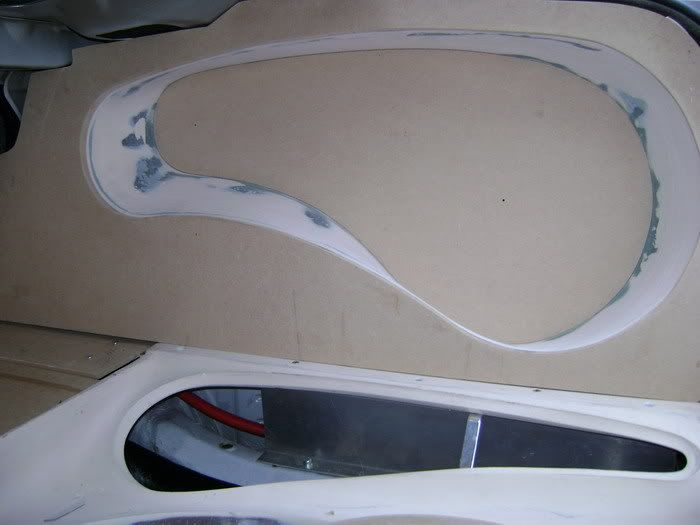
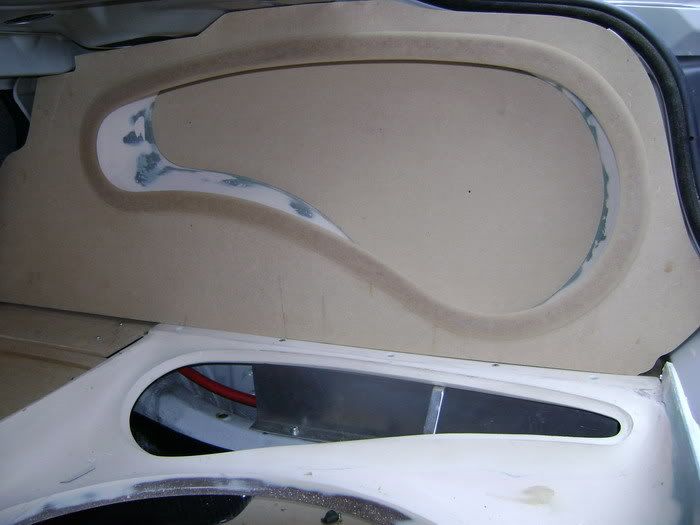
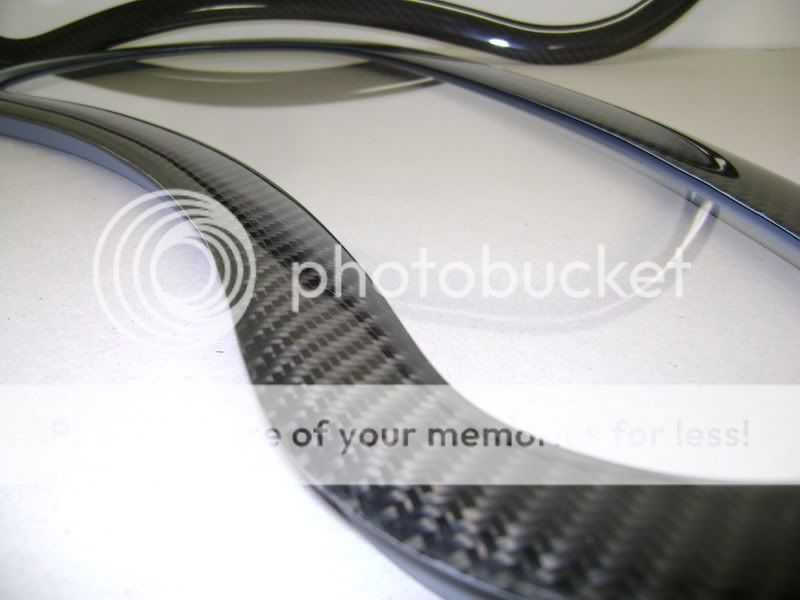
Then he made a model in MDF. You can see he's holding on to the same shapes as the cf ventholders
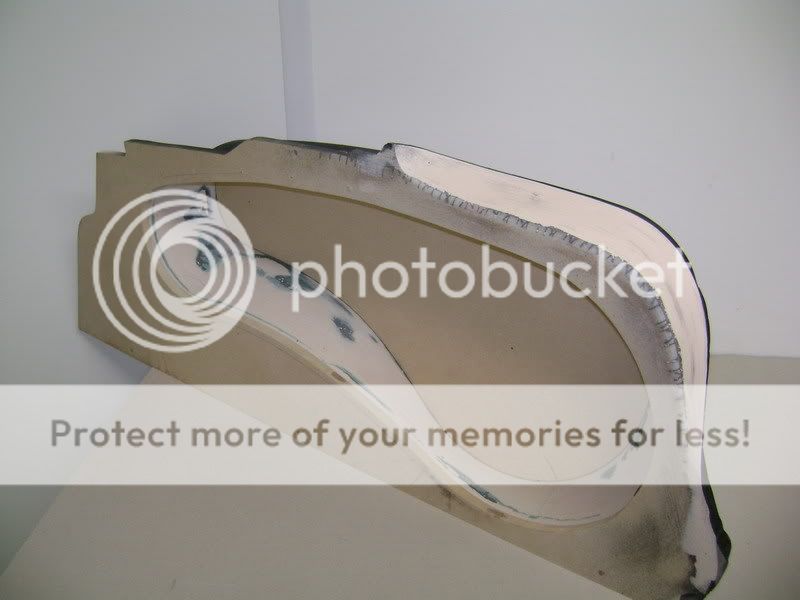
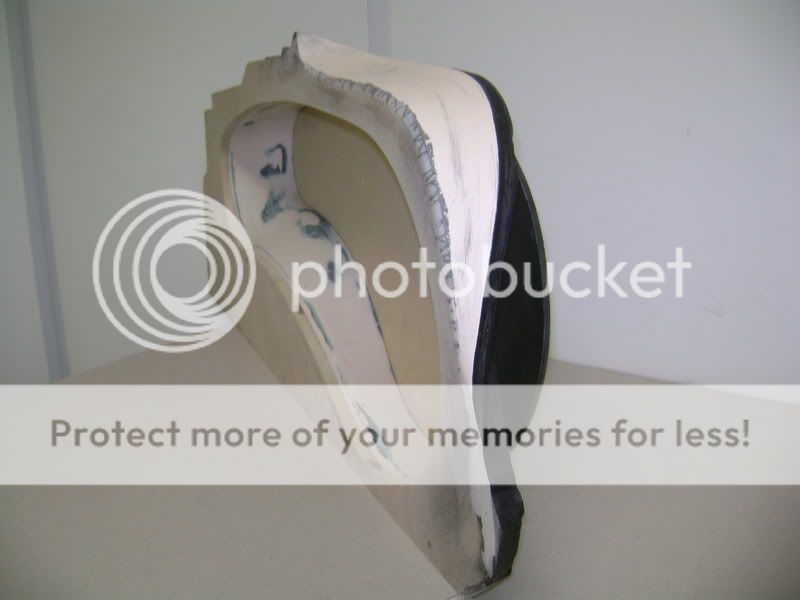
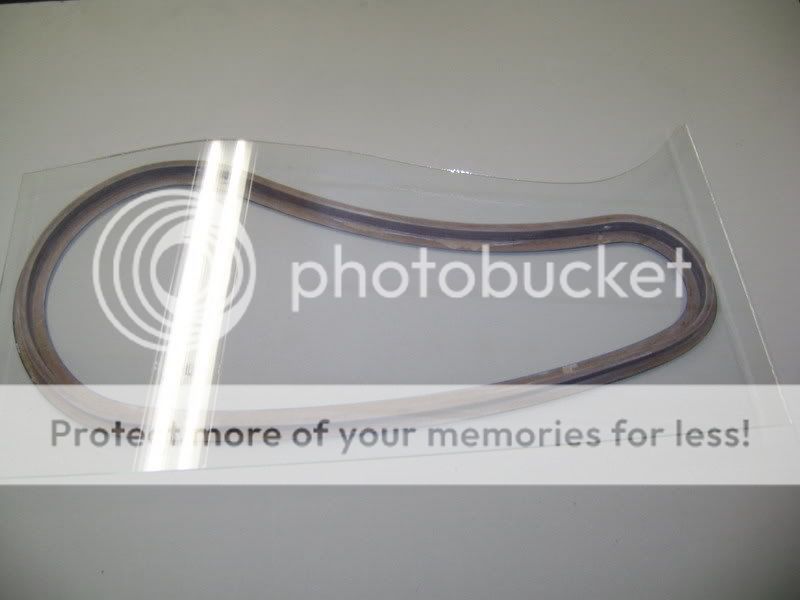
This is the frontplate of the side. Here also comes the model of the (rain)drop
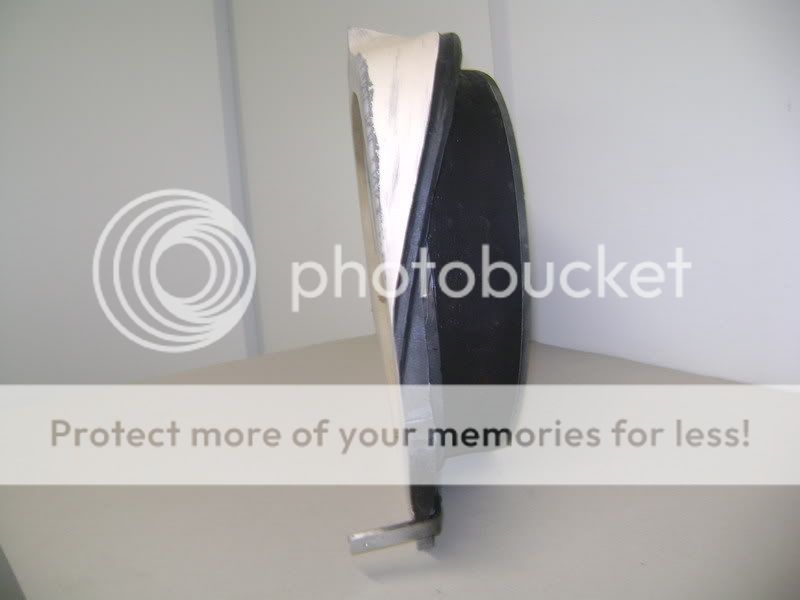
This is the mdf frame where the glass is getting into. Fits exactly into the front panel. This will come in CF, so there will be a great contrast with the frontpanel that'll come in silver.
I worked many hours milding, glad I still got all fingers.

Here you can see he didn't exactly copy the (rain)-drops. Doing silly , why not?

Now I has to stretch the stretchfoil en combine the two parts with fiberglas/polyester
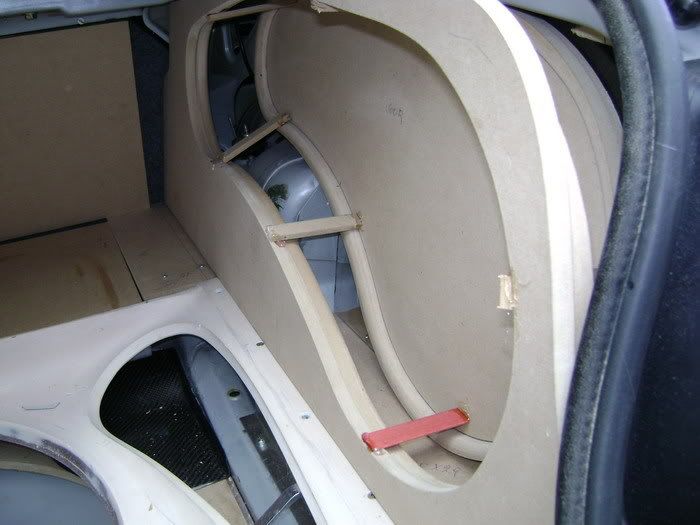
little stuff like making another mdf plate against the back seat, and some other stuff
 [/QUOTE]
Do not underestimate these things. We've seen many many great installs, but on the sidepanels mostly they get a 5/10
So I got work to do.
My biggest problem still, was the fueltank.
And on the left-side I hd the problem, I didn't have the same depth, cause there must come an extra amp behind it.. This amp will not be showed when its' finished
First, startin' to make a plexi plate. The meaning of this is that he can see where he's coming with the panel.
The wood on top is just for extra support
Then he made a model in MDF. You can see he's holding on to the same shapes as the cf ventholders
This is the frontplate of the side. Here also comes the model of the (rain)drop
This is the mdf frame where the glass is getting into. Fits exactly into the front panel. This will come in CF, so there will be a great contrast with the frontpanel that'll come in silver.
I worked many hours milding, glad I still got all fingers.
Here you can see he didn't exactly copy the (rain)-drops. Doing silly , why not?
Now I has to stretch the stretchfoil en combine the two parts with fiberglas/polyester
little stuff like making another mdf plate against the back seat, and some other stuff
[/QUOTE]
Dec 2, 2011 | 02:13 PM
#135
Thread Starter
| Teamspeed Member
Joined: Jan 2008
Posts: 179
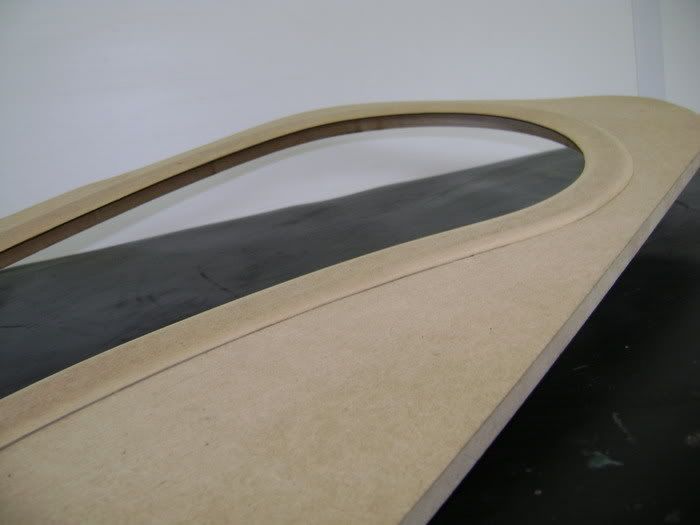
On this picture, you see i glued the front and back together with some wooden sticks
I got it all out of the car, and placed it on the table.
Here you see I did the same but on the back.
Glued VERY TIGHT on each other, so the stretchsheet will be tight when fastened
This is how it looks.
I was making a wooden fruitscale
Then I took some stretchsheet, and stretched nicely, not so easy as it looks

now work with some polyester, and that's it
Life can be simple, isn't it?
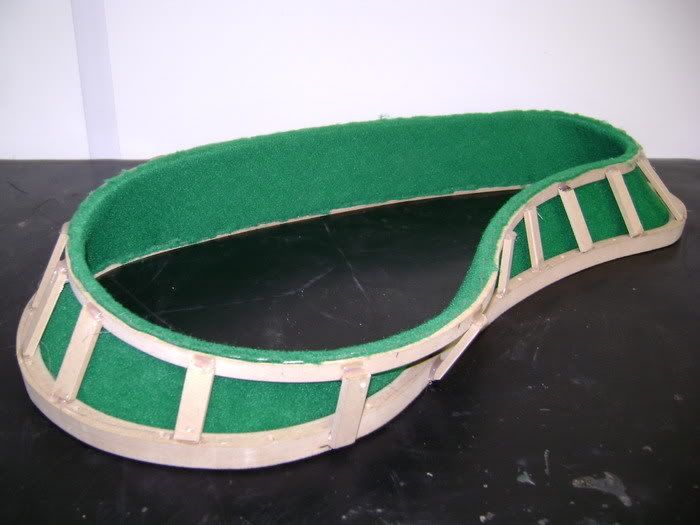
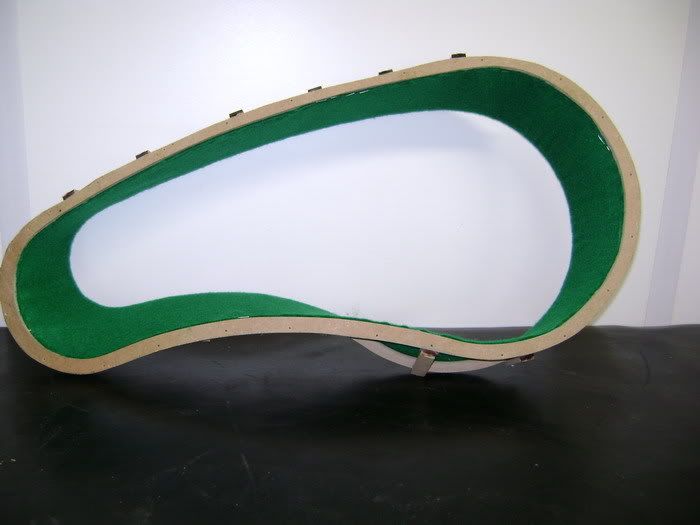
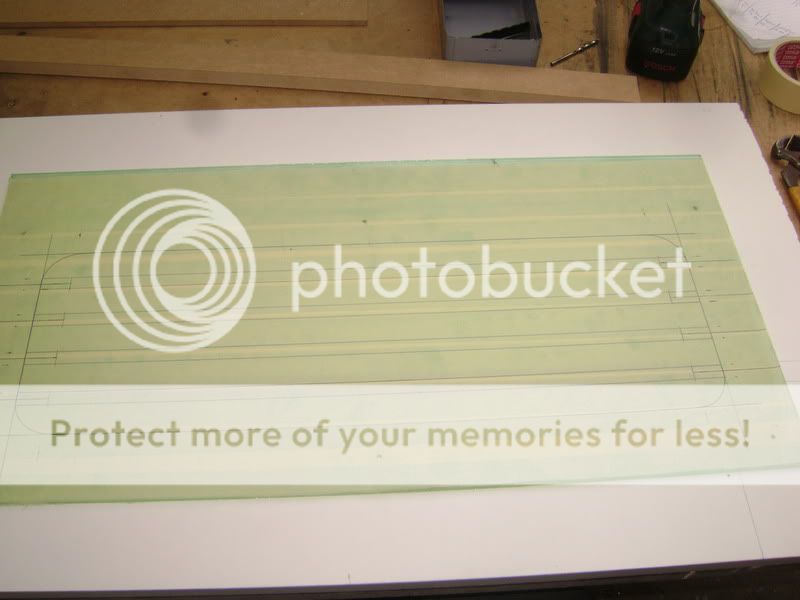
The green golf course isn't seeable any more
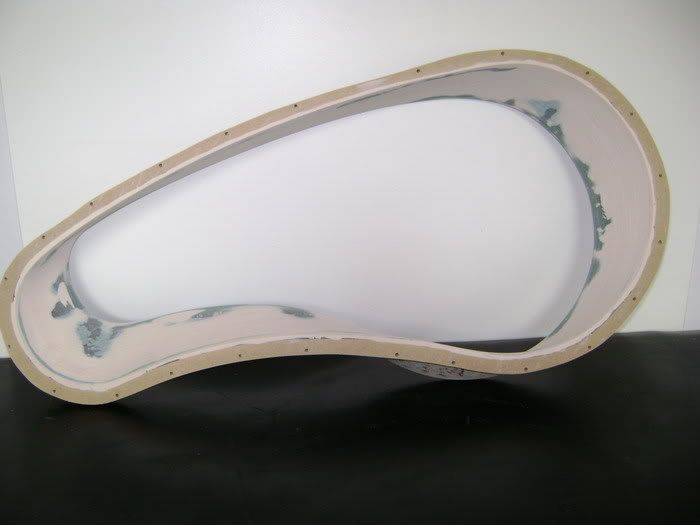
Everything filled with filler, and this piece will be covered in CF-Kevlar:-)
I wants to get the same effect as the subkist. The back also will be covered in CF.
The carbonkevlar won't go withour a 'snitch'. That's why I going to try putting on top, cause to see this, you gotta be a real gymnast in a trunk
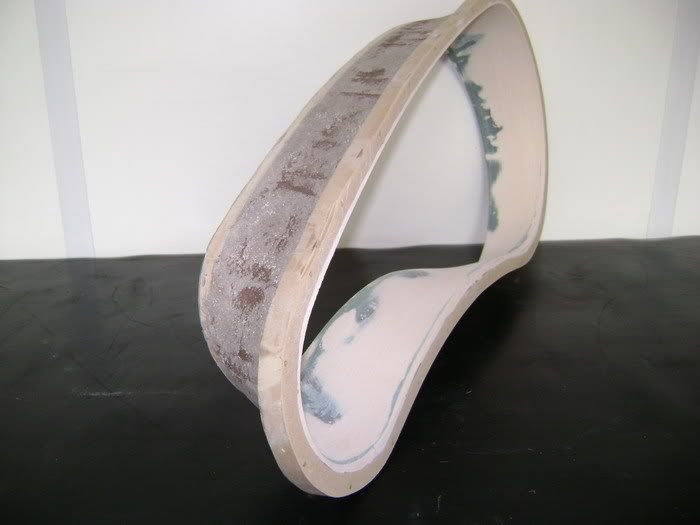
You see, every piece can get out of each other
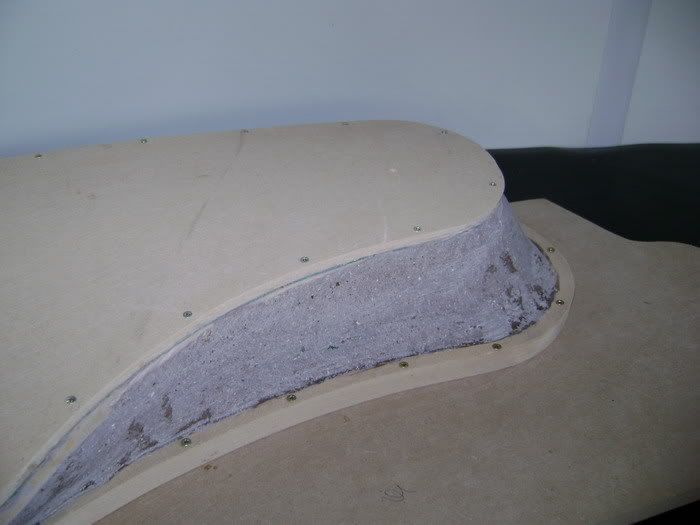
If you look as this pic, it doesn't look like much, but in real life, we think it's awesum !
with the frame in front
I got it all out of the car, and placed it on the table.
Here you see I did the same but on the back.
Glued VERY TIGHT on each other, so the stretchsheet will be tight when fastened
This is how it looks.
I was making a wooden fruitscale
Then I took some stretchsheet, and stretched nicely, not so easy as it looks
now work with some polyester, and that's it
Life can be simple, isn't it?
The green golf course isn't seeable any more
Everything filled with filler, and this piece will be covered in CF-Kevlar:-)
I wants to get the same effect as the subkist. The back also will be covered in CF.
The carbonkevlar won't go withour a 'snitch'. That's why I going to try putting on top, cause to see this, you gotta be a real gymnast in a trunk
You see, every piece can get out of each other
If you look as this pic, it doesn't look like much, but in real life, we think it's awesum !
with the frame in front
Dec 2, 2011 | 02:15 PM
#136
Thread Starter
| Teamspeed Member
Joined: Jan 2008
Posts: 179
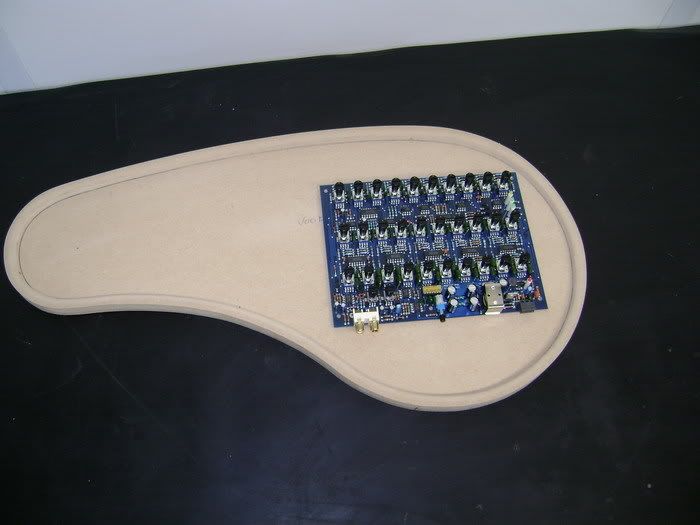
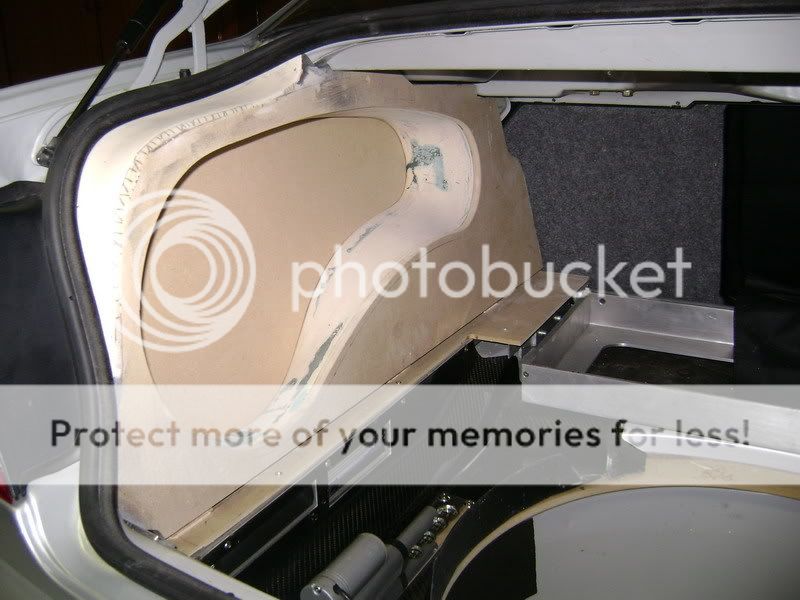
the left panel is also finished. The little box where the eqt will stand.
the 2 cf frames with a layer of epoxy. now rubb it good and hard, so we can put another layer,...

Here I turned of the back panel. Now you can see how the amp will come (amp=dummy)


space between plate and amp. on top it's about 1cm

This amp, will get enough coolin with the 2 vents
I got lucky that underneath the amp, there's a vent-shaft thats comes out behind the bumpers.
I also did the preperations to cover the side of the boxes in CFkevlar.
hope I will get this to a good end...cause that won't be easy.
if it fails, they will be sprayed in car colour
Here you can see, what happens if you try with CF Kevlar and it doens't go wel...

for 150dollars in the bin, a well.
I tried to cover the sides, for 3 times, but it just didn't go.
... **** it
CF will be the same, so, I decided to spray it in silver. Maybe good, to don't have an CF overkill.
Started to fasten the panels.
Here you see 3 blockes with some wholes in it.

On the panel you see 3 pins. They will fit in the wholes so it 'll fit nicely and hold it together
The whole panel will be fastened with 2 screws.
Then I saw, the boxes who come next to it, where a bit slanted cause of the polyester.
So I made big RUB BLOCK to equally rubb it.
Simple to make. A big MDF plate of 5 cm and put some big sheets of rubbingpaper on it. This rubbing paper they use to rubb of wooden flores with a machine.

Put the piece on it, and started rubbin'

You can see what was wrong, look at the black paint in the middle.

This was how the piece looked like when I stopted. The black is gone, so my piece is 100% flat.

here you see it again.
don't need expensive machines, or have to make it complicated to get good result.
[QUOTE=robolop;8573628]The sides of the MDF had to fit the rubber of the trunk nicely.

the 2 cf frames with a layer of epoxy. now rubb it good and hard, so we can put another layer,...
Here I turned of the back panel. Now you can see how the amp will come (amp=dummy)
space between plate and amp. on top it's about 1cm
This amp, will get enough coolin with the 2 vents
I got lucky that underneath the amp, there's a vent-shaft thats comes out behind the bumpers.
I also did the preperations to cover the side of the boxes in CFkevlar.
hope I will get this to a good end...cause that won't be easy.
if it fails, they will be sprayed in car colour
Here you can see, what happens if you try with CF Kevlar and it doens't go wel...
for 150dollars in the bin, a well.
I tried to cover the sides, for 3 times, but it just didn't go.
... **** it
CF will be the same, so, I decided to spray it in silver. Maybe good, to don't have an CF overkill.
Started to fasten the panels.
Here you see 3 blockes with some wholes in it.
On the panel you see 3 pins. They will fit in the wholes so it 'll fit nicely and hold it together
The whole panel will be fastened with 2 screws.
Then I saw, the boxes who come next to it, where a bit slanted cause of the polyester.
So I made big RUB BLOCK to equally rubb it.
Simple to make. A big MDF plate of 5 cm and put some big sheets of rubbingpaper on it. This rubbing paper they use to rubb of wooden flores with a machine.
Put the piece on it, and started rubbin'
You can see what was wrong, look at the black paint in the middle.
This was how the piece looked like when I stopted. The black is gone, so my piece is 100% flat.
here you see it again.
don't need expensive machines, or have to make it complicated to get good result.
[QUOTE=robolop;8573628]The sides of the MDF had to fit the rubber of the trunk nicely.
Dec 2, 2011 | 02:16 PM
#137
Thread Starter
| Teamspeed Member
Joined: Jan 2008
Posts: 179
I've cut some glas to mount in the sidepanels.


Then i've sanded the carbon frames and prepared them to get painted.

The inner rail is mounted a bit lower than the rest. I'm going to fix everything with TEC7.


The carbon on the frontside is sanded and ready to get clearcoated.


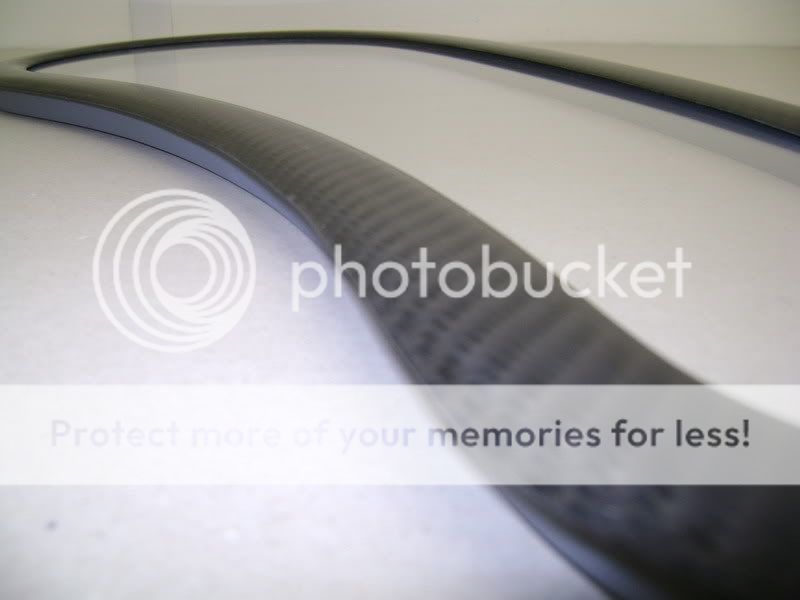
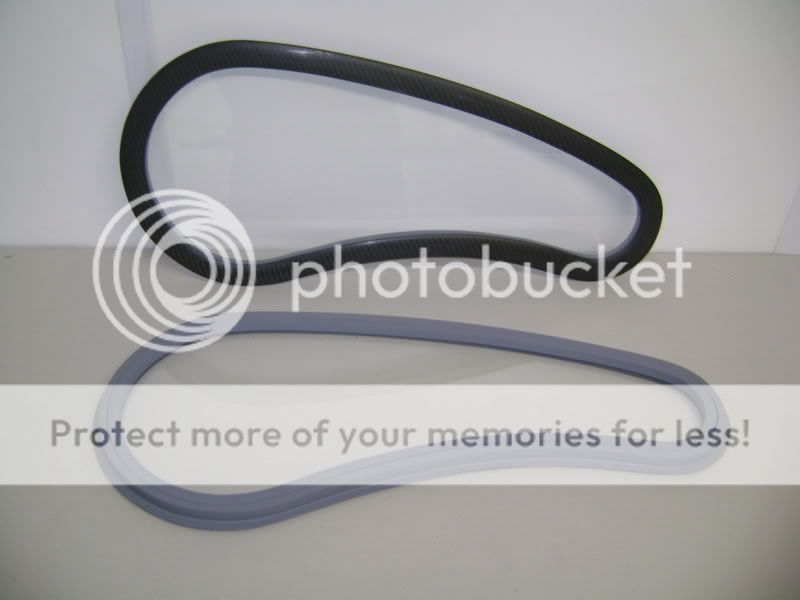
Then i've sanded the carbon frames and prepared them to get painted.
The inner rail is mounted a bit lower than the rest. I'm going to fix everything with TEC7.
The carbon on the frontside is sanded and ready to get clearcoated.
Dec 2, 2011 | 02:16 PM
#138
Thread Starter
| Teamspeed Member
Joined: Jan 2008
Posts: 179
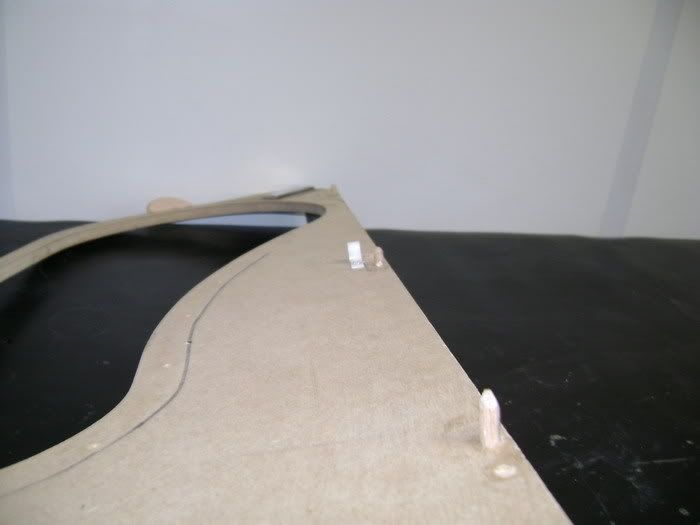
I've made some changes to the sidepanels.
The straight part looked rathed ugly, so i've changed its shape.
Here you can see that i've made the changes so that everything fits perfectly.


Clearcoated.


After I made the MDF boards, i was afraid that it wouldn't look nice and that they would oversize.
Here is the result, and at least I am satisfied with it.......

The straight part looked rathed ugly, so i've changed its shape.
Here you can see that i've made the changes so that everything fits perfectly.
Clearcoated.
After I made the MDF boards, i was afraid that it wouldn't look nice and that they would oversize.
Here is the result, and at least I am satisfied with it.......
Dec 2, 2011 | 02:18 PM
#139
Thread Starter
| Teamspeed Member
Joined: Jan 2008
Posts: 179
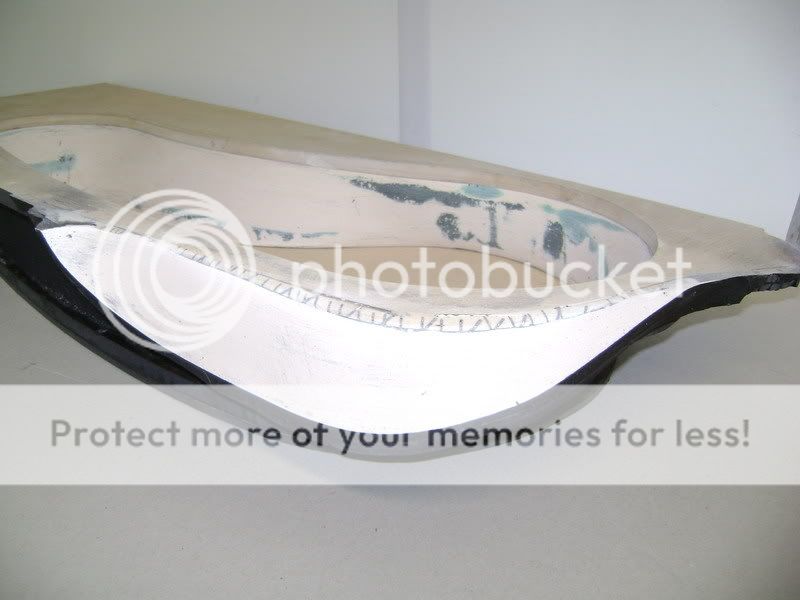
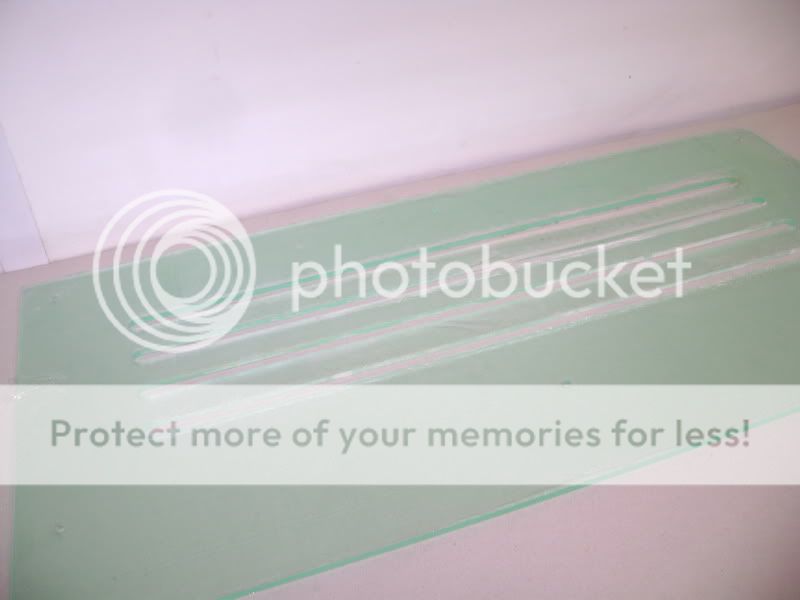
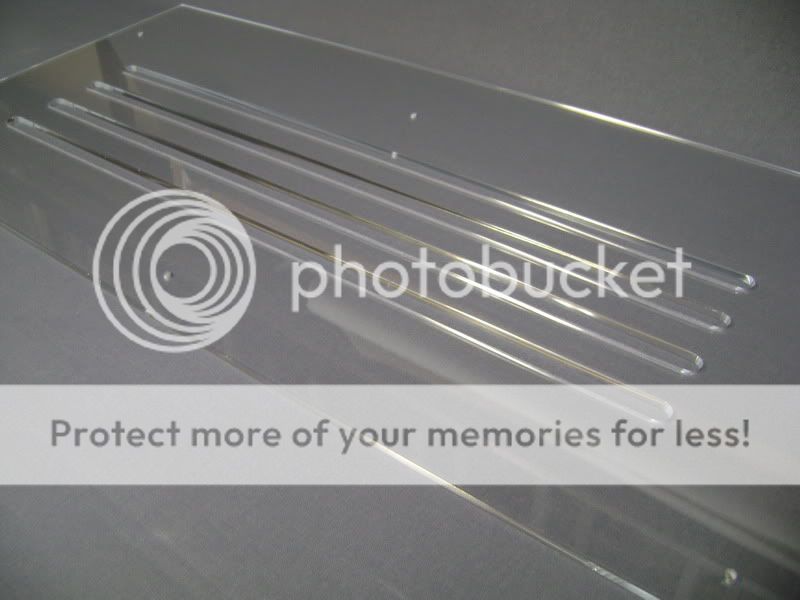
This is the plexi where it’s all about
I tightened this with 6 screws

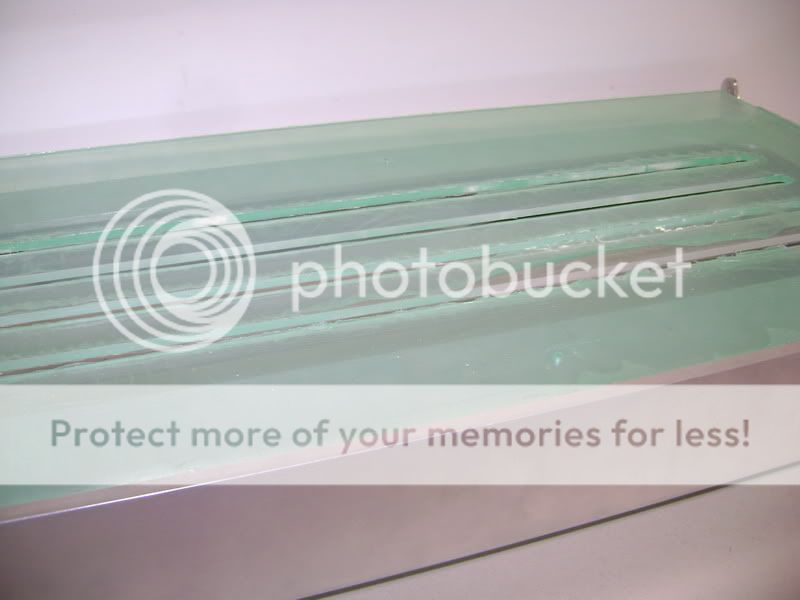
Turned it all over and drew out the whole.
Through this whole you’ll see the amplifier on the inner side.
Drew out how I wanted the slots.
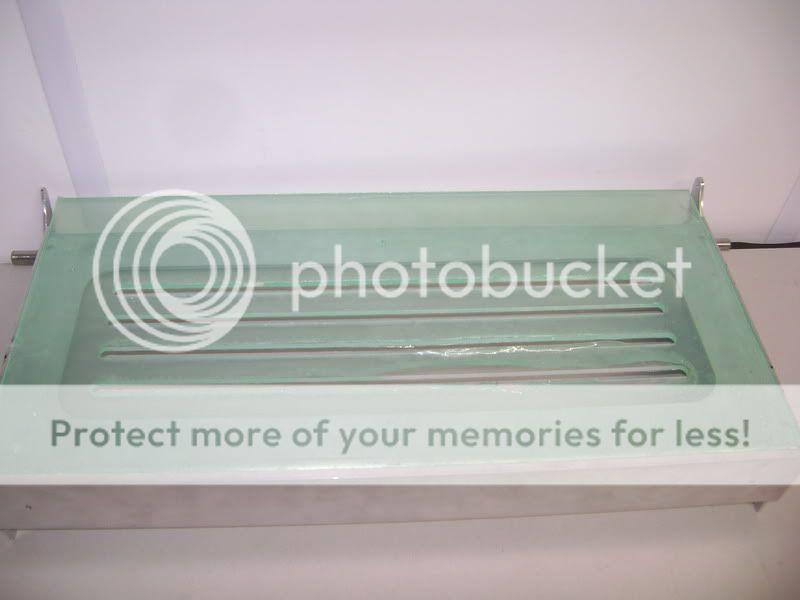
On this wooden plate I’m going to mill the plexi. First I made a slot here and there, so the mill won’t touch the wood. So I have a nice bottom to work on the plexi.

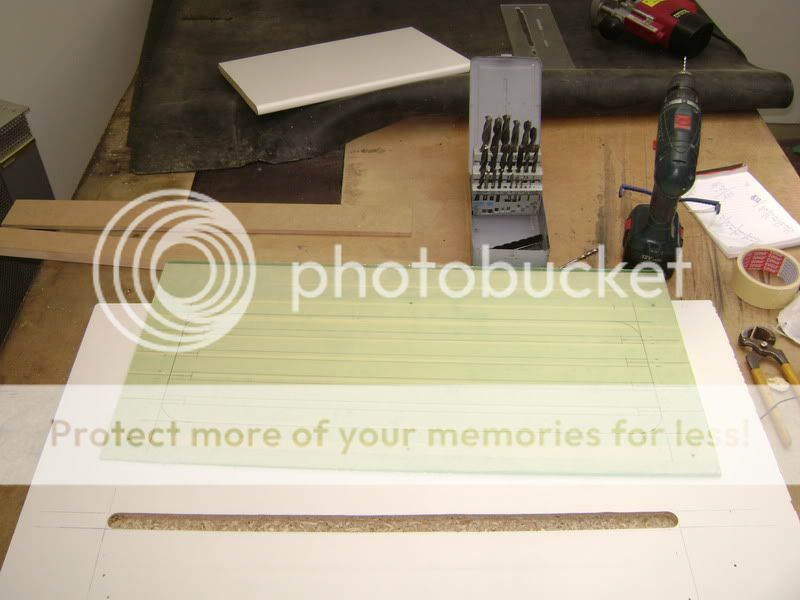
Before I begun, I messured out how many mm I had to span/yoke the slath, to glide next to with the mill.
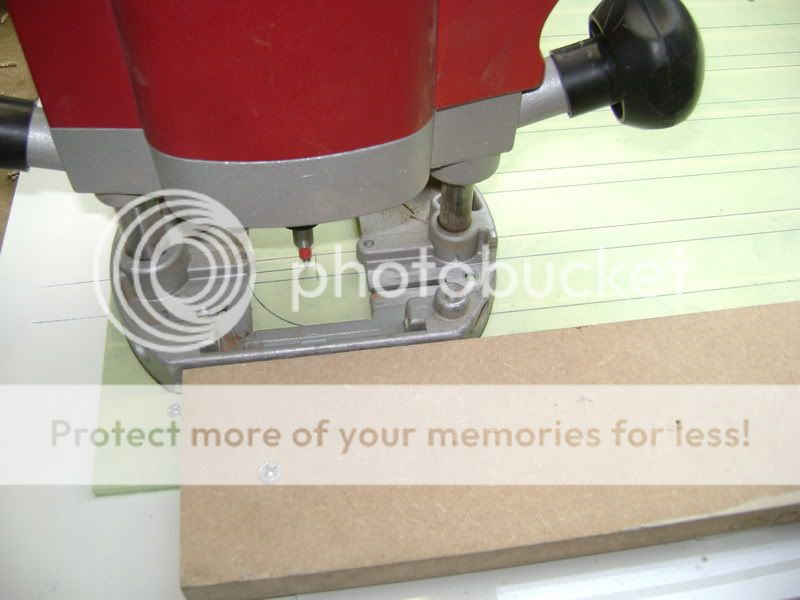
Once this was done, the muppet-show could begin

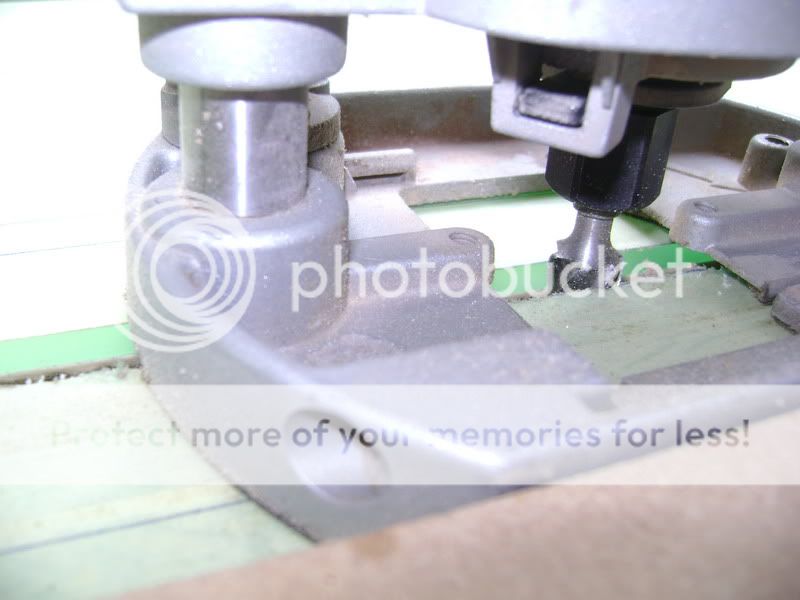
Nr1 is done, 3 more to go

When you look closely, you see I hit a little slath in the 2nd slot on the bottom.
I did this each time, so my plexi was always straight up when I was making the whole.
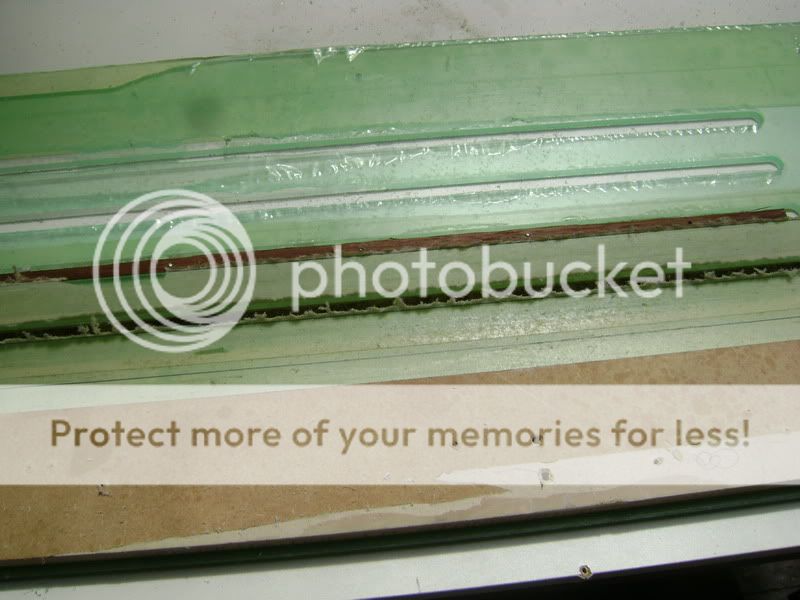
Done with milling, thank you lord I still have all my fingers.
Now the time has come to rubb and polish all of this nice and equally.
I tightened this with 6 screws
Turned it all over and drew out the whole.
Through this whole you’ll see the amplifier on the inner side.
Drew out how I wanted the slots.
On this wooden plate I’m going to mill the plexi. First I made a slot here and there, so the mill won’t touch the wood. So I have a nice bottom to work on the plexi.
Before I begun, I messured out how many mm I had to span/yoke the slath, to glide next to with the mill.
Once this was done, the muppet-show could begin
Nr1 is done, 3 more to go
When you look closely, you see I hit a little slath in the 2nd slot on the bottom.
I did this each time, so my plexi was always straight up when I was making the whole.
Done with milling, thank you lord I still have all my fingers.
Now the time has come to rubb and polish all of this nice and equally.
Dec 2, 2011 | 02:19 PM
#140
Thread Starter
| Teamspeed Member
Joined: Jan 2008
Posts: 179
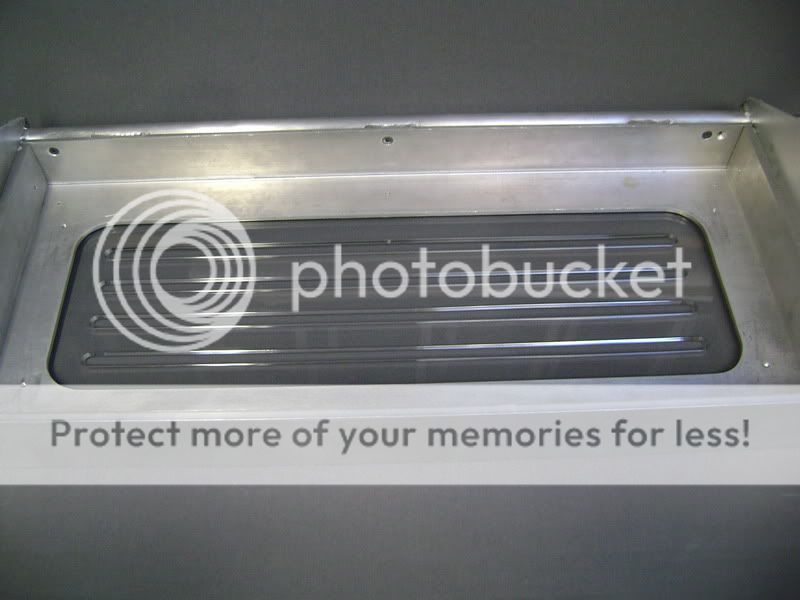
I’ve managed to continue on the plexi plate. Before I started rubbing, I tape it.
When you even LOOK wrong at plexiglass, you’ve got scratches, so being carefull is the question

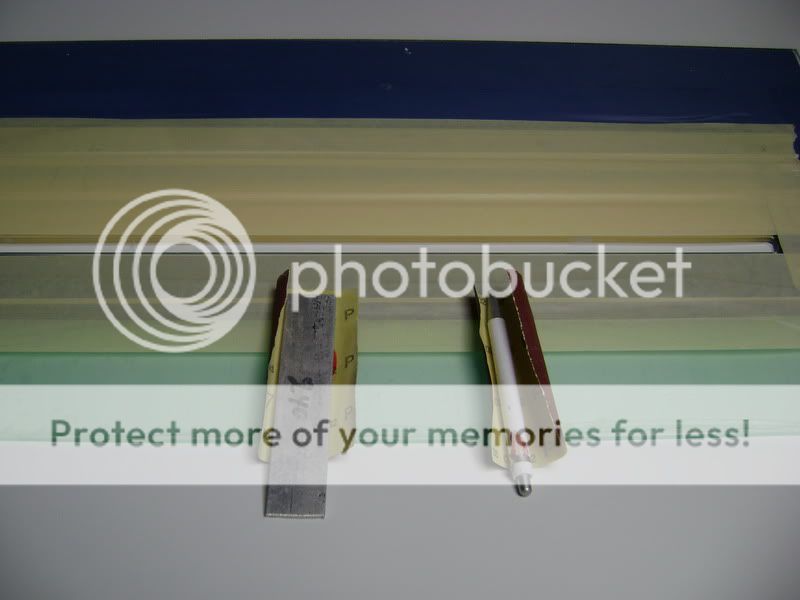
So I started searching around for a fine rubbing material, and this was the best tool I got�and the easiest.
On the left just a ordinary aluminum plate to do the straight sides and lines, on the right a thick pen with around it my rubbing paper, for the curvy parts.
To do this, it took me 5 hours to polisch and rubb it all.


The bottom where the plexi is screwed on to. The black you see is self-adheside vilt. I used this so I couldn’t make any scratches.

Inside of the �.’tank’ ‘box’ ?

When you even LOOK wrong at plexiglass, you’ve got scratches, so being carefull is the question
So I started searching around for a fine rubbing material, and this was the best tool I got�and the easiest.
On the left just a ordinary aluminum plate to do the straight sides and lines, on the right a thick pen with around it my rubbing paper, for the curvy parts.
To do this, it took me 5 hours to polisch and rubb it all.
The bottom where the plexi is screwed on to. The black you see is self-adheside vilt. I used this so I couldn’t make any scratches.
Inside of the �.’tank’ ‘box’ ?