DIY Project - Fixing the Z3 M Coupe's Wobbly Seats
 Dec 30, 2011 | 03:19 AM
#1
Thread Starter
| Teamspeed Pro
Joined: Mar 2009
Posts: 2,882


DIY Project - Fixing the Z3 M Coupe's Wobbly Seats
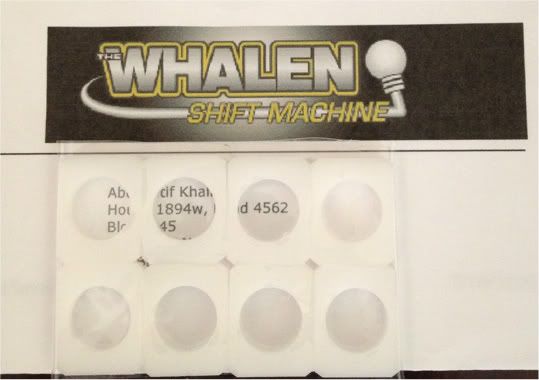
For anyone who has owned a Z3, a common problem is that the seats start wobbling after a few years. As the rubber washers wear out, the seats start sliding back and forth and it gets very annoying. My passenger seat starting wobbling a couple of years ago, and when I took it into the shop, the dealers checked both seats and returned the car to me with the driver seat also damaged. They quoted me in the range of $5,000 to get a whole new railing system for both seats. After a bit of research, I found these plastic washers (pictured below) from Whalen for $30 and they apparently fix the problem.
Day 1, I took out the seat by unfastening the rails (4 bolts) and removing the wiring loom. I will try to finish this project over this long weekend, doing a little every time my wife and kids leave the house I'll keep updating with my progress.
Perhaps its a good time to vacuum under the seat
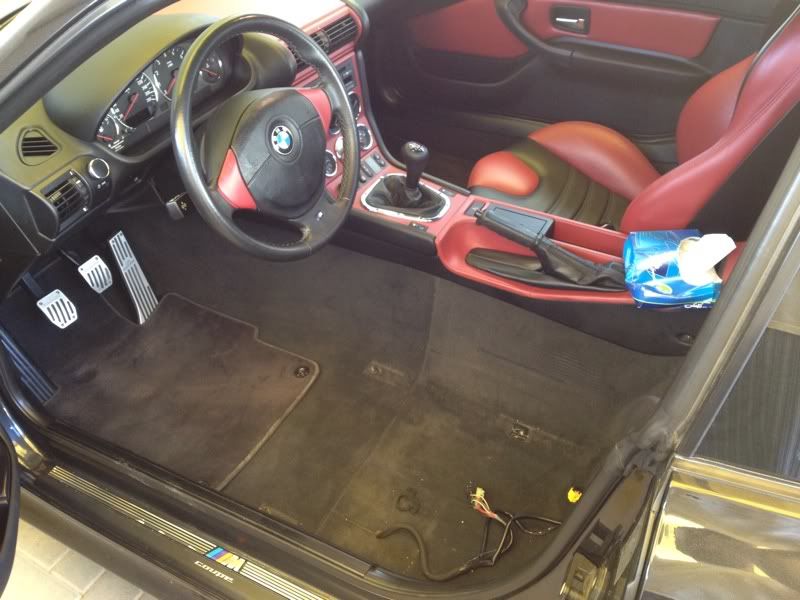
Removed
Under the seat
The washers
Day 1, I took out the seat by unfastening the rails (4 bolts) and removing the wiring loom. I will try to finish this project over this long weekend, doing a little every time my wife and kids leave the house
I'll keep updating with my progress. Perhaps its a good time to vacuum under the seat
Removed
Under the seat
The washers
Last edited by MC321; Dec 30, 2011 at 03:22 AM.
Dec 30, 2011 | 04:12 AM
#2
Thread Starter
| Teamspeed Pro
Joined: Mar 2009
Posts: 2,882
First mistake - should have taken the seat all the way back before removing it from the car, that way I can expose the big torx screw in the front. Had to move the seat back, plug it in, move it and bring it back in. (Pic 1 below)
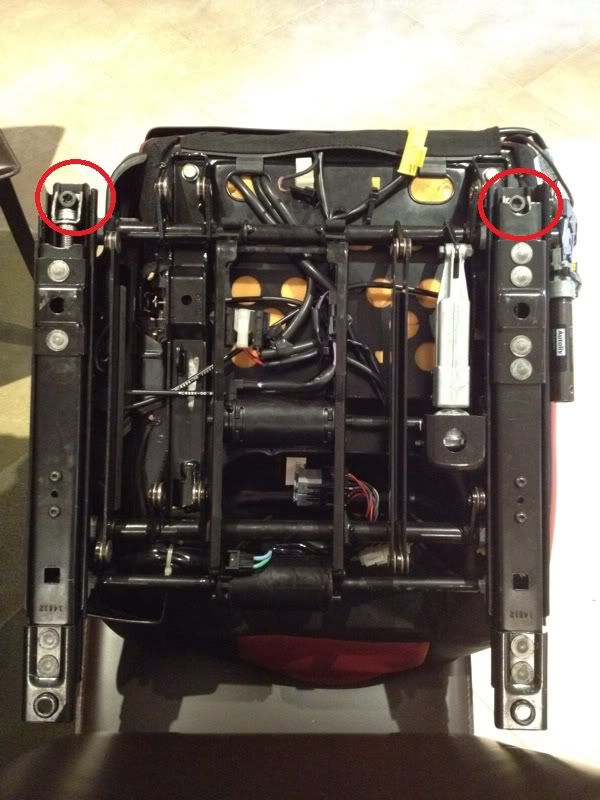
First problem - the stealership screwed my t20 torx screws and they're loose. Need to find a solution to be able to remove this last one to get to the washers. (Pic 2 below)
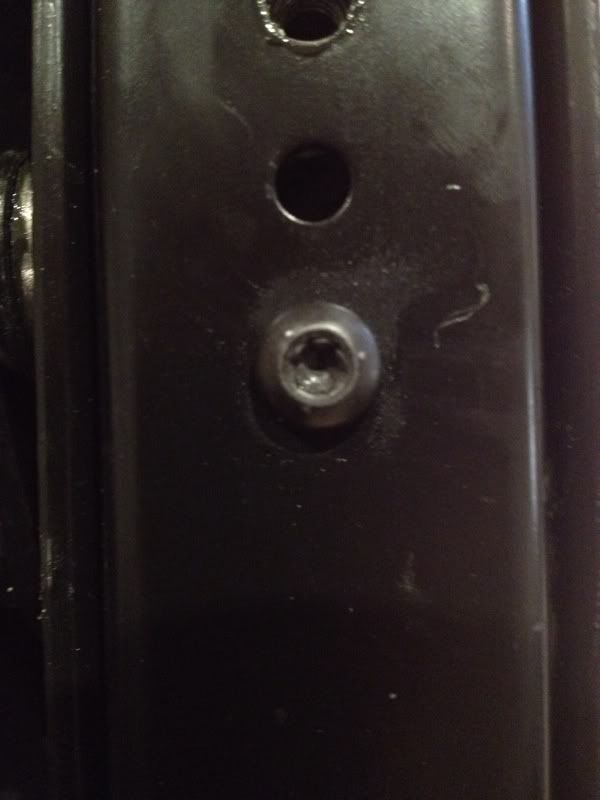
First problem - the stealership screwed my t20 torx screws and they're loose. Need to find a solution to be able to remove this last one to get to the washers. (Pic 2 below)
Dec 30, 2011 | 10:36 AM
#5
Thread Starter
| Teamspeed Pro
Joined: Mar 2009
Posts: 2,882
Alright.. it was physically and mentally challenging..
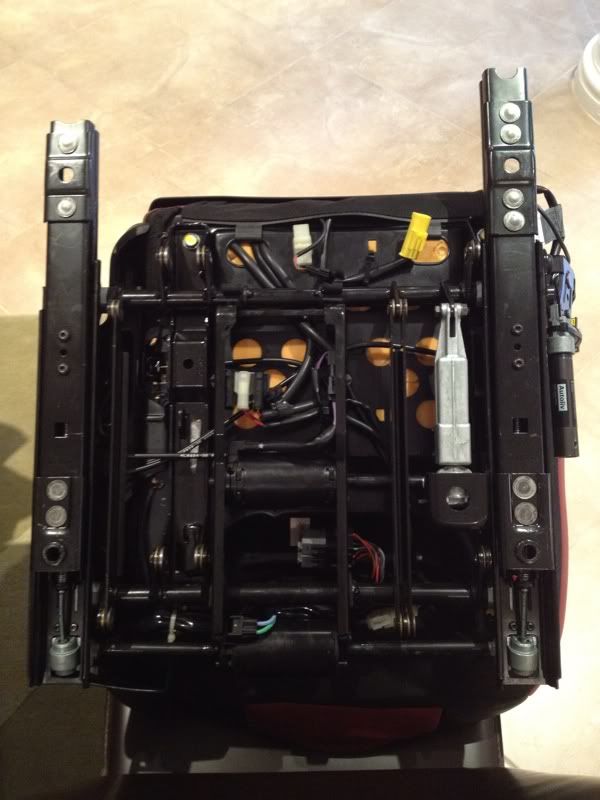
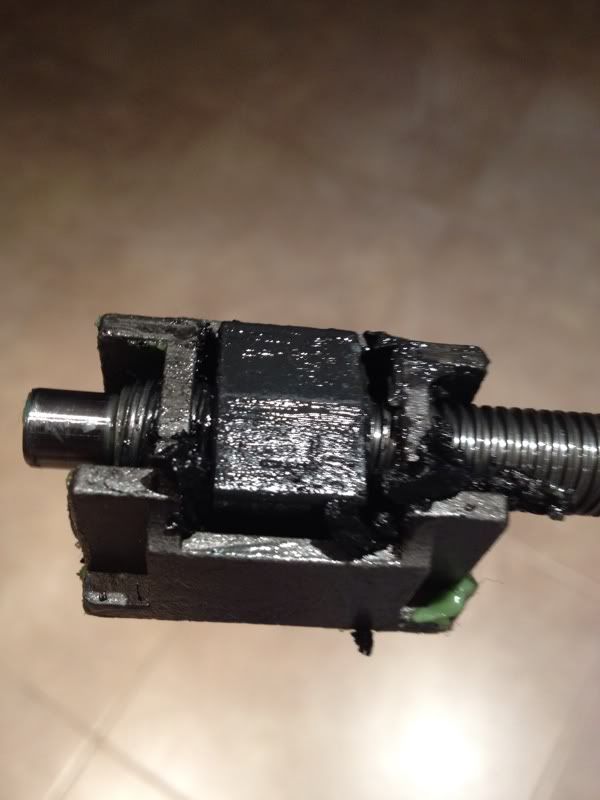
So I was able to get the last torx screw out and got to the offender. I marked where the brackets stood on the rail to get it right when putting everything back together. Used a sharpy and masking tape just incase.
This is what it looks like with the previous rubber bushings all MELTED
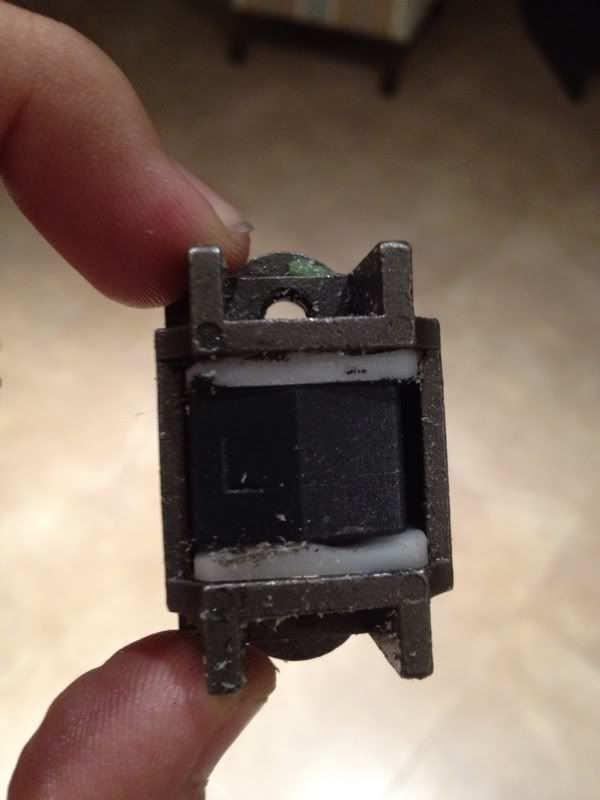
Spent time cleaning all the goop out and got it all nice and clean. next step was to install the new plastic bushings but unfortunately they are made wide, so I had to sand them down and slot them in.
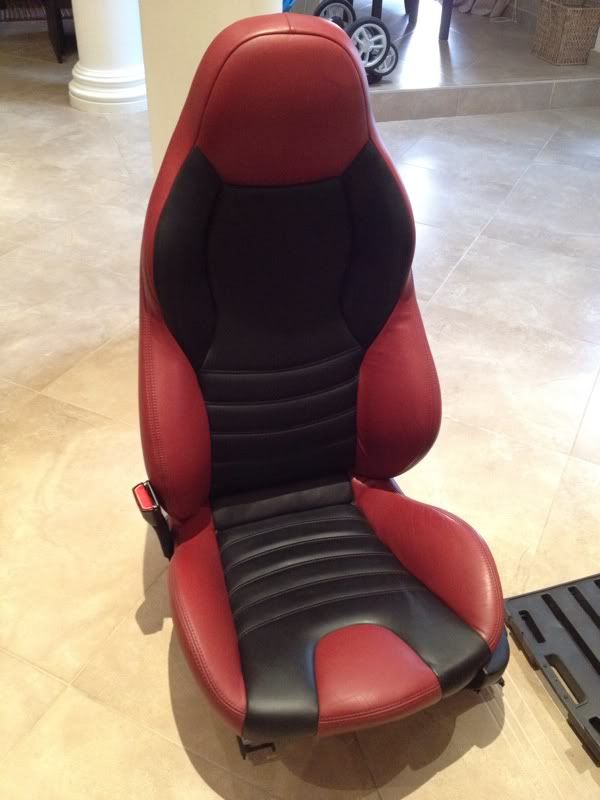
Finished product
You can see a major difference in the before and after. Put everything back together which was a bit of hassle. You need to get the rail lined up, and then make sure the motor is properly connected and aligned. Once done I cleaned the seat with some leather cleaner/protector.
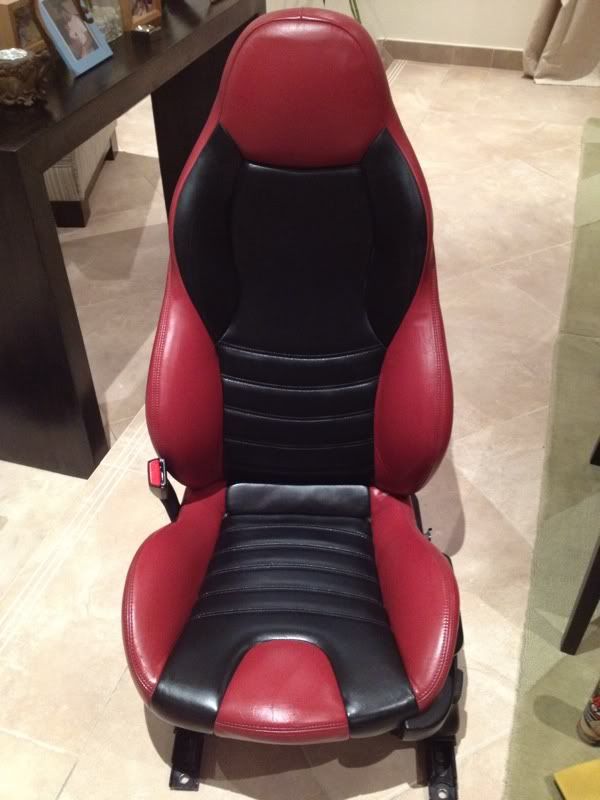
Put the seat back in the car and it lined up just fine. Screwed everything back in and voila, no more rocking and wobbling! $5,000 saved. I'll do the passenger seat tomorrow
So I was able to get the last torx screw out and got to the offender. I marked where the brackets stood on the rail to get it right when putting everything back together. Used a sharpy and masking tape just incase.
This is what it looks like with the previous rubber bushings all MELTED
Spent time cleaning all the goop out and got it all nice and clean. next step was to install the new plastic bushings but unfortunately they are made wide, so I had to sand them down and slot them in.
Finished product
You can see a major difference in the before and after. Put everything back together which was a bit of hassle. You need to get the rail lined up, and then make sure the motor is properly connected and aligned. Once done I cleaned the seat with some leather cleaner/protector.
Put the seat back in the car and it lined up just fine. Screwed everything back in and voila, no more rocking and wobbling! $5,000 saved. I'll do the passenger seat tomorrow