
Carbon fiber Ventilation slots (DIY)
 Oct 22, 2011 | 03:23 PM
#1

Thread Starter
| Teamspeed Member
Joined: Jan 2008
Posts: 179


Carbon fiber Ventilation slots (DIY)
I started thinking of something I�ve got my mind hooked on for some years now, and I always said: �when I�ll have the dollars, I�ll buy my one of those�.
But still ain�t got the money, cause I think it�s way too expensive.
I�m talking about this…
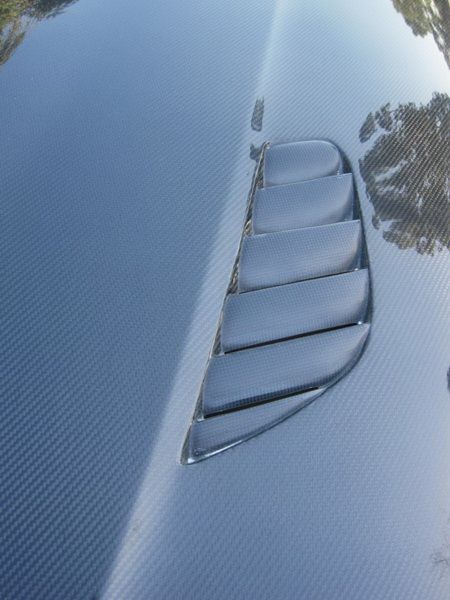
Ventilation slots
Not everyone will like it, but I just love it.
I decided to just go for it, and make those vents myself, in carbon fiber offcourse.
After many hours of thinking and drawing, I did a little test.
It worked out pretty fine, and here you can see the outer ring of the vent.

My making these, I also saw what I�ve done wrong, so I made EVO2.
I made this model a bit more short.
Here you can see how I made it, but it�s not so simple to explain.
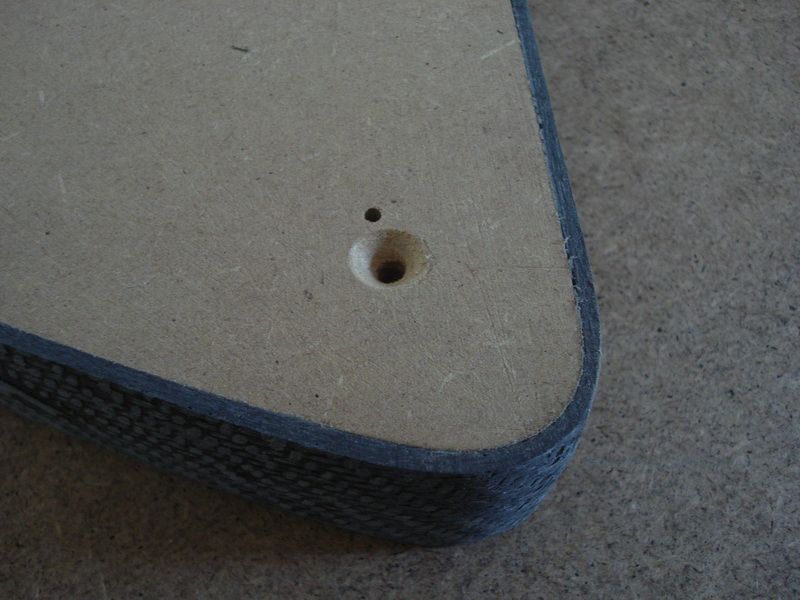
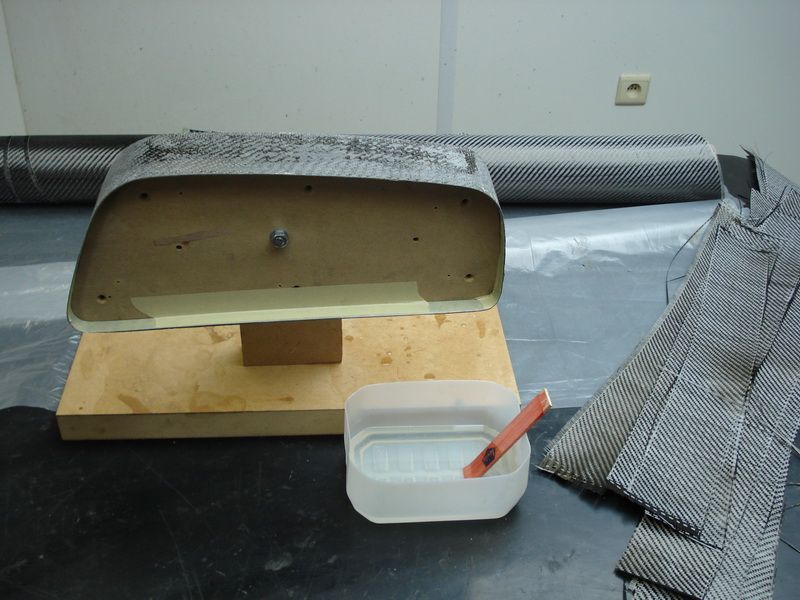
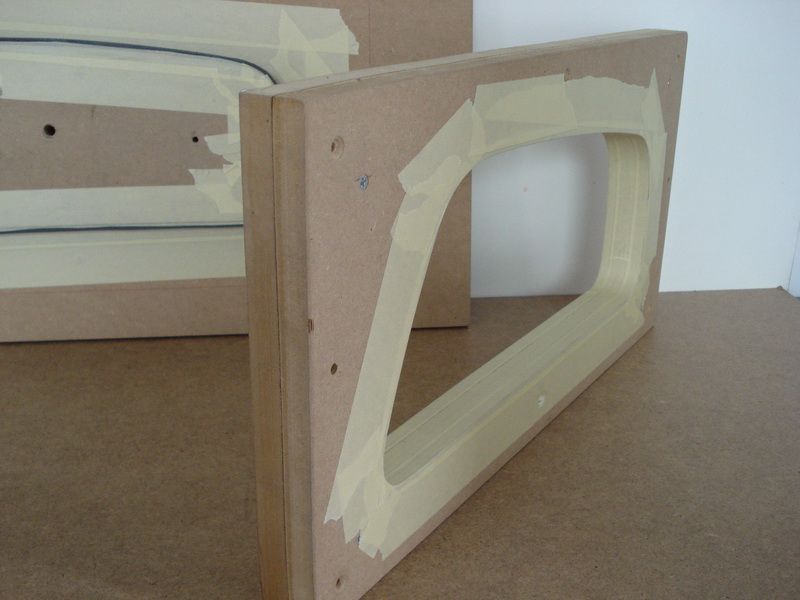
First I made the outside out of MDF


This is the inside
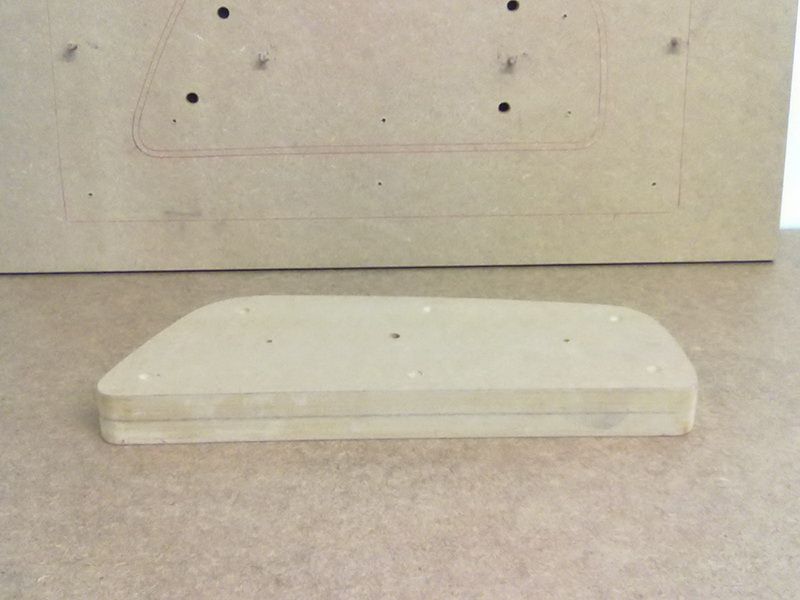
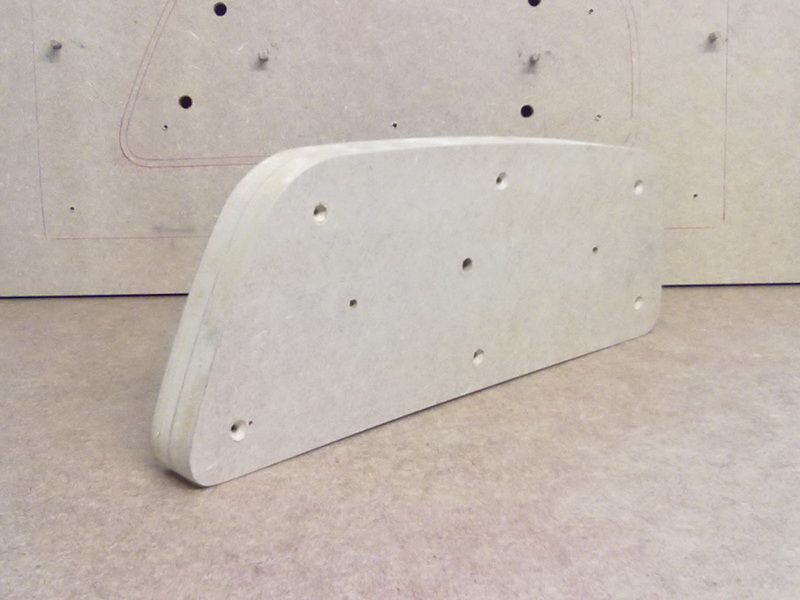
Then I screwed it all on a plate.
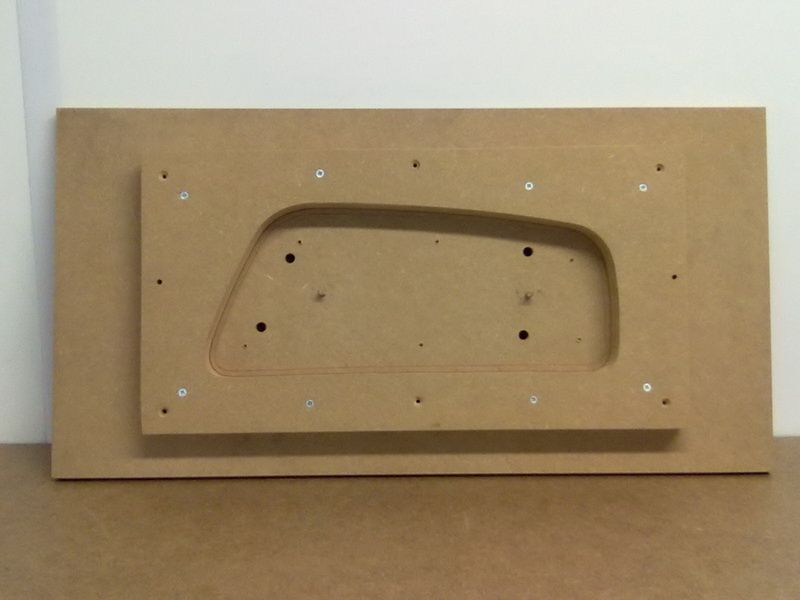

The total thickness will be around 36mm

The ditch you see, will become a little frame, and is 6mm thick.
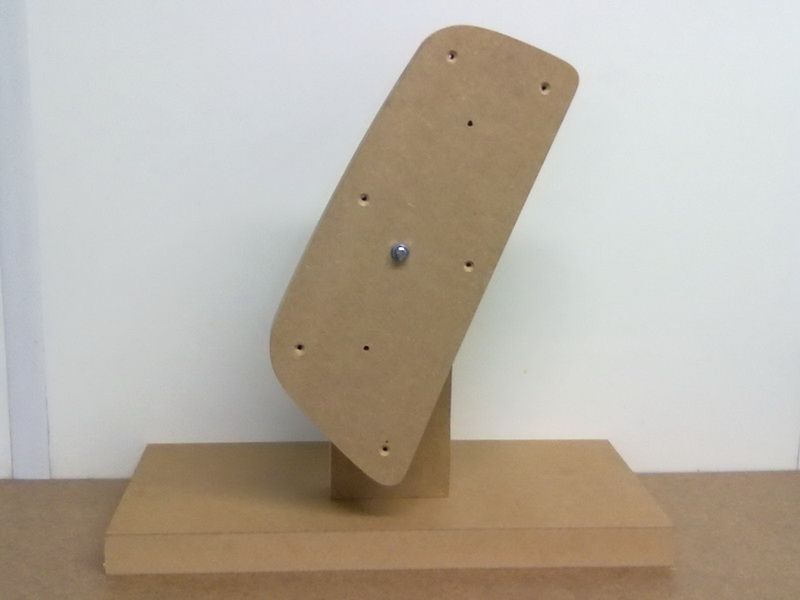
Then I took the inner shelf, and mounted this on a MDF foot with a M8


Now I can turn this perfectly when I�m covering it with carbon fibre.
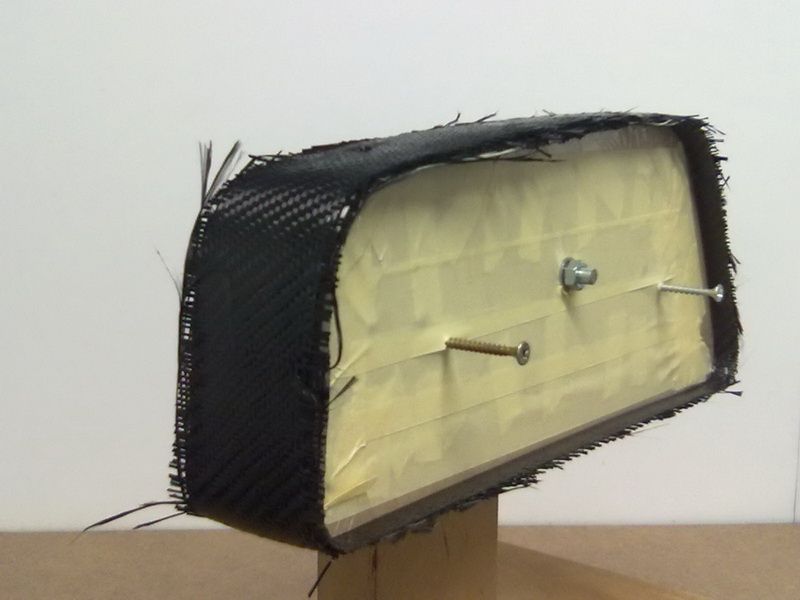
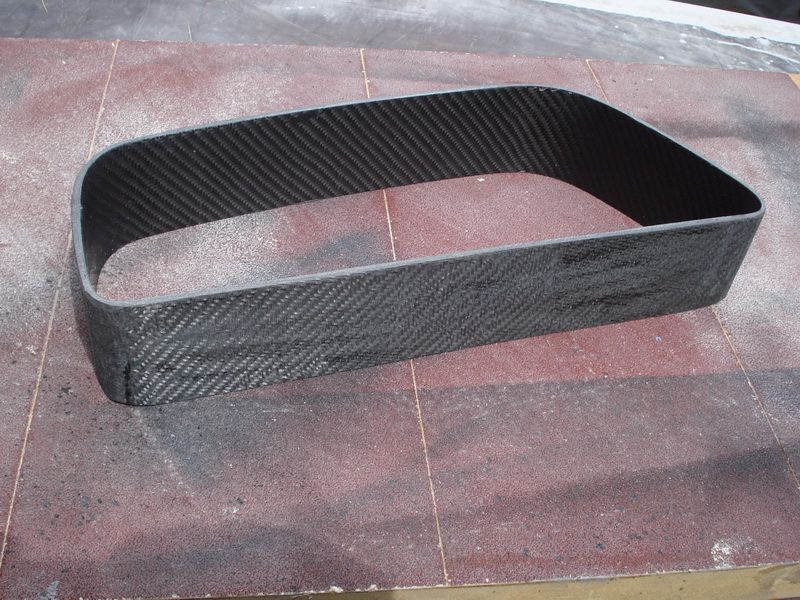
Here you can see the result.

Here there are 8 layers on.
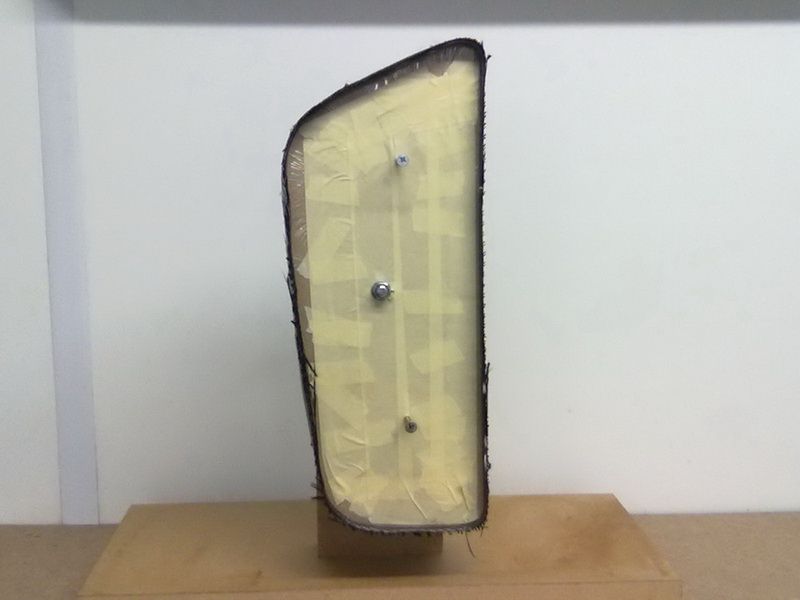
One this is dry, I�ll grind and polish it, and then it�s time for the next step.
But still ain�t got the money, cause I think it�s way too expensive.
I�m talking about this…
Ventilation slots
Not everyone will like it, but I just love it.
I decided to just go for it, and make those vents myself, in carbon fiber offcourse.
After many hours of thinking and drawing, I did a little test.
It worked out pretty fine, and here you can see the outer ring of the vent.
My making these, I also saw what I�ve done wrong, so I made EVO2.
I made this model a bit more short.
Here you can see how I made it, but it�s not so simple to explain.
First I made the outside out of MDF
This is the inside
Then I screwed it all on a plate.
The total thickness will be around 36mm
The ditch you see, will become a little frame, and is 6mm thick.
Then I took the inner shelf, and mounted this on a MDF foot with a M8
Now I can turn this perfectly when I�m covering it with carbon fibre.
Here you can see the result.
Here there are 8 layers on.
One this is dry, I�ll grind and polish it, and then it�s time for the next step.
Oct 22, 2011 | 03:25 PM
#2
Thread Starter
| Teamspeed Member
Joined: Jan 2008
Posts: 179
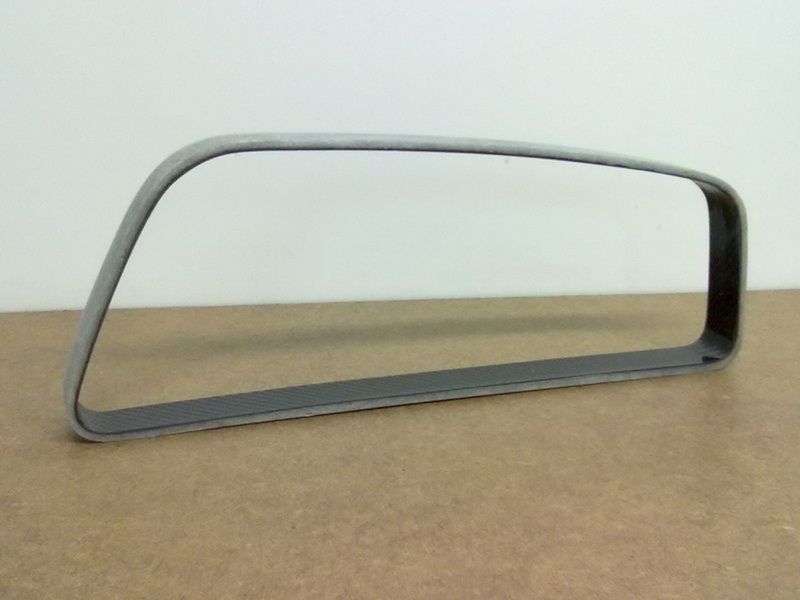
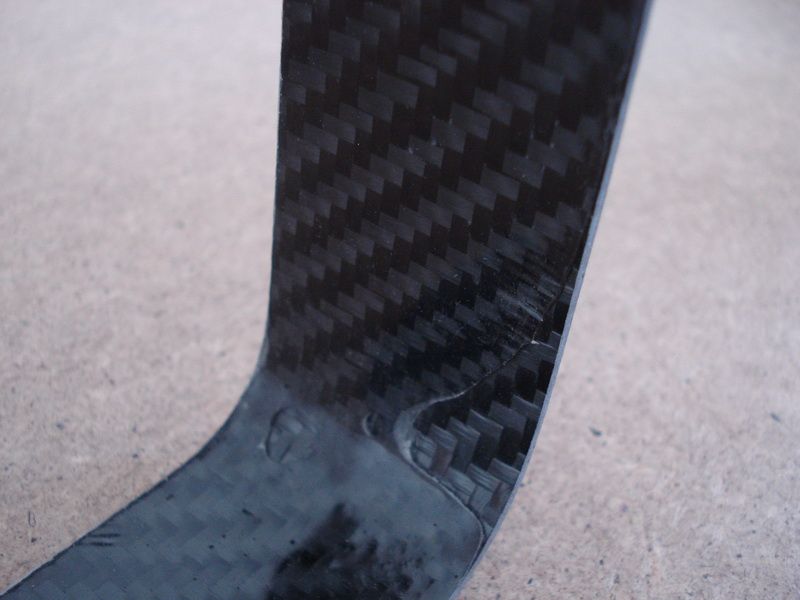
Here you can see the further process of EVO2.
First I grinded it, and rubbed it down…
You can also see the thickness of the many layers Carbon Fibre.
The I knocked the MDF out, with this as result:
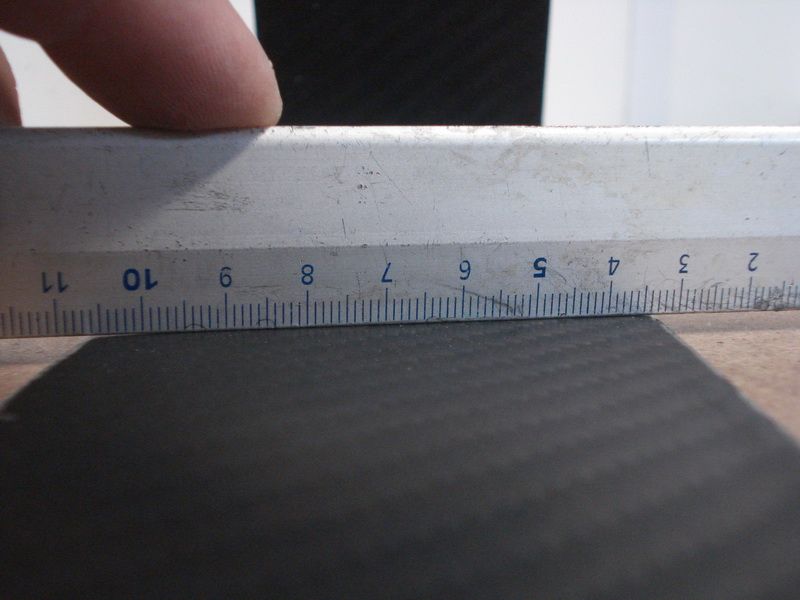
Damn, not enough epoxi...But there’s a solution for that...so no problem.
But then I saw another thing that I didn’t like.
When you take a close look, you see the carbon isn’t equally flat.

How that came, I know now.
EVO3 is drying at the moment, and I’m pretty curious how that’ll turn out.
I’m working with carbon fibre many years know, and made a hundreds of things in carbon fibre…but I’ll have to say that every job you do with carbon fibre, you have to check everything 10 times when you go to work. There’s constantly something waiting to go wrong.
But quitting ain’t my game, it’s a bit too early for that now.
Here’s EVO1 and EVO2, you can also see EVO2 got a bit smaller.

These 2 will come above my bed
First I grinded it, and rubbed it down…
You can also see the thickness of the many layers Carbon Fibre.
The I knocked the MDF out, with this as result:
Damn, not enough epoxi...But there’s a solution for that...so no problem.
But then I saw another thing that I didn’t like.
When you take a close look, you see the carbon isn’t equally flat.
How that came, I know now.
EVO3 is drying at the moment, and I’m pretty curious how that’ll turn out.
I’m working with carbon fibre many years know, and made a hundreds of things in carbon fibre…but I’ll have to say that every job you do with carbon fibre, you have to check everything 10 times when you go to work. There’s constantly something waiting to go wrong.
But quitting ain’t my game, it’s a bit too early for that now.
Here’s EVO1 and EVO2, you can also see EVO2 got a bit smaller.
These 2 will come above my bed
Oct 22, 2011 | 03:25 PM
#3
Thread Starter
| Teamspeed Member
Joined: Jan 2008
Posts: 179
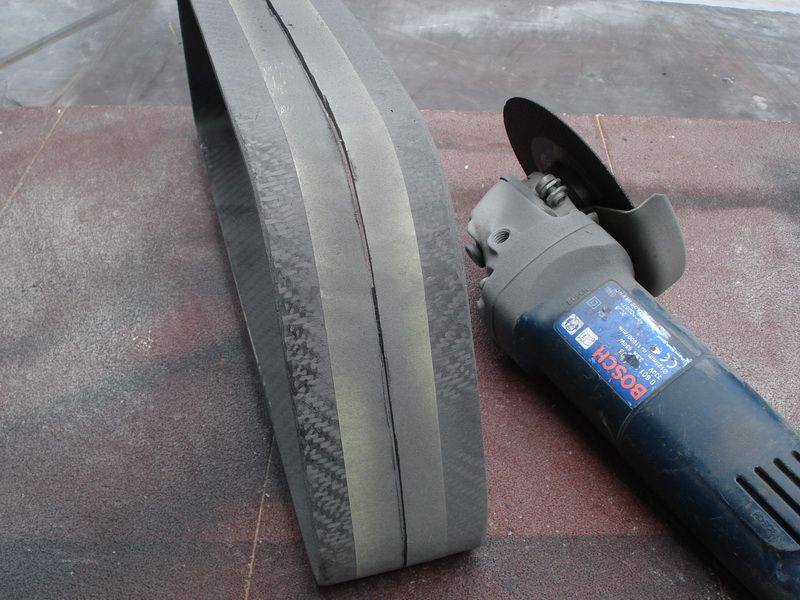
As you can see, I’m working on EVO4 now, and now it’s looking like I wanted it to look.

You can also see I made a wider one. Now I only have one job to do, and I can just cut it in half.

As you see this one I nicely straight.
I just needed to find a way to make these stronger. I cut out some carbon flaps of 9 centimeters.
I added them, and once it was dry, abraded it all nicely equal.
Then I’m planning of doing the trick with the pigeons again

You can also see I made a wider one. Now I only have one job to do, and I can just cut it in half.
As you see this one I nicely straight.
I just needed to find a way to make these stronger. I cut out some carbon flaps of 9 centimeters.
I added them, and once it was dry, abraded it all nicely equal.
Then I’m planning of doing the trick with the pigeons again
Oct 22, 2011 | 03:26 PM
#4
Thread Starter
| Teamspeed Member
Joined: Jan 2008
Posts: 179
The frame that’s covered with about 15 layers of carbon fibre, will get his last adjustement.
First I dug into my garage to look for my giant abrading-block to rub it all equal.
Then I drawed 2 lines in the centre.

Took my favorite tool, and disced it in 2.

Abraded the cut piece flat.
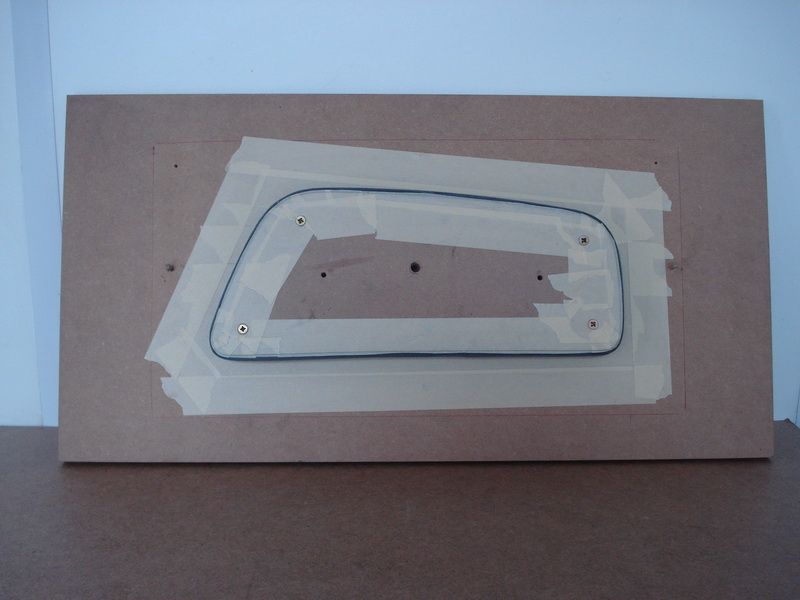
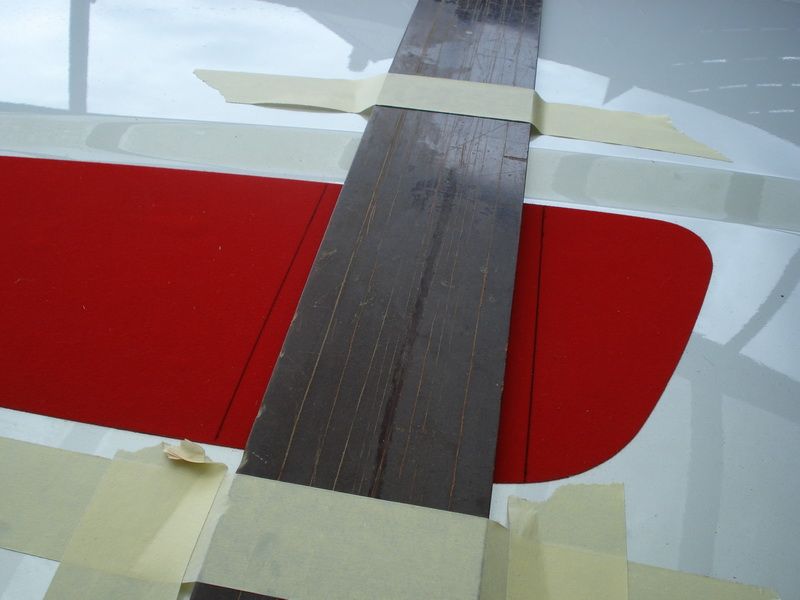
Cause the outside of the frame needed a nice and straight side, I came up with this.
Put the inner block mdf back into it, and taped it all.
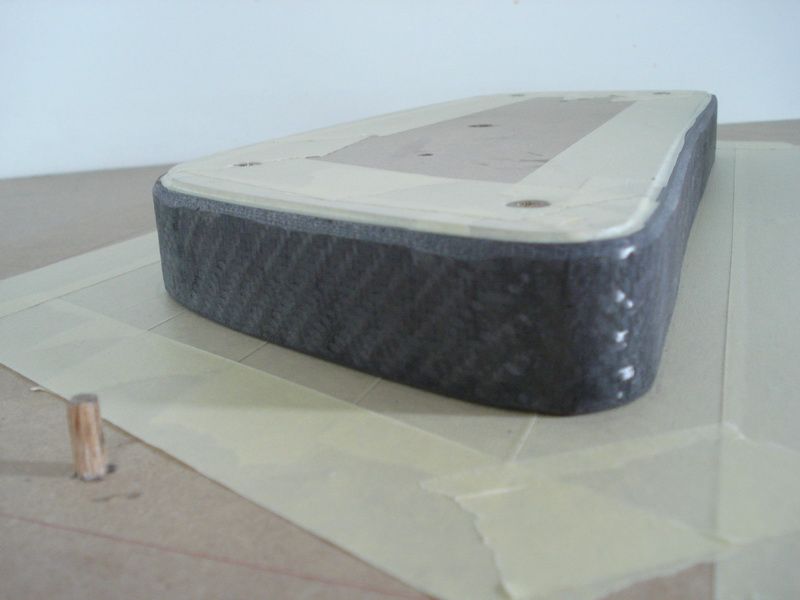
The I taped the outer mdf.
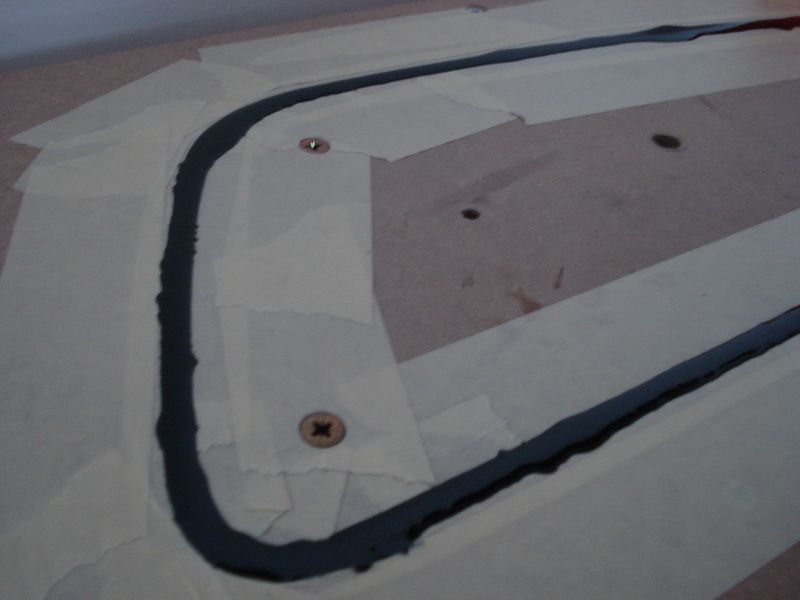
Here you see how it all is screwed.
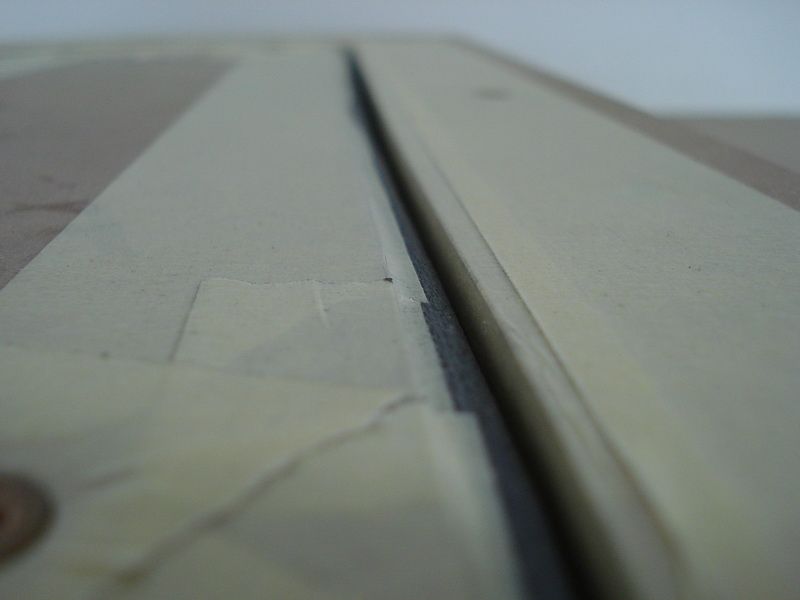
When you look at this picture closely, you can see a little ditch between the carbon fibre and the outer side.
The black line is the carbon fibre, and the red one, is the ditch that needed to be filled.
To get the outside also so nicely tight, I did the trick with the pigeon again.
Magician tricks are stupid, but o so functional.
I orderd myself 200gr of carbondust.
I’m not aware of the price you pay for 200gr of coke, but this wasn’t cheap also…And I’m guessing that when you’ll sniff a line of this stuff, you’ll be in 7th heaven too.
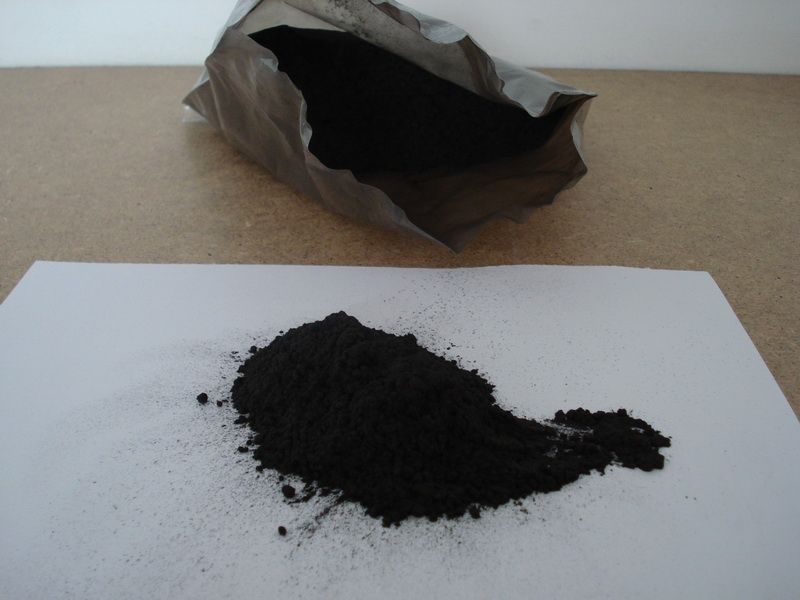
Then I took some epoxy, warmed this to a certain point, and added the powder till I got a liquid porridge.
CARBONSTUW, lol
Be heating up the expoy, it gets more liquid, and I was able to fill up the ditch with my carbon mush.
Once the ditch was flooded, I hammered with my hammer, so I was sure that it got to everywhere downthere. Here and there I had to fill some more, but I’m guessing it’s completely filled now.

I’m letting this harden for 2 days now, and once I’m screwing this loos, I’ll be able to see if my frame worked 100% !
First I dug into my garage to look for my giant abrading-block to rub it all equal.
Then I drawed 2 lines in the centre.
Took my favorite tool, and disced it in 2.
Abraded the cut piece flat.
Cause the outside of the frame needed a nice and straight side, I came up with this.
Put the inner block mdf back into it, and taped it all.
The I taped the outer mdf.
Here you see how it all is screwed.
When you look at this picture closely, you can see a little ditch between the carbon fibre and the outer side.
The black line is the carbon fibre, and the red one, is the ditch that needed to be filled.
To get the outside also so nicely tight, I did the trick with the pigeon again.
Magician tricks are stupid, but o so functional.
I orderd myself 200gr of carbondust.
I’m not aware of the price you pay for 200gr of coke, but this wasn’t cheap also…And I’m guessing that when you’ll sniff a line of this stuff, you’ll be in 7th heaven too.
Then I took some epoxy, warmed this to a certain point, and added the powder till I got a liquid porridge.
CARBONSTUW, lol
Be heating up the expoy, it gets more liquid, and I was able to fill up the ditch with my carbon mush.
Once the ditch was flooded, I hammered with my hammer, so I was sure that it got to everywhere downthere. Here and there I had to fill some more, but I’m guessing it’s completely filled now.
I’m letting this harden for 2 days now, and once I’m screwing this loos, I’ll be able to see if my frame worked 100% !
Oct 22, 2011 | 03:26 PM
#5
Thread Starter
| Teamspeed Member
Joined: Jan 2008
Posts: 179
The frame worked out perfectly for me. I’m pleased with how it looks now.

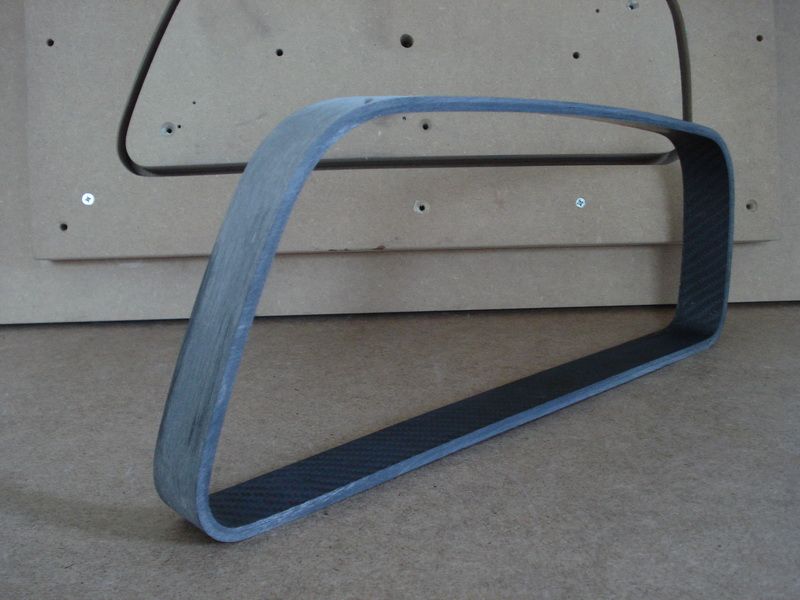
I provided the second one of it’s carbonmush also...so it’ll also be ready soon.
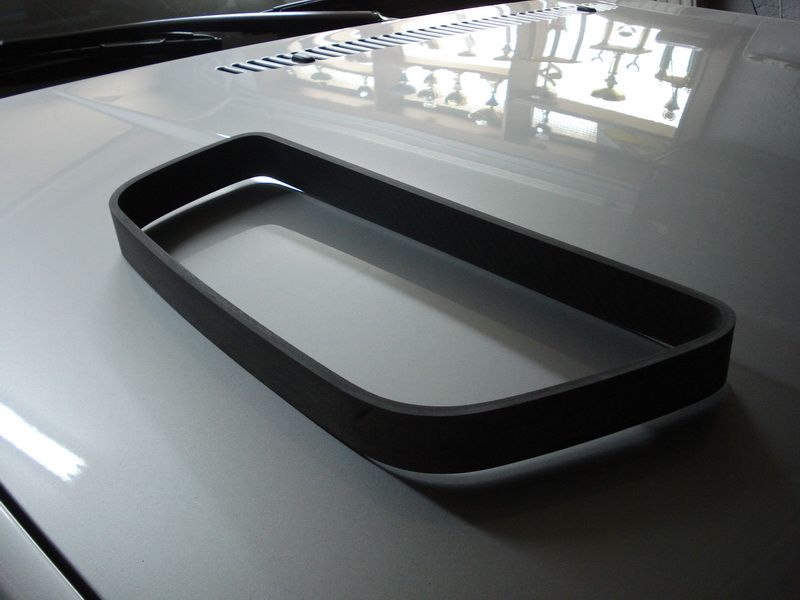
Then I layed this thing on my hood, at the point where it needs to come.
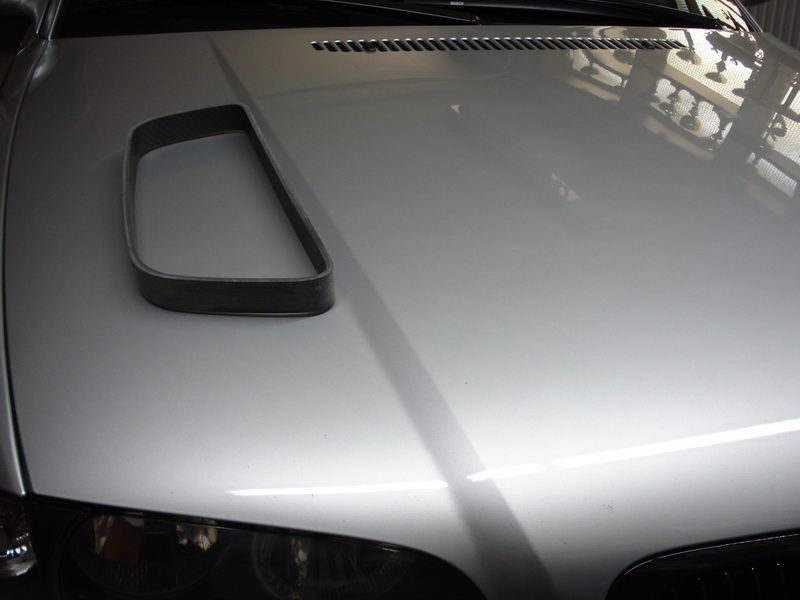
I immediately got a kick, just be seeing this:
When you may know, the hood of a E46 isn’t particully straight.
So now it’s my job to provide these frames with the same roundings as the hood.
I provided the second one of it’s carbonmush also...so it’ll also be ready soon.
Then I layed this thing on my hood, at the point where it needs to come.
I immediately got a kick, just be seeing this:
When you may know, the hood of a E46 isn’t particully straight.
So now it’s my job to provide these frames with the same roundings as the hood.
Oct 22, 2011 | 03:27 PM
#6
Thread Starter
| Teamspeed Member
Joined: Jan 2008
Posts: 179
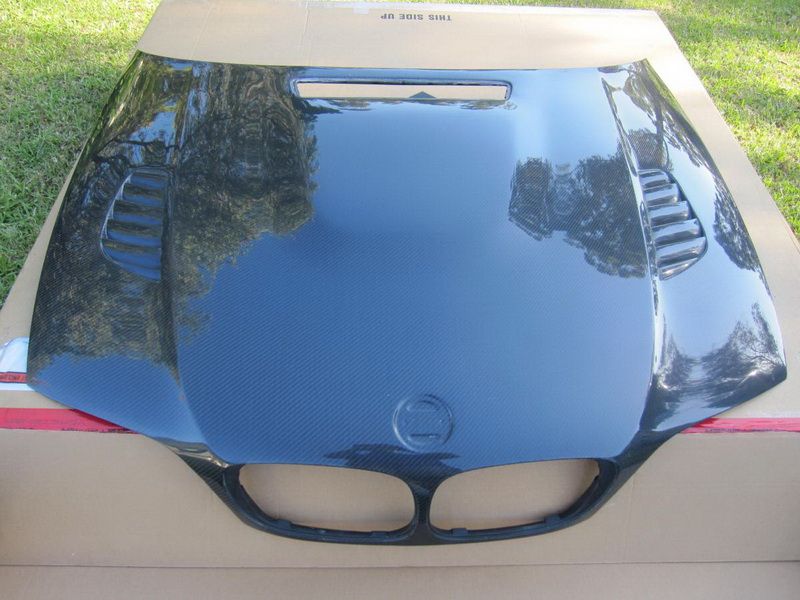
Ok dudes, playtime is over.
Time for the real stuff.
Before I made the 2 holes in the hood, I thought it over, again.
Buying a new hood, letting it get sprayed, …. It’s an easy 800-900€.
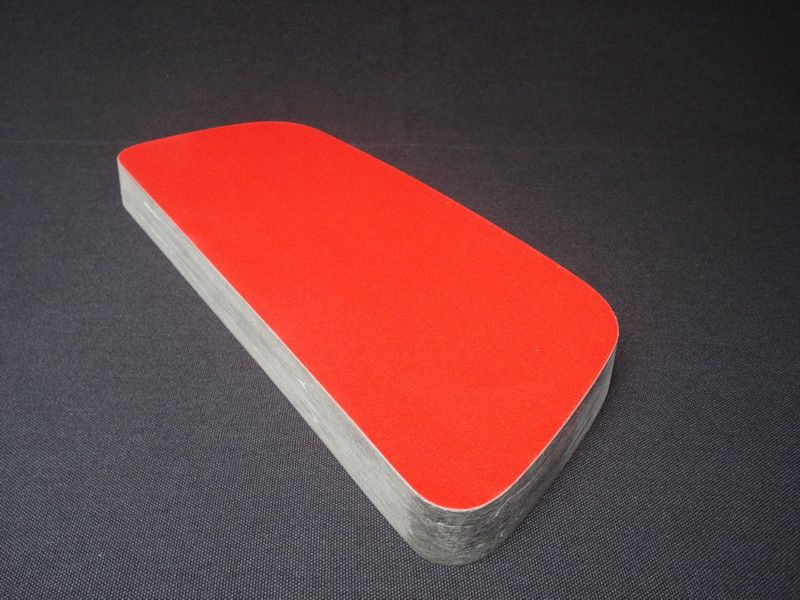
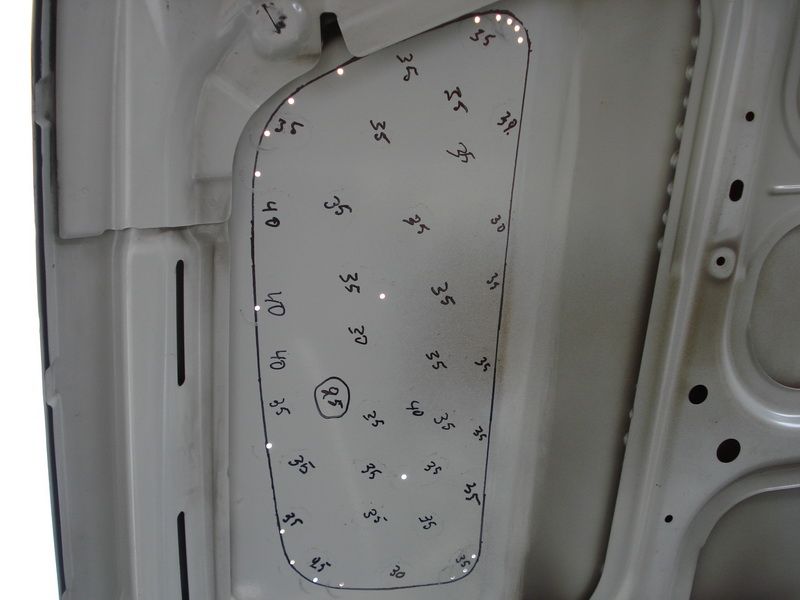
So first I took the vent-holes and provided them with self-adhesive tape.
I took this because of the thickness. The color is red, because there wasn’t any other color available.
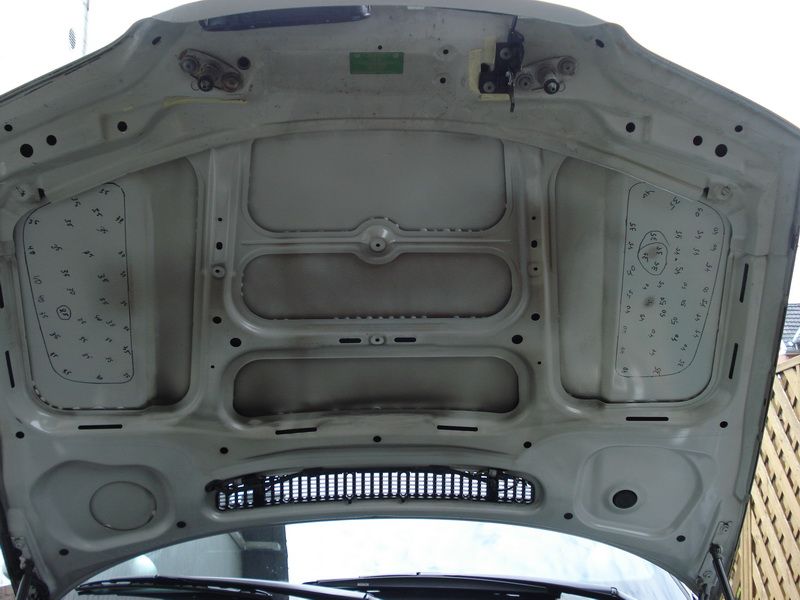
Then I taped these under the hood, and drawed them out with a ballpoint
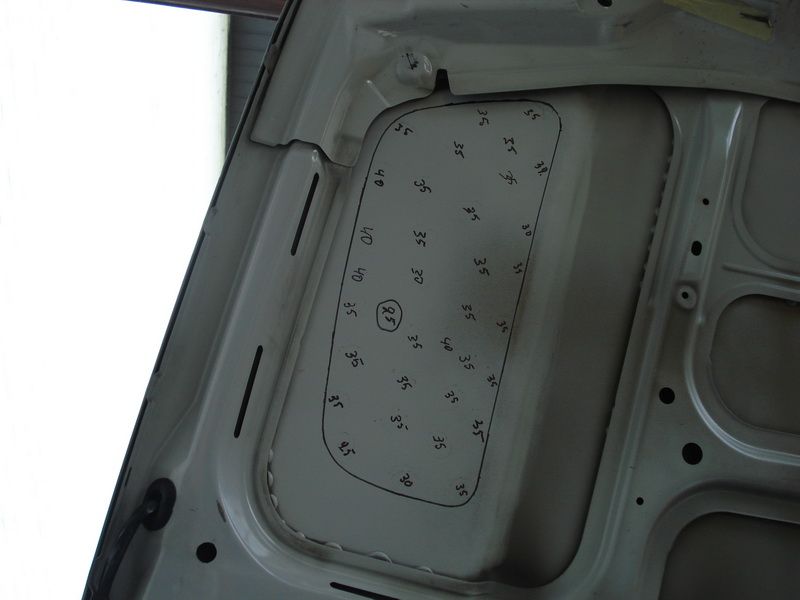
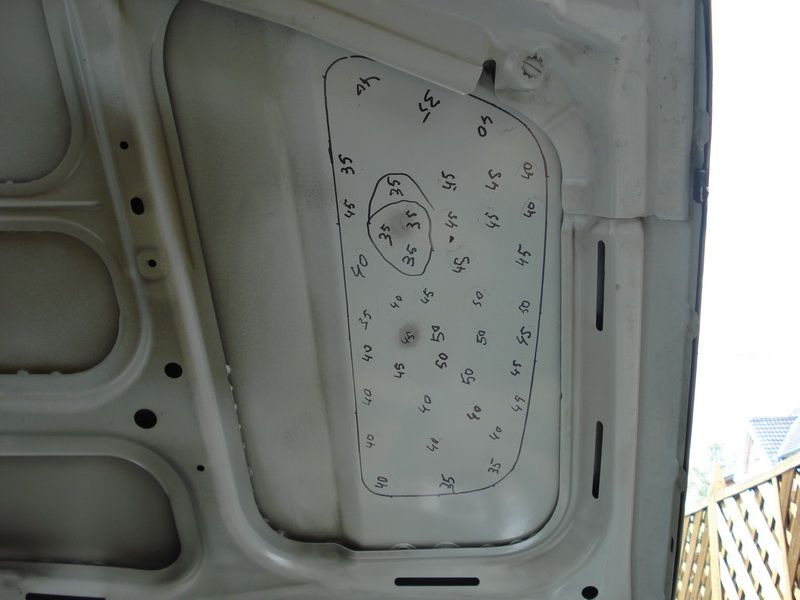
Then I kept myself occupied of placing kit to the hood, to measure how much space there is between the hood and the fiberglass covers I made.
Here you can see that on 1 place, I only have 25millimeters. There the cap of the window-wipers
Never mind, time will tell what I’m going to do with that, maybe leave the aluminium cap or so…
On the driver-side, there’s more room.
What I am going to do, is make them the same height.
I prepared my drill. You can see I placed the head of the drill on a flat rubber.

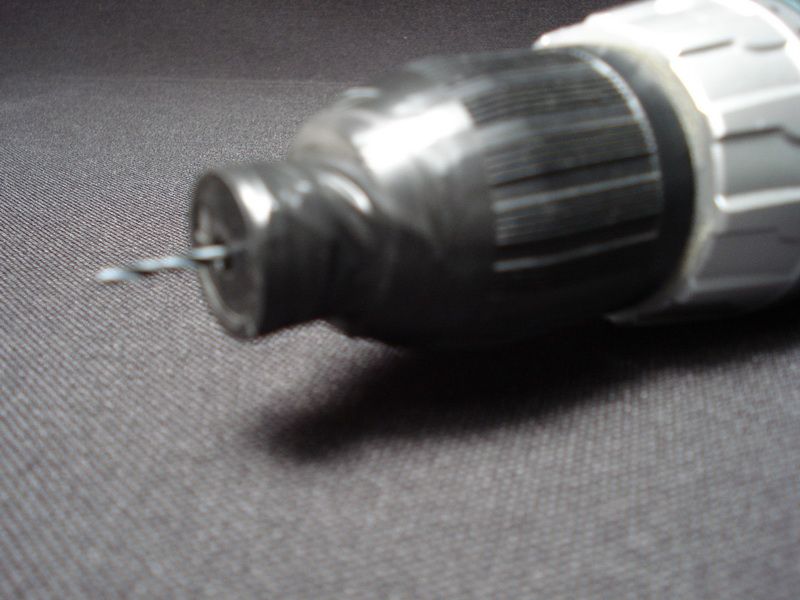
When I’m drilling through the hood, and I should lose control of the drill, the rubber takes the smash.
Enough talking, let’s go drillin’
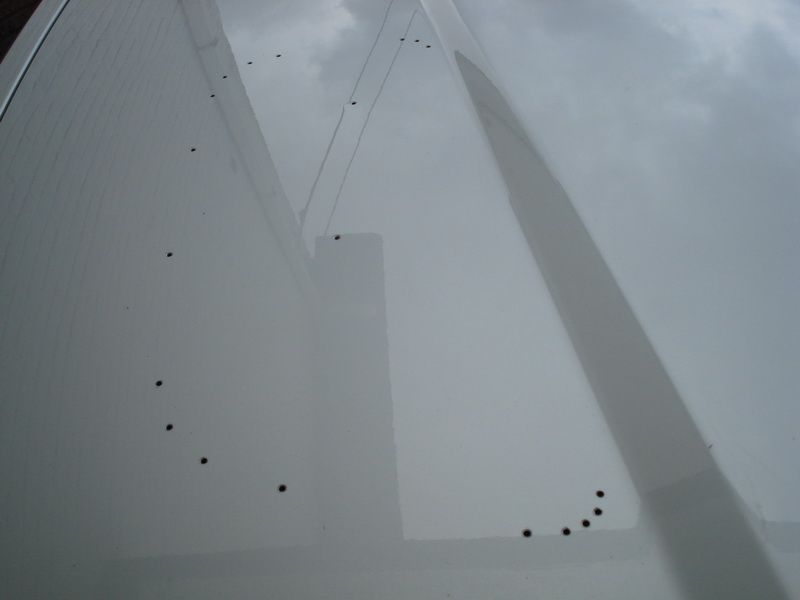
I drilled a couple of 2.5mm holes from the inside towards the outside.
You see I’m a bit more on the inside than the line.

This is how it looks on the oudside, and now I know exactly where to place the sticker to draw out the outside.
Before I drilled the first hole, I drilled some holes in the middle of the material that needs to be deleted, makes it easier.
And believe me, you need to give it some big strength before you go through that the first time.
I’d also span a bar, measured and drawed to place the bars inside the air-vents

Took off the hood, and layed it on the table.
When I planted the disc in the hood…

A friend who was with me at that moment, asked me: “are you SURE ???”
But even before he started the word SURE, I already went for it.

Time for the real stuff.
Before I made the 2 holes in the hood, I thought it over, again.
Buying a new hood, letting it get sprayed, …. It’s an easy 800-900€.
So first I took the vent-holes and provided them with self-adhesive tape.
I took this because of the thickness. The color is red, because there wasn’t any other color available.
Then I taped these under the hood, and drawed them out with a ballpoint
Then I kept myself occupied of placing kit to the hood, to measure how much space there is between the hood and the fiberglass covers I made.
Here you can see that on 1 place, I only have 25millimeters. There the cap of the window-wipers
Never mind, time will tell what I’m going to do with that, maybe leave the aluminium cap or so…
On the driver-side, there’s more room.
What I am going to do, is make them the same height.
I prepared my drill. You can see I placed the head of the drill on a flat rubber.
When I’m drilling through the hood, and I should lose control of the drill, the rubber takes the smash.
Enough talking, let’s go drillin’
I drilled a couple of 2.5mm holes from the inside towards the outside.
You see I’m a bit more on the inside than the line.
This is how it looks on the oudside, and now I know exactly where to place the sticker to draw out the outside.
Before I drilled the first hole, I drilled some holes in the middle of the material that needs to be deleted, makes it easier.
And believe me, you need to give it some big strength before you go through that the first time.
I’d also span a bar, measured and drawed to place the bars inside the air-vents
Took off the hood, and layed it on the table.
When I planted the disc in the hood…
A friend who was with me at that moment, asked me: “are you SURE ???”
But even before he started the word SURE, I already went for it.
