
Carbon fiber Ventilation slots (DIY)
 Oct 22, 2011 | 03:50 PM
#12
Teamspeed Pro
Joined: Apr 2008
Posts: 2,343


Geez, you've got way more courage than me in cutting that hood. And some real talent in creating the carbon fibre. VERY COOL!!! Reppin you for your guts and creativity.
Wild that you've been on here longer than most, but still only have 6 posts. With projects like this, I look forward to reading more of your posts.
Wild that you've been on here longer than most, but still only have 6 posts. With projects like this, I look forward to reading more of your posts.
Last edited by Superfly; Oct 22, 2011 at 03:53 PM.
Oct 22, 2011 | 03:52 PM
#13
Teamspeed Pro
Joined: Aug 2007
Posts: 5,051
From: Miami, Fl
nice to see you on here. you are quite the craftman, post up some of the stuff you've modified on your BMW. The seat backs /exhaust / sound systems is pretty cool. Not many people have the talent to work carbon like you do.
welcome to the forum!
welcome to the forum!
Oct 23, 2011 | 12:40 PM
#19

Thread Starter
| Teamspeed Member
Joined: Jan 2008
Posts: 179
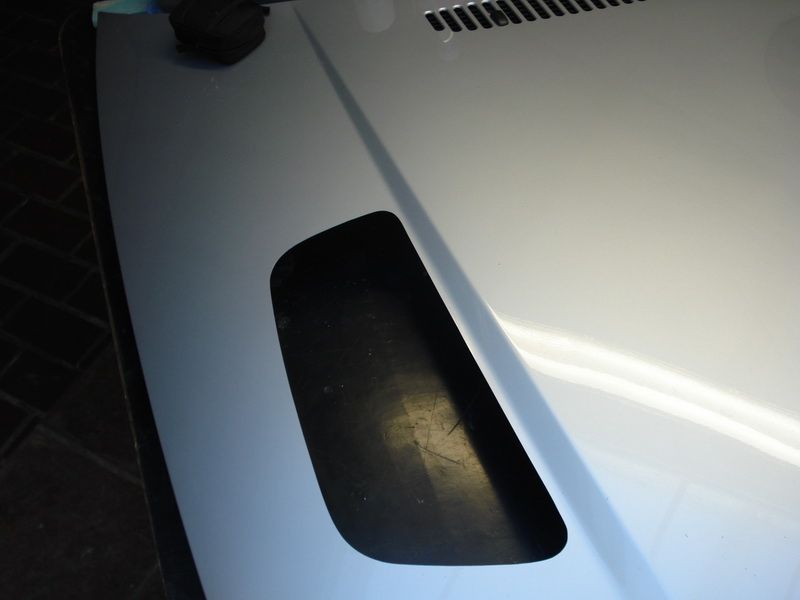
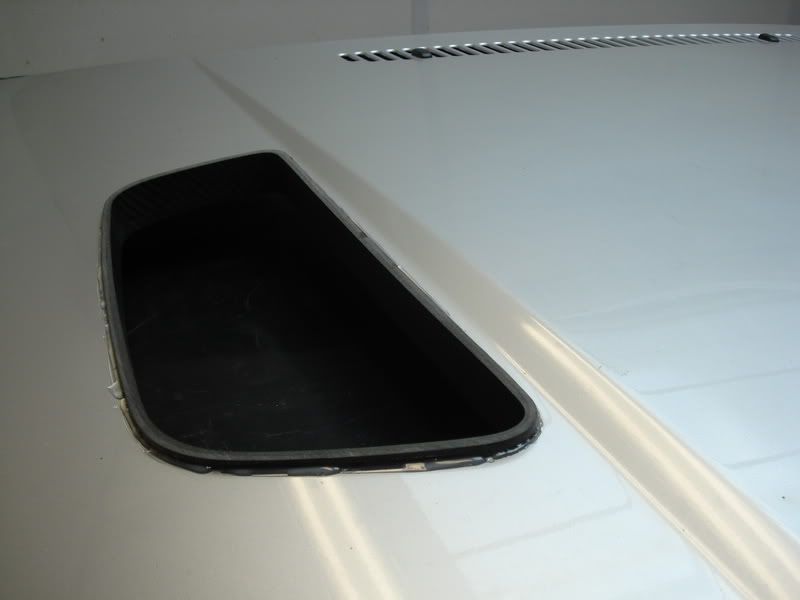
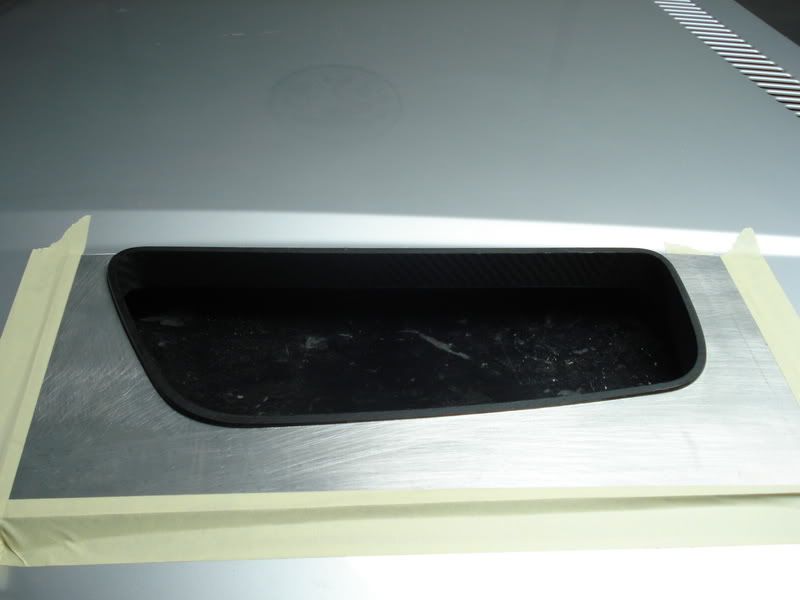
The first cut-out was a success
It wasn�t very hard to make the hole, but during the cutting, milling and filing I had to be very careful to not make any dents.
On the place where the holes are, there are no reinforcements.
So if you make a hole there, the metal is very weak, so dents are easy made.
This is with the carbon frame in it.

You can also see that the hood makes a curve on both sides.
I�ll have to draw this out, and give the carbon fiber the same roundings.
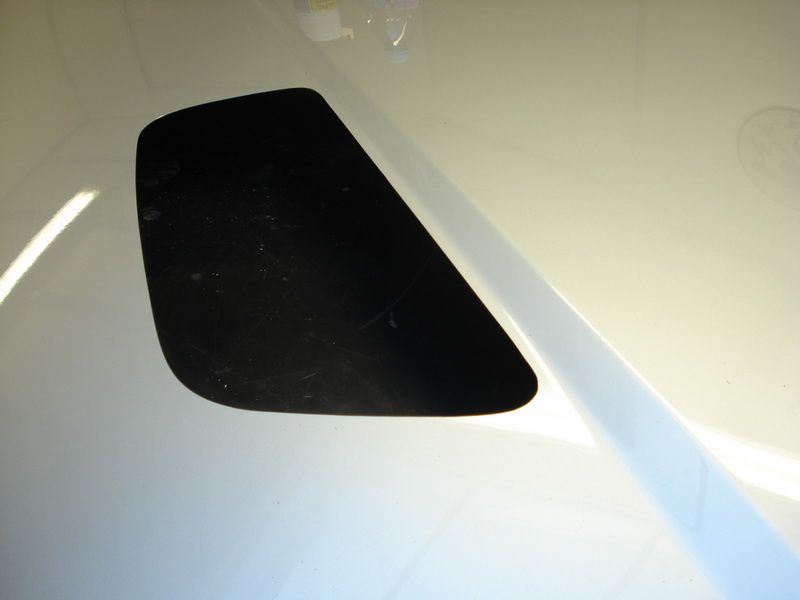
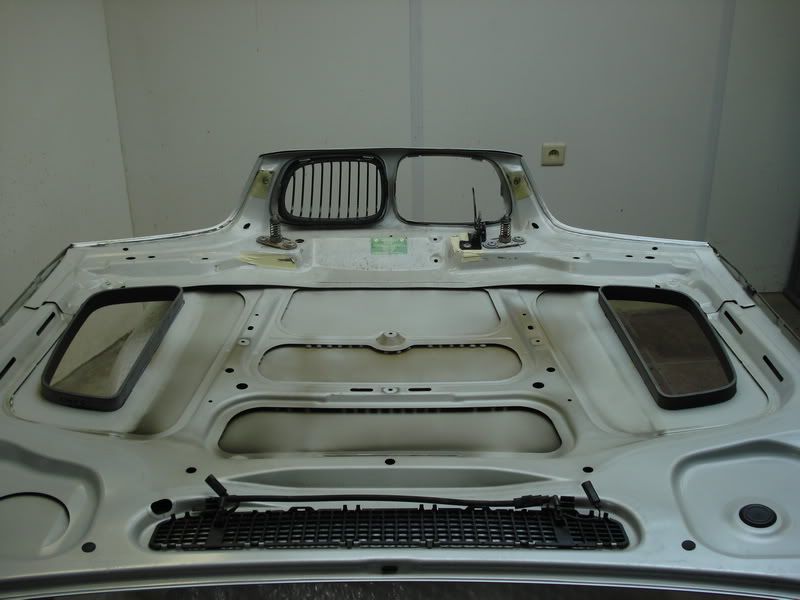
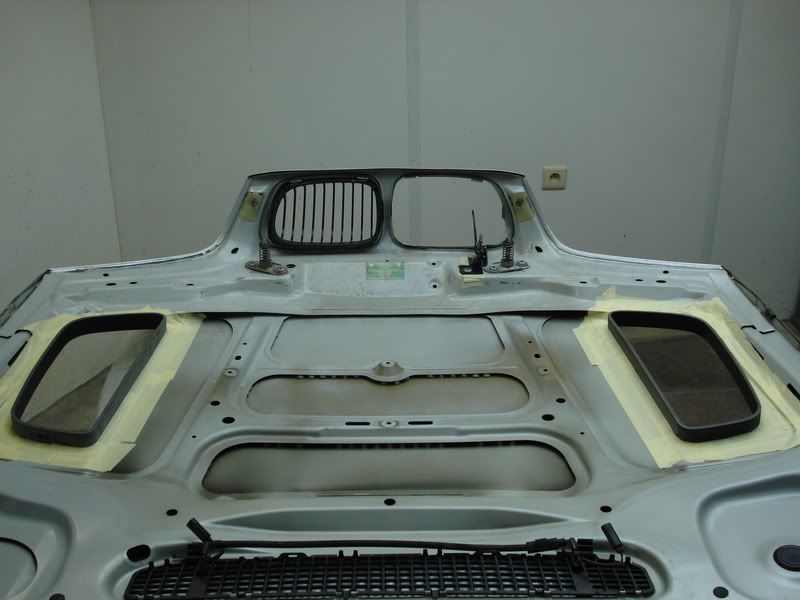
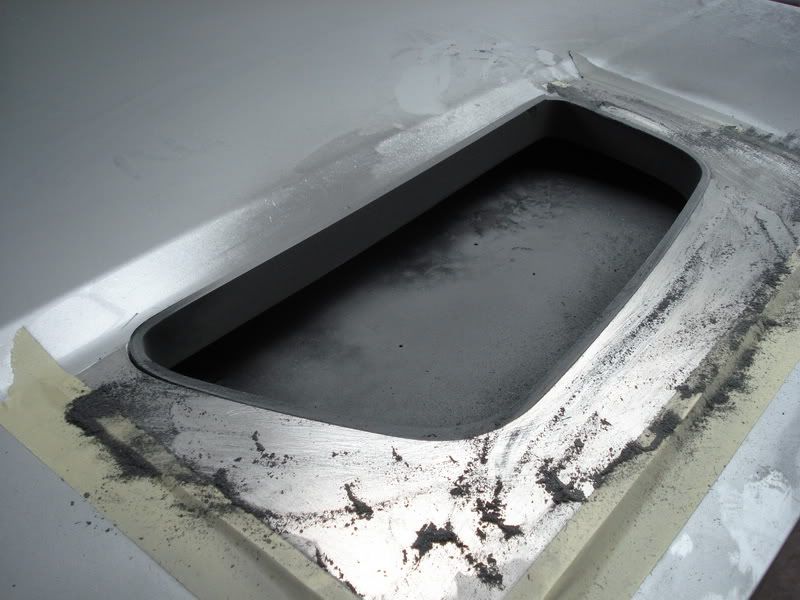
The second hole is ready, and it looks as good as the first one.
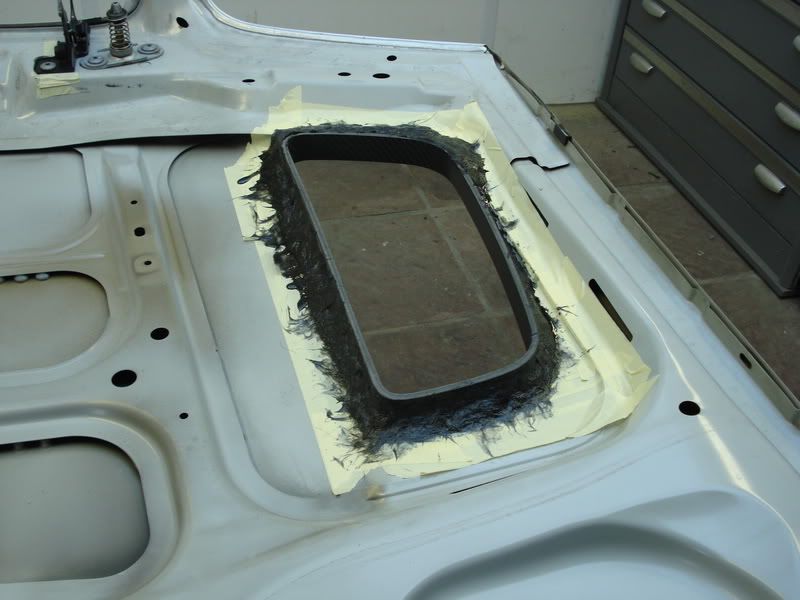
Here you can see I glued the frames in with hot glue.
Once I did this, I turned it all over.
The meaning is to make a sort of flange, so that the frame lays at the exact same depth, all the time.
I taped the hood with tape

Then I made a carbon fiber mush out of epoxy with carbon chips.
Greased it round the frame.
When this was dry, I turned the hood over again, and eliminated the glue on the upperside.
Now I had to give the frame the same rounding as the hood.
I managed to do this quite easily�
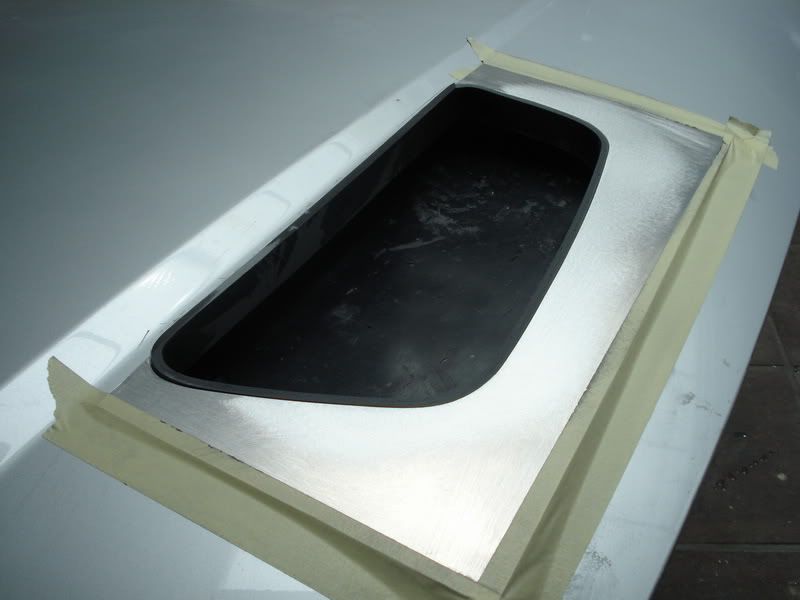
I taped a piece of aluminum from 1mm thick onto the outer MDF mold I used to make this all
I held this to the copy mill, and cut this plate in 2.
Then I taped this onto the hood.
It wasn�t very hard to make the hole, but during the cutting, milling and filing I had to be very careful to not make any dents.
On the place where the holes are, there are no reinforcements.
So if you make a hole there, the metal is very weak, so dents are easy made.
This is with the carbon frame in it.
You can also see that the hood makes a curve on both sides.
I�ll have to draw this out, and give the carbon fiber the same roundings.
The second hole is ready, and it looks as good as the first one.
Here you can see I glued the frames in with hot glue.
Once I did this, I turned it all over.
The meaning is to make a sort of flange, so that the frame lays at the exact same depth, all the time.
I taped the hood with tape
Then I made a carbon fiber mush out of epoxy with carbon chips.
Greased it round the frame.
When this was dry, I turned the hood over again, and eliminated the glue on the upperside.
Now I had to give the frame the same rounding as the hood.
I managed to do this quite easily�
I taped a piece of aluminum from 1mm thick onto the outer MDF mold I used to make this all
I held this to the copy mill, and cut this plate in 2.
Then I taped this onto the hood.
Oct 23, 2011 | 12:41 PM
#20
Thread Starter
| Teamspeed Member
Joined: Jan 2008
Posts: 179
When this was dry, I turned the hood over again, and eliminated the glue on the upperside.
Now I had to give the frame the same rounding as the hood.
I managed to do this quite easily�
I taped a piece of aluminum from 1mm thick onto the outer MDF mold I used to make this all
I held this to the copy mill, and cut this plate in 2.
Then I taped this onto the hood.
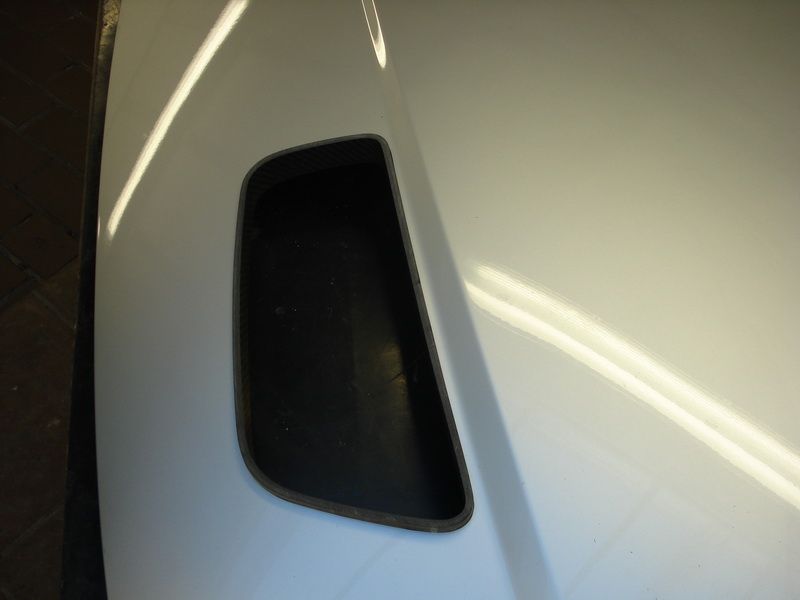
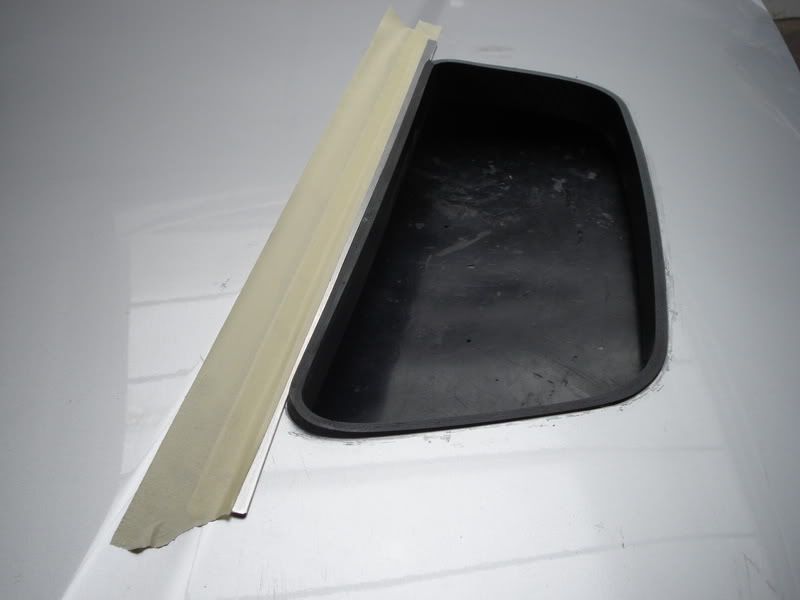
The I cut away some carbon fiber that stoke a bit out and then I rubbed it all down equally with the block.
Here you can see the tight result I had.
After that I did the inside.
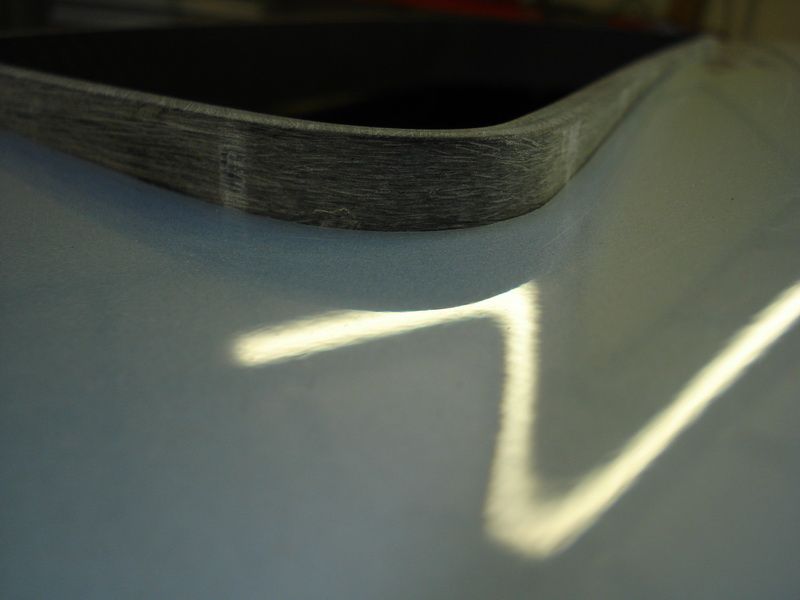
I was only able to glue a little piece of aluminum here, cause this was pretty close to the characterline of the hood.
The 1mm of the frame that comes out, I�m going to work it out at the bottom.
On the flange I�m going to cut out a rubber of 1mm thick, so that everything comes equally with the outside.
Once I had this all, there was only one thing that could go wrong with the hood.
I had to get the 2 frames out of the hood without making any scratches or dents.
When I taped it all, I wax the hood a couple of times to be sure that it still could be extracted.
I had to give it quite a pull, but I managed to extract it without any damages.
Here the frame with the flange:

Everything that contained a risk is over now. When something still goes wrong now, it�ll be very stupid of me.
Now I had to give the frame the same rounding as the hood.
I managed to do this quite easily�
I taped a piece of aluminum from 1mm thick onto the outer MDF mold I used to make this all
I held this to the copy mill, and cut this plate in 2.
Then I taped this onto the hood.
The I cut away some carbon fiber that stoke a bit out and then I rubbed it all down equally with the block.
Here you can see the tight result I had.
After that I did the inside.
I was only able to glue a little piece of aluminum here, cause this was pretty close to the characterline of the hood.
The 1mm of the frame that comes out, I�m going to work it out at the bottom.
On the flange I�m going to cut out a rubber of 1mm thick, so that everything comes equally with the outside.
Once I had this all, there was only one thing that could go wrong with the hood.
I had to get the 2 frames out of the hood without making any scratches or dents.
When I taped it all, I wax the hood a couple of times to be sure that it still could be extracted.
I had to give it quite a pull, but I managed to extract it without any damages.
Here the frame with the flange:
Everything that contained a risk is over now. When something still goes wrong now, it�ll be very stupid of me.