
How to make HDR pics!
 Oct 10, 2008 | 11:34 AM
#1
Thread Starter
| Teamspeed Senior Member
Joined: May 2008
Posts: 594
From: Germany - Philippines - China


How to make HDR pics!
So after my first epic theard, which shouldn�t been one I thought what I could do with my Post 111, so I thought I help you guys with a little tut.
Alright this is my first tut so please be kind.
I try to explain every step I�ve did but sometimes I just didn�t think about explaining stuff since it�s normal for me.
If you have a question or don�t understand a step feel free to ask me.
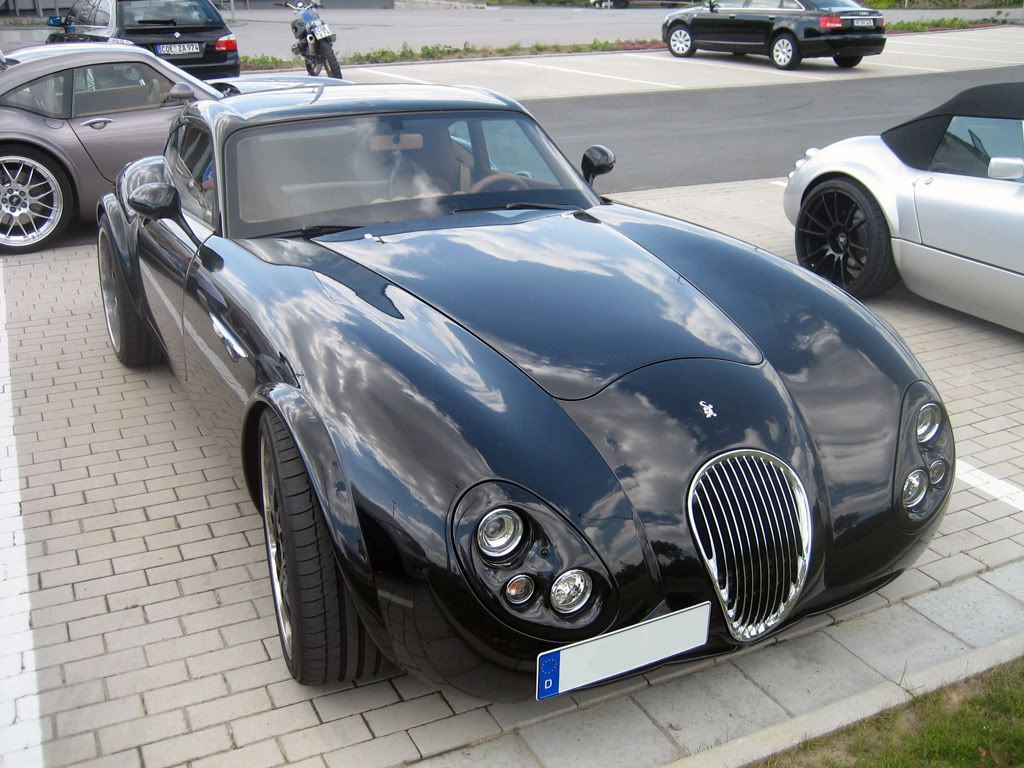
So to start this of I want to show you guys how to turn your normal pic(even cell phone pics work) into a nice looking HDR style pic.
You can�t expect to much but this is a nice little trick to make your pics stand out a bit
You need Photoshop and a tool called Lucis Art.
You can buy or test it online or you send me a PM and I�ll send you a nice little link to get it free. J
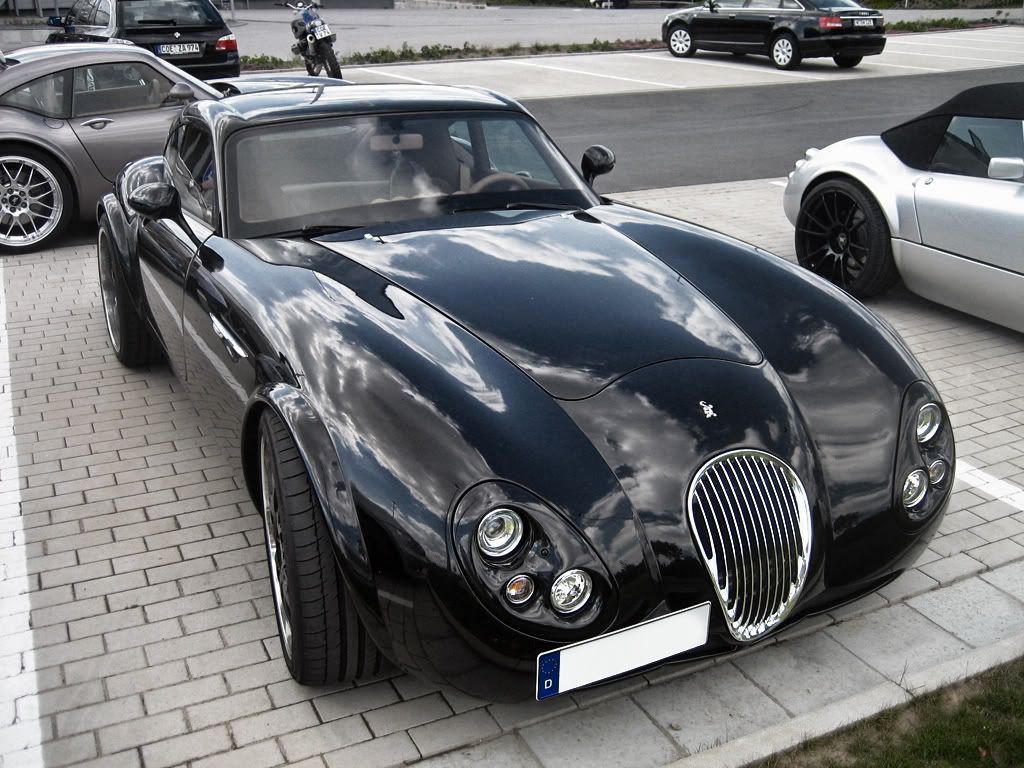
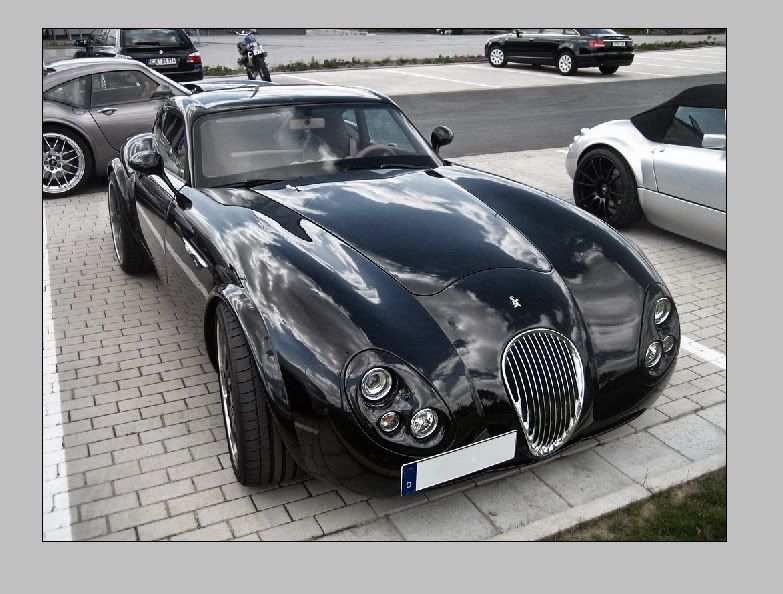
To give you an idea what can be done with this tut here is a showcase:
So I don�t explain how to set up the tool aso.
If you want to know it please, please feel free to ask it�s no problem to explain it aswell.
But I think most of you have done such things before.
Ok let�s start now:
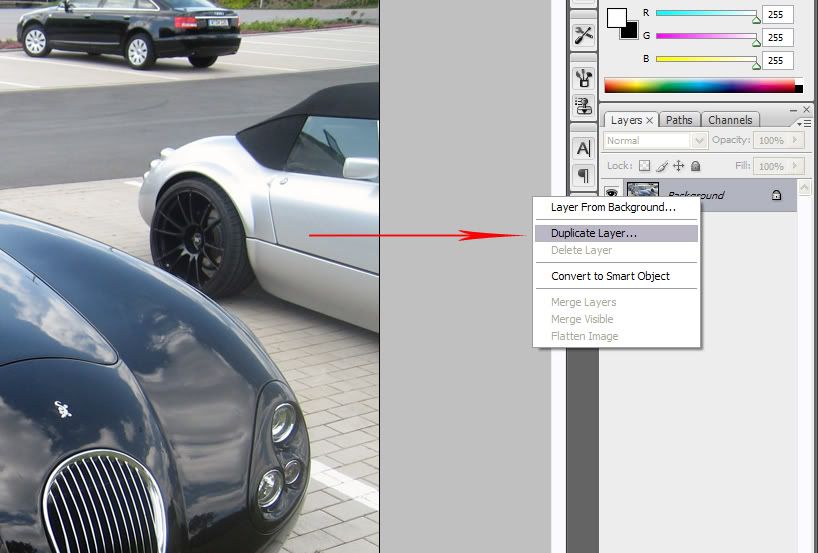
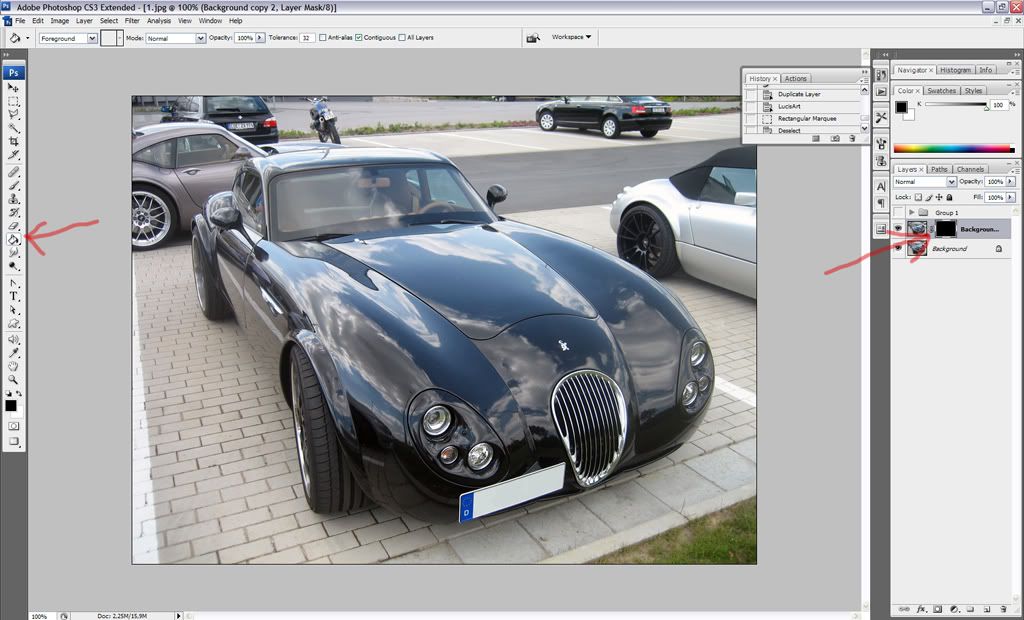
First you have your normal pic, now the first thing to do is to copy your pic so you�ve got 2 layers, just like that:
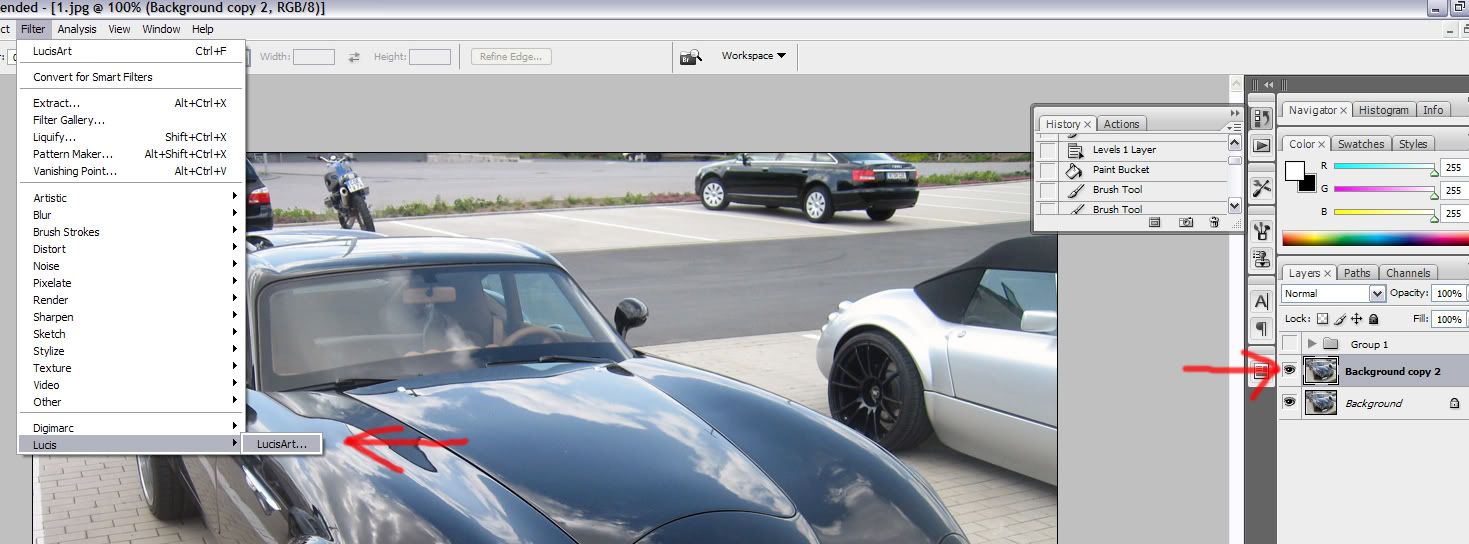
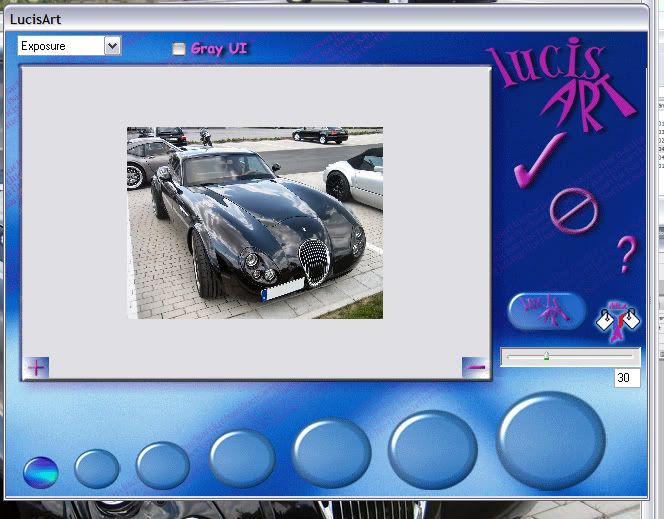
Now start Lucis Art:
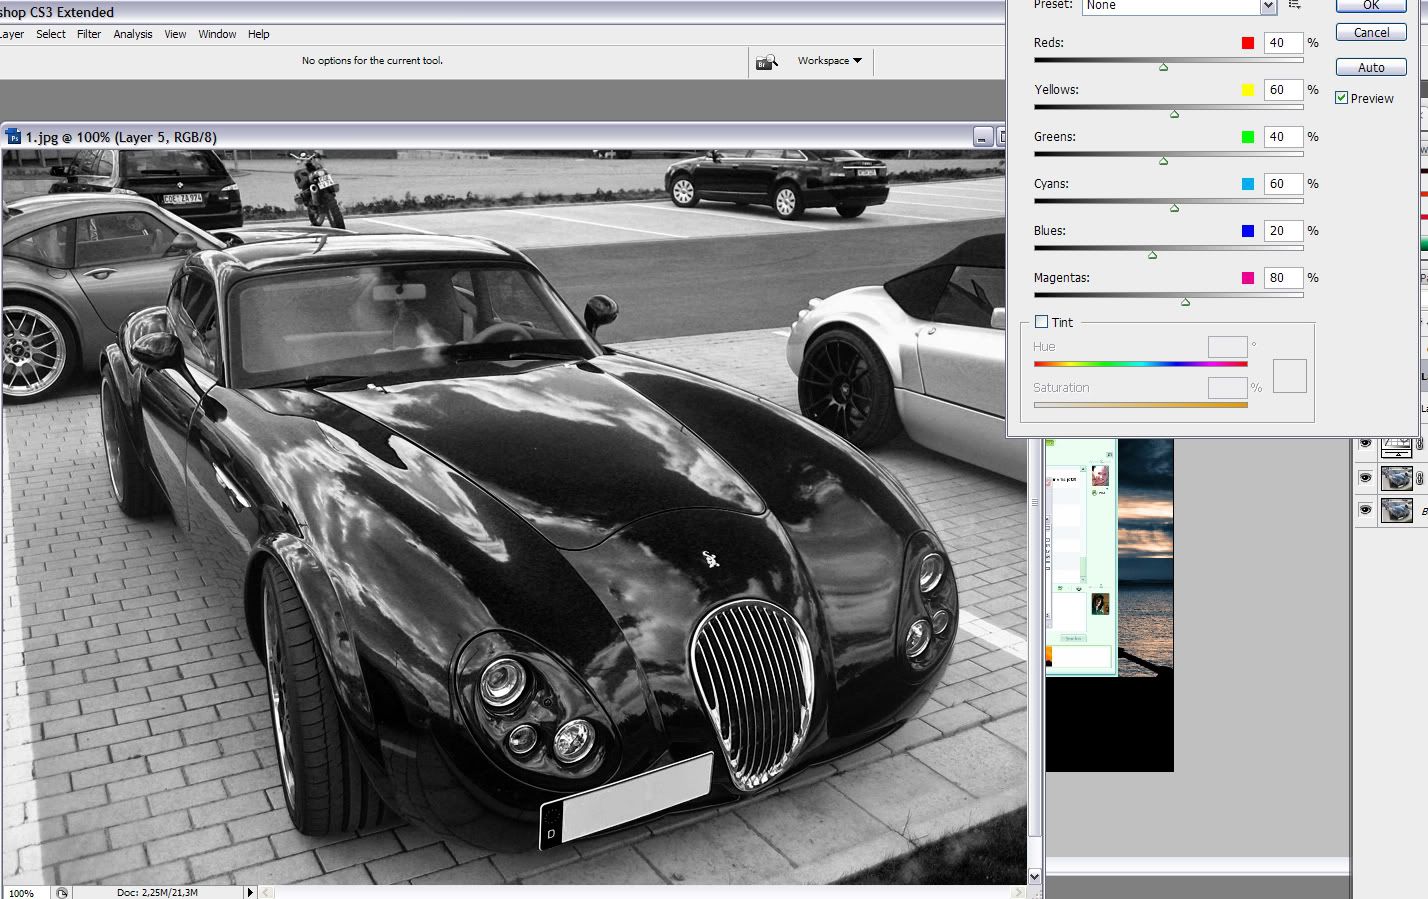
Set it to about 30%:
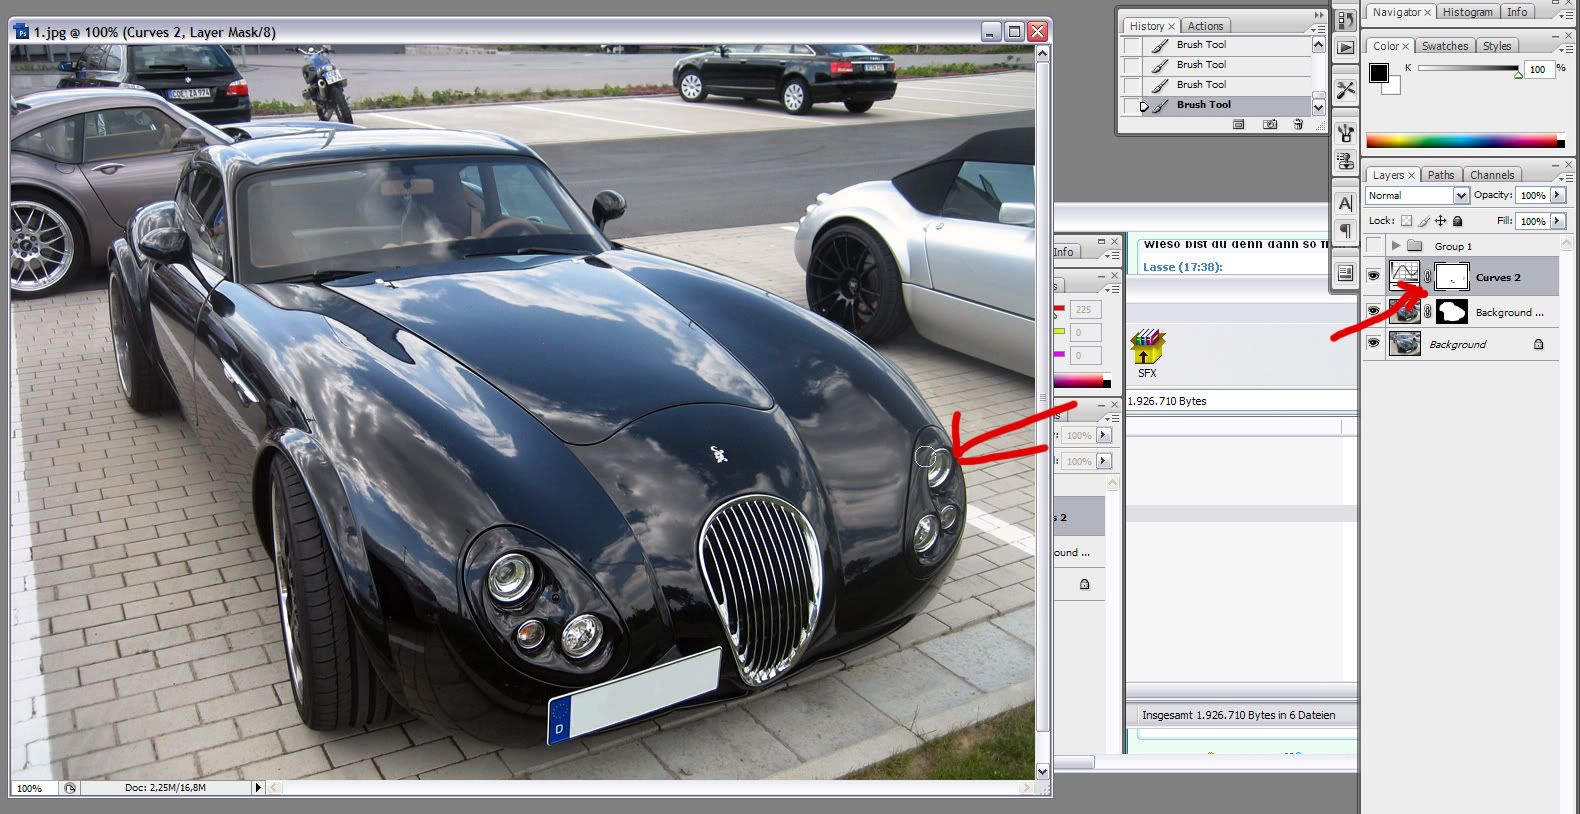
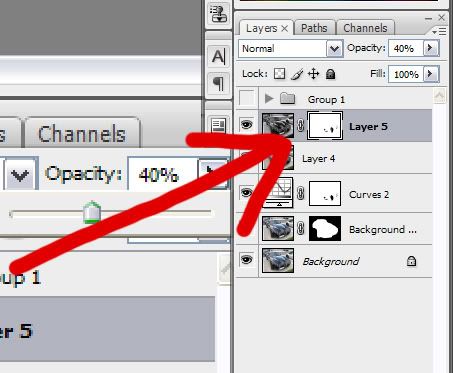
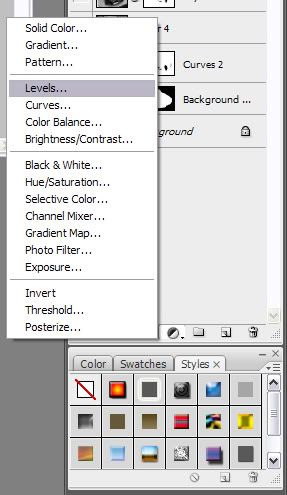
Now we need a layer mask which you creat on this button:

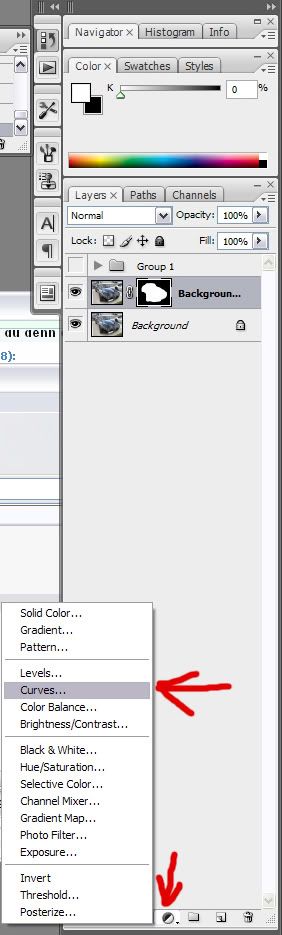
You fill the new mask with black:
It�s important that you draw on the mask and not on the real mask, now set the brush to white and select everything that is important in the pic, in this case just the black car.
Again be sure to draw on the mask!

Next we will add a new adjustment layer. Select the curves from the drop-down menu just like that:
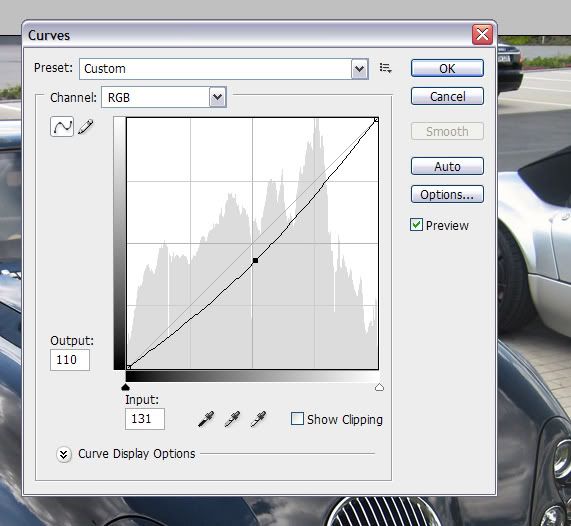
You can set it up the way you like, I used 110 on the Output and 131 on the Input:
Alright this is my first tut so please be kind.
I try to explain every step I�ve did but sometimes I just didn�t think about explaining stuff since it�s normal for me.
If you have a question or don�t understand a step feel free to ask me.
So to start this of I want to show you guys how to turn your normal pic(even cell phone pics work) into a nice looking HDR style pic.
You can�t expect to much but this is a nice little trick to make your pics stand out a bit
You need Photoshop and a tool called Lucis Art.
You can buy or test it online or you send me a PM and I�ll send you a nice little link to get it free. J
To give you an idea what can be done with this tut here is a showcase:
So I don�t explain how to set up the tool aso.
If you want to know it please, please feel free to ask it�s no problem to explain it aswell.
But I think most of you have done such things before.
Ok let�s start now:
First you have your normal pic, now the first thing to do is to copy your pic so you�ve got 2 layers, just like that:
Now start Lucis Art:
Set it to about 30%:
Now we need a layer mask which you creat on this button:
You fill the new mask with black:
It�s important that you draw on the mask and not on the real mask, now set the brush to white and select everything that is important in the pic, in this case just the black car.
Again be sure to draw on the mask!
Next we will add a new adjustment layer. Select the curves from the drop-down menu just like that:
You can set it up the way you like, I used 110 on the Output and 131 on the Input:
Oct 10, 2008 | 11:35 AM
#2
Thread Starter
| Teamspeed Senior Member
Joined: May 2008
Posts: 594
From: Germany - Philippines - China
Now go to the mask of the adjustment and set some highlights with black.
Next press Command + A to make a selection, go to Edit > Copy Merged, and again go to Edit > Paste. Then go to Filter > Lucis > LucisArt and this time select Exposure and set it to 60. Then set the Opacity to 50%.
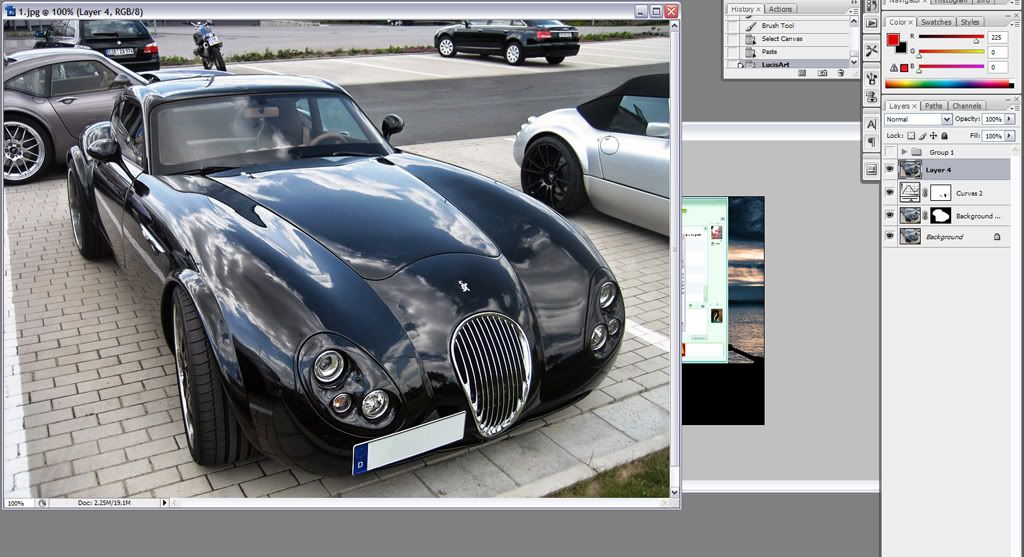
Press Command + A to make a selection over the entire image. Then again go to Edit > Copy Merged and Edit > Paste.
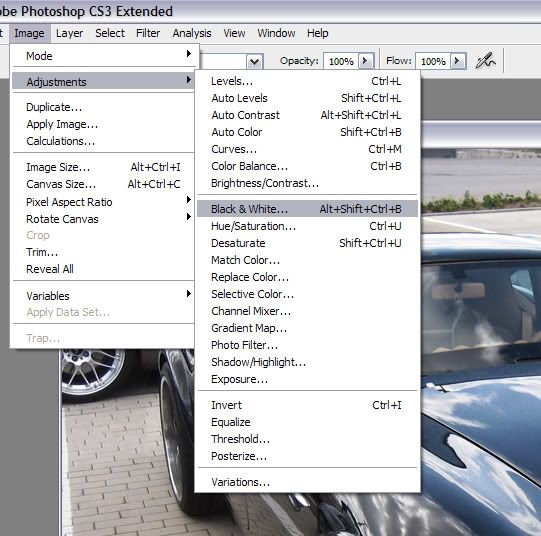
Now that you have all the layers copied go to Image > Adjustments > Black And White and play with the settings.
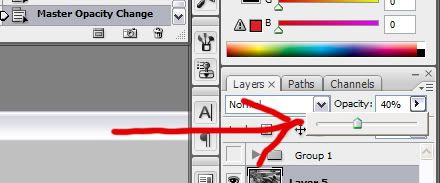
Set the layer to Multiply and the Opacity to 40%.
Now make a Layer Mask for this layer and erase some of this effect from the lights using the Brush Tool (B), just as we did in the step before.
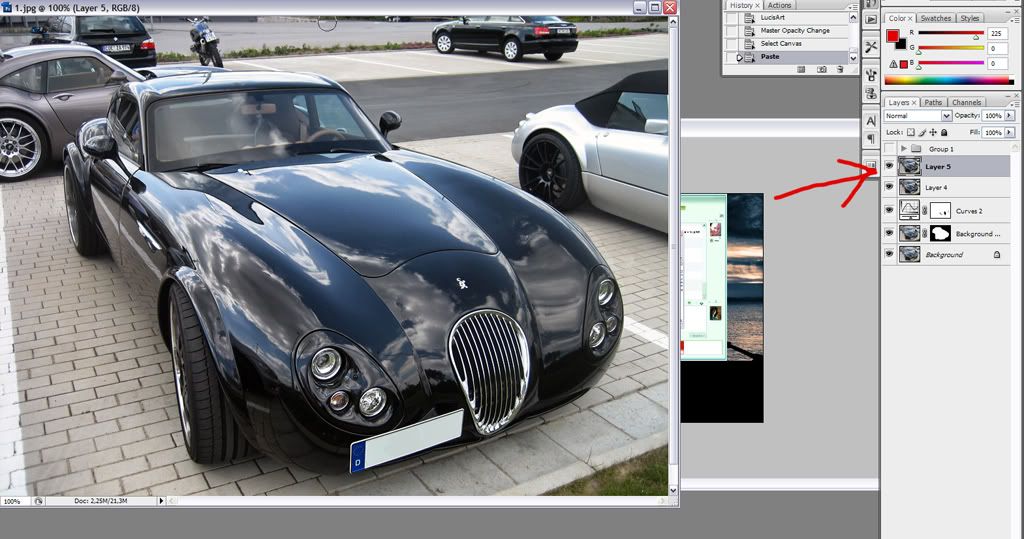
Next you need to press Command + A to make a selection. Then go to Edit > Copy Merged and Edit > Paste. Then go to Filter > Lucis > LucisArt and this time use Sculpture set to 20.
Next press Command + A to make a selection, go to Edit > Copy Merged, and again go to Edit > Paste. Then go to Filter > Lucis > LucisArt and this time select Exposure and set it to 60. Then set the Opacity to 50%.
Press Command + A to make a selection over the entire image. Then again go to Edit > Copy Merged and Edit > Paste.
Now that you have all the layers copied go to Image > Adjustments > Black And White and play with the settings.
Set the layer to Multiply and the Opacity to 40%.
Now make a Layer Mask for this layer and erase some of this effect from the lights using the Brush Tool (B), just as we did in the step before.
Next you need to press Command + A to make a selection. Then go to Edit > Copy Merged and Edit > Paste. Then go to Filter > Lucis > LucisArt and this time use Sculpture set to 20.
Oct 10, 2008 | 11:36 AM
#3
Thread Starter
| Teamspeed Senior Member
Joined: May 2008
Posts: 594
From: Germany - Philippines - China
Mask the layer and fill it with black. Now using a white brush, you'll need to make visible only a few parts of the image. You'll also need to decrease the opacity of the brush to create the effect gradually. I will try not to draw with the brush over the car. (like we did in other steps so no new pic J )
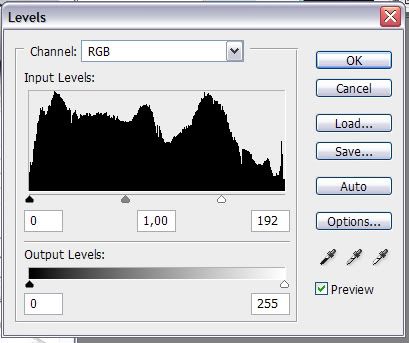
To bring a bit more detailes into the pic we need to select the Levels.
Select the Levels setting from the Create New Fill Or Adjustment Layer and set the right slider to left at 192. That way we become the levels in a new layer.
Fill the mask that was created automatically with black. Then with a small white brush set to a lower Opacity, draw over the lights and sections you want to highlight.

Done hope this helps you!
To bring a bit more detailes into the pic we need to select the Levels.
Select the Levels setting from the Create New Fill Or Adjustment Layer and set the right slider to left at 192. That way we become the levels in a new layer.
Fill the mask that was created automatically with black. Then with a small white brush set to a lower Opacity, draw over the lights and sections you want to highlight.
Done hope this helps you!
Oct 10, 2008 | 11:42 AM
#5
Teamspeed Pro
Joined: Jan 2008
Posts: 5,659
From: Plano, TX
If you saw only the finished product could you tell it was HDR or Fake HDR? Granted, the original isn't the best picture in the world, but I'd say the final product still looks better.
Oct 10, 2008 | 11:45 AM
#6
Thread Starter
| Teamspeed Senior Member
Joined: May 2008
Posts: 594
From: Germany - Philippines - China
 Oct 10, 2008 | 12:26 PM
#9
Thread Starter
| Teamspeed Senior Member
Joined: May 2008
Posts: 594
From: Germany - Philippines - China
BTW.
HDR stands for High Dynamic Range
In image processing, computer graphics, and photography, high dynamic range imaging (HDRI) is a set of techniques that allows a greater dynamic range of exposures (the range of values between light and dark areas) than normal digital imaging techniques. The intention of HDRI is to accurately represent the wide range of intensity levels found in real scenes ranging from direct sunlight to shadows.
Oct 10, 2008 | 01:12 PM
#10
Teamspeed Pro
Joined: Feb 2008
Posts: 2,866
From: TO
high dynamic range imaging (HDRI) is a set of techniques that allows a greater dynamic range of exposures (the range of values between light and dark areas) than normal digital imaging techniques. The intention of HDRI is to accurately represent the wide range of intensity levels found in real scenes ranging from direct sunlight to shadows.

