
Bentley GT 60 hour Detail By Barry Theal of Presidential Details
 May 11, 2011 | 10:05 AM
#1
Thread Starter
| TS Detailing Sponsor | Northeast
Joined: Oct 2009
Posts: 70
From: Lancaster PA


PRESIDENTIAL DETAILS OF LANCASTER PA
A leading professional of automotive treatments and detailing.
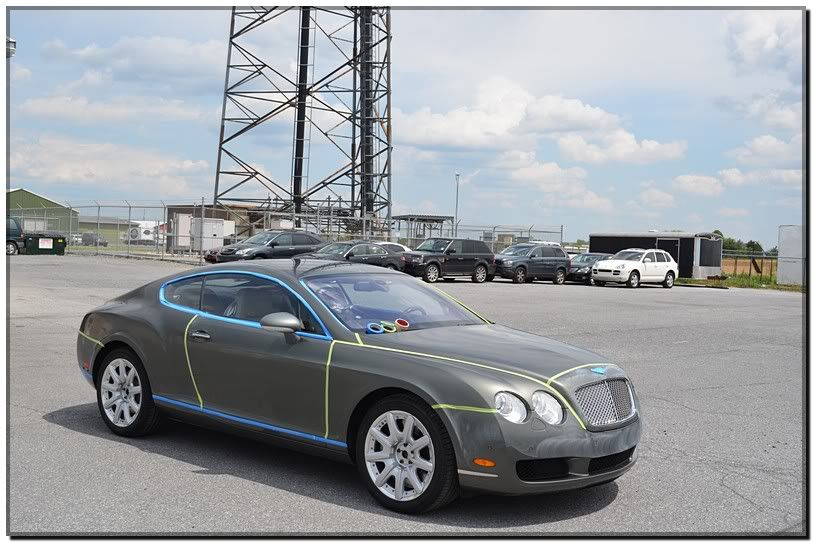
Presidential Details of Lancaster PA is proud to announce a 60 plus hour Automotive reconditioning of a 2005 Bentley GT dressed in an exterior color of Cypress while the interior wore an elegant yet sexy Loxley color. This car received a complete reconditioning from the ground up. Included in the art and science of this treatment, was a complete wet sanding to remove paint defects, a 2 stage polishing finished with our exclusive Migliore Presidential a Luxury wax containing nearly 50% of Carnauba along with a few other exotic natural ingredients. While the exterior received a 40 hour plus treatment, there�s no doubt the Loxley interior needed help as well. In all, over 60 plus hours were spent completely reconditioning this vehicle from top to bottom. All treatments on this car were exclusively done by Barry Theal at the owners request.
Approaching a detail like this is something that should be thought out prior to doing it. I spent about two hours examining the vehicle prior to providing the service. The owner is another out of state customer, and everything had to be of the highest Presidential Standard before Shipping the vehicle home. People often ask me about my company slogan. :When Passion meets Perfection� I tell them it�s the passion I have for a fine automobile that leads me to perfection. Performing services on others cars as if they were mine. This treatment was a leading example of the heart and soul that drives my passion to perfection. Hopefully you enjoy this write as read, its my goal to make the consumer as well as the professional detailer enjoy my writings!
Now onto the vehicle at hand. This particular Bentley GT was a new purchase for the owner and he bought it dirty and asked for it not to be cleaned up. He wanted me to perform all the treatments and not some dealership trying to make a quick buck while ruining the car and probably making it worse for me. Although, I don�t think it could have been worse then what laid ahead. A detail like this can wear a man down both mentally and physically. Needless to say I was pretty beat up when it was all said and done.
Lets move into the decontamination and cleansing part of this detail. Often said it�s all in the prep. I spent almost an entire day just degreasing the car. A total of 7 hours went into this step. I�m a firm believer that this part of reconditioning is the foundation to success or failure of an automotive treatment.
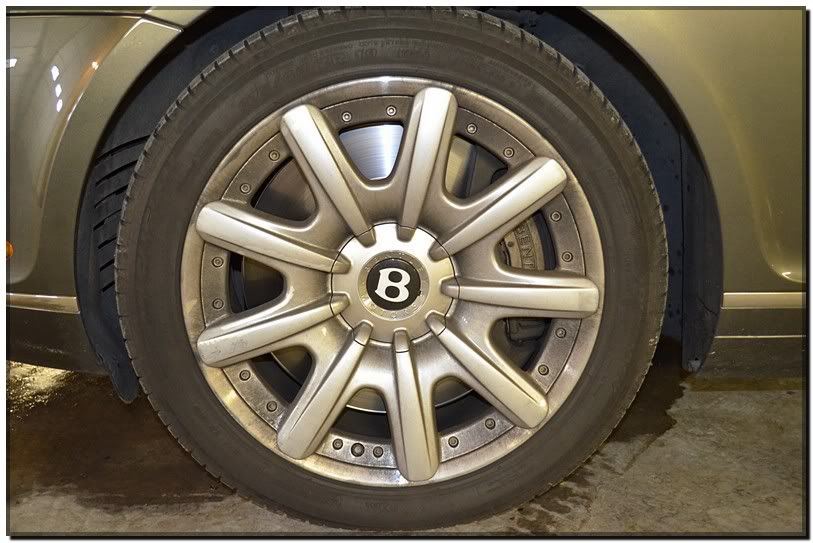
First Step was to remove the wheels and completely cleanse the entire wheel and tire along with the inner wheel wells. This was a dirty task to say the least.
The wheels came in baked with brake dust and normal driving dirt. Someone did a great job on creating a mess! In the below picture is of the left front wheel.
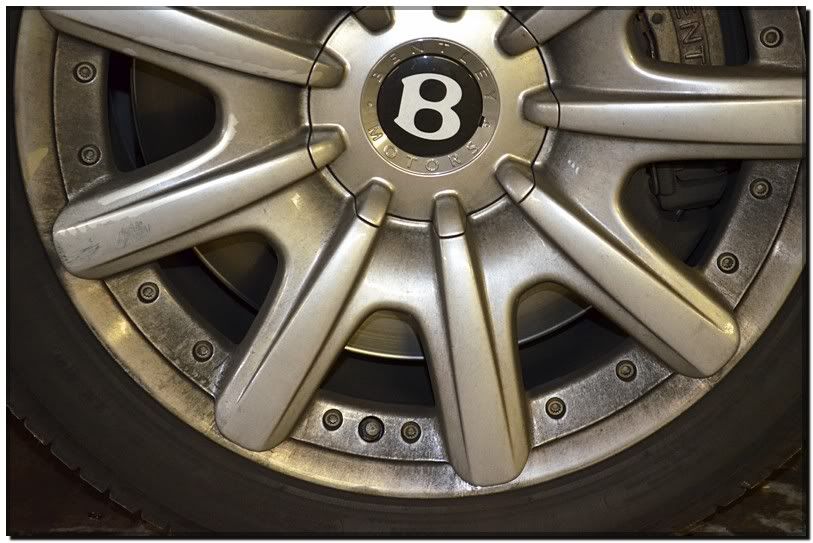
Here is a close up to show you just had bad they really were.
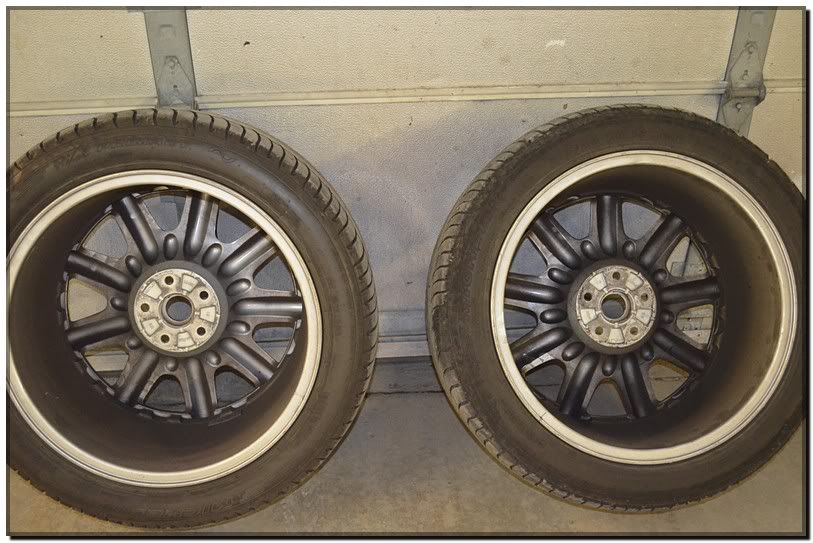
In order to get the wheels to a clean state, all wheels were removed and cleaned individually both front and back. Placing the car on jack stands allowed me to do this. I first did the left two wheels then mounted them followed by the right side wheels. In the below picture your focus is on the inner barrels.
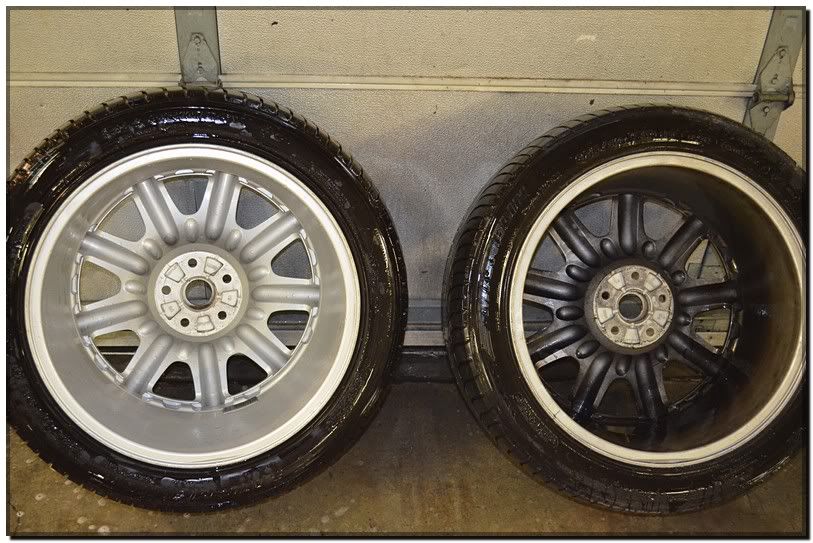
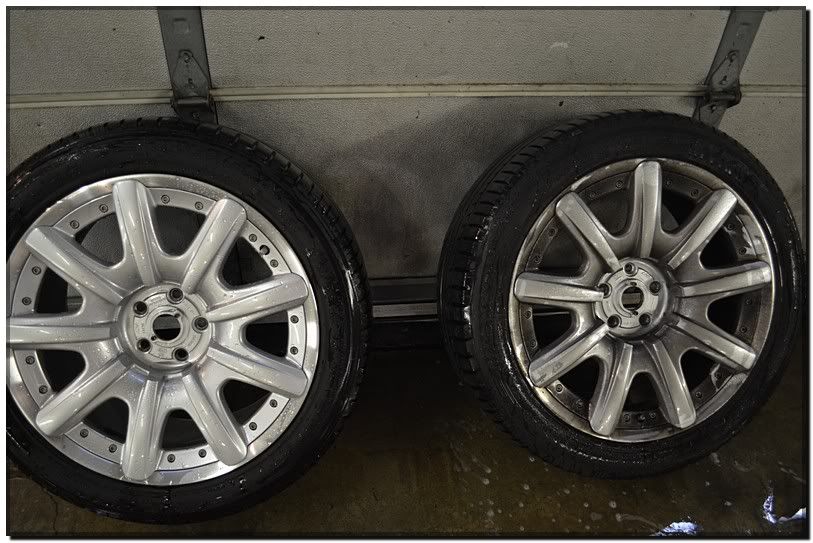
Here is a 50/50 of A dirty wheel versus a clean wheel. The difference is huge in this case.
During the wheel cleaning process I used a variety of wheel cleaners and brushes followed by a good pressure washing to remove all the cleaning agents. Here you can see me using a nylon bristle brush similar to a tooth brush to get all the tight spots.
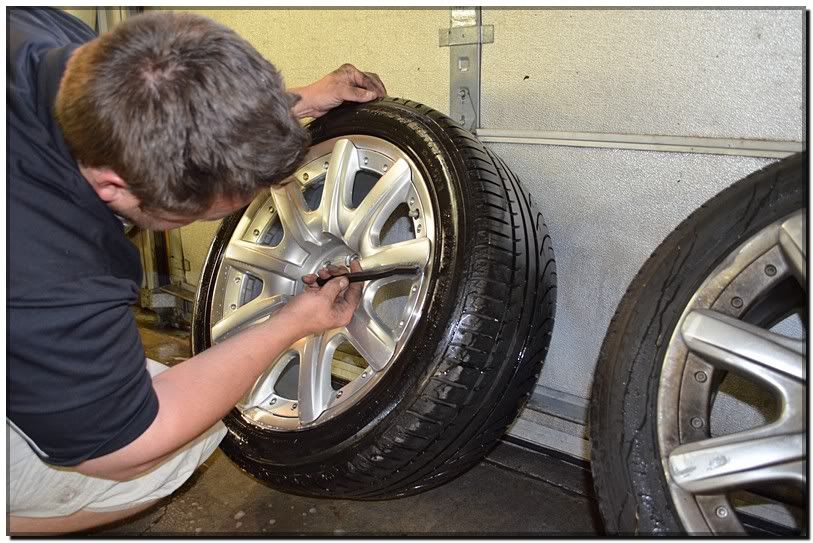
The below image shows you how all the hard worked paid off in a side by side comparison:
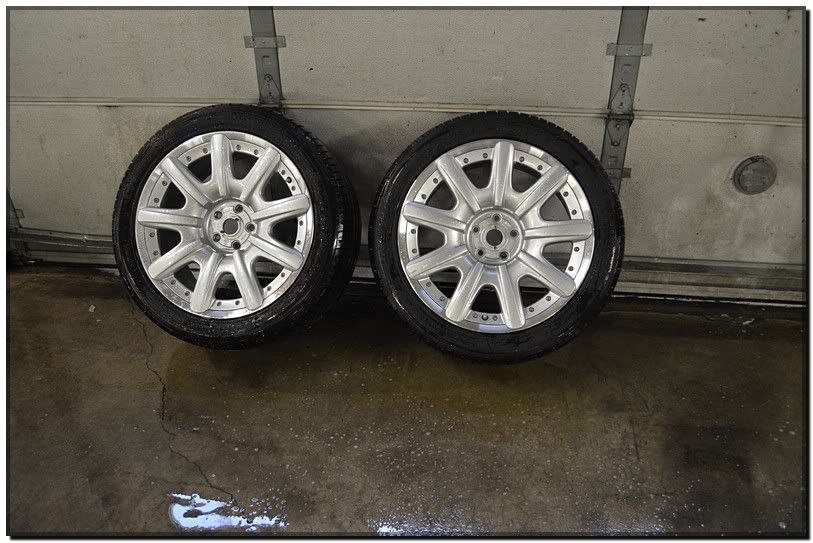
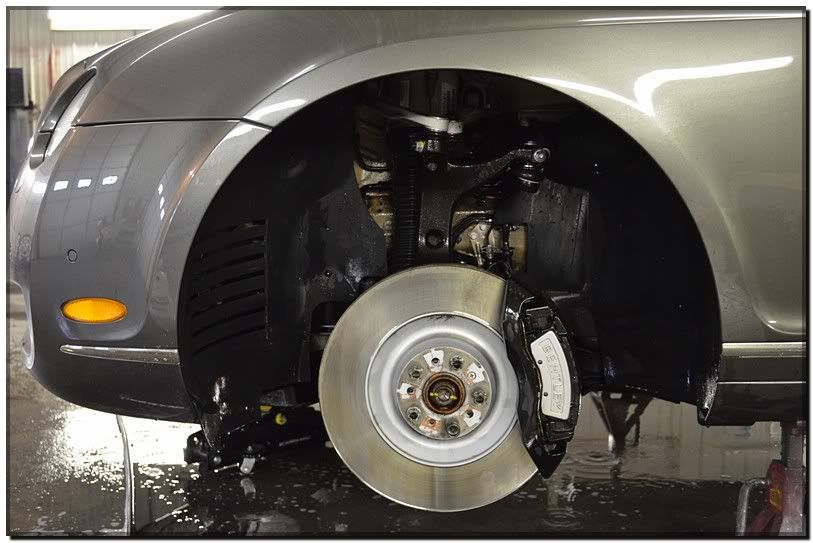
Here they are all clean. Not yet polished or sealed:
After drying the wheels down, I went over and focused my attention to the in wheel well area. These things were dirty as can be,
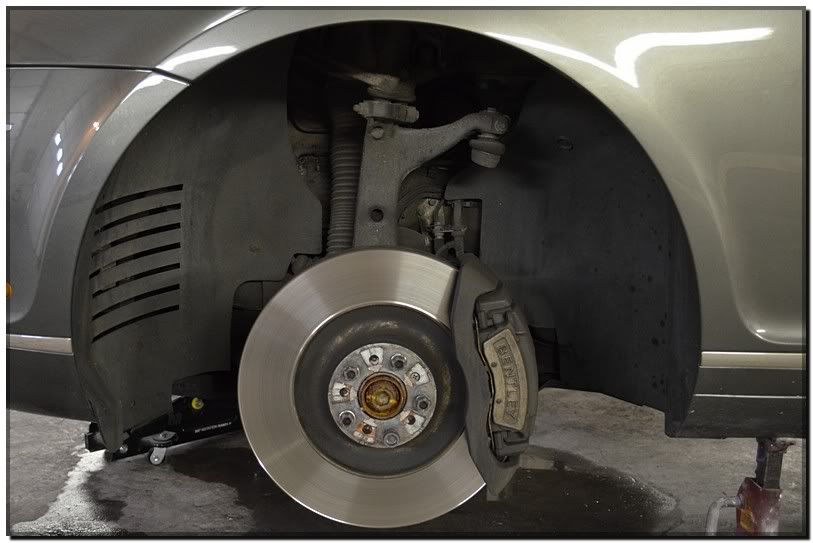
Using degreaser ran through a 2 gallon weed sprayer I cover the entire area. My goal was to let the chemical do the work as opposed to taking more of a mechanical approach. Although ,many areas were agitated by brush and hand.

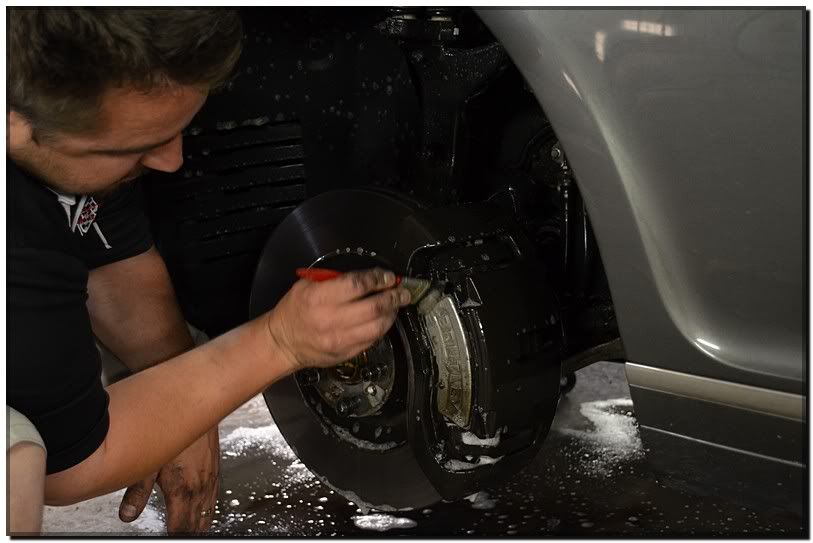
I used a variety of brushes to do most of the work, In the photo below you can see how a common household paint brush really broke it down a little more. In this shot look at the brake caliper area. You can see the difference of what some good ol� fashioned elbow grease can do.
Things were looking better now! I followed this plan throughout the rest of the car. The rear of this car had carpet wheel well liners that required a few extra steps, but nothing crazy.
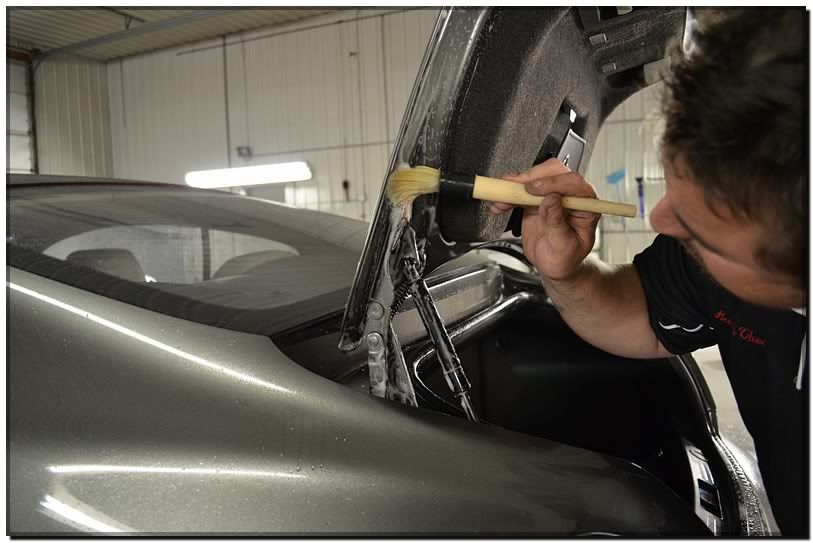
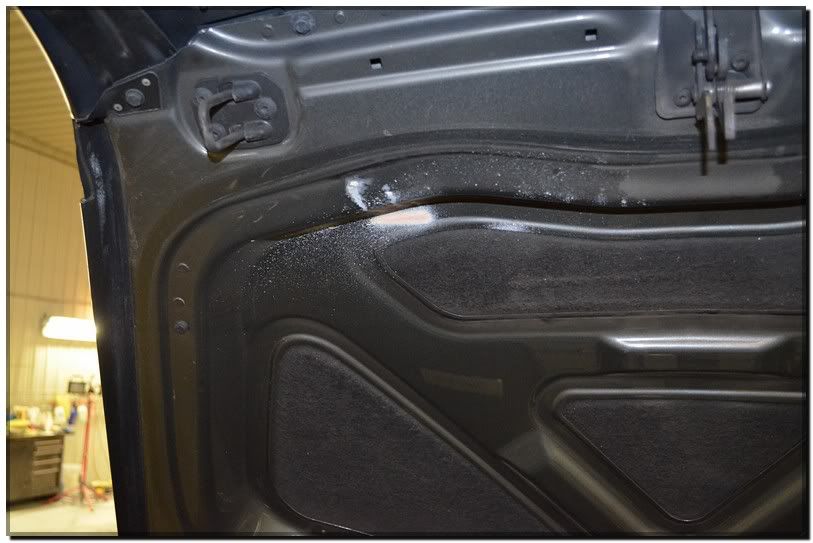
Next I moved onto the door jambs and such. Trying to remove all the build up was fairly easy. Using degreaser and a boars hair brush I sprayed, massaged and rinsed. One of nice things about using this brush is it doesn�t leave any marring behind. Often in my write ups you can see me using them on areas easily prone to scratches.
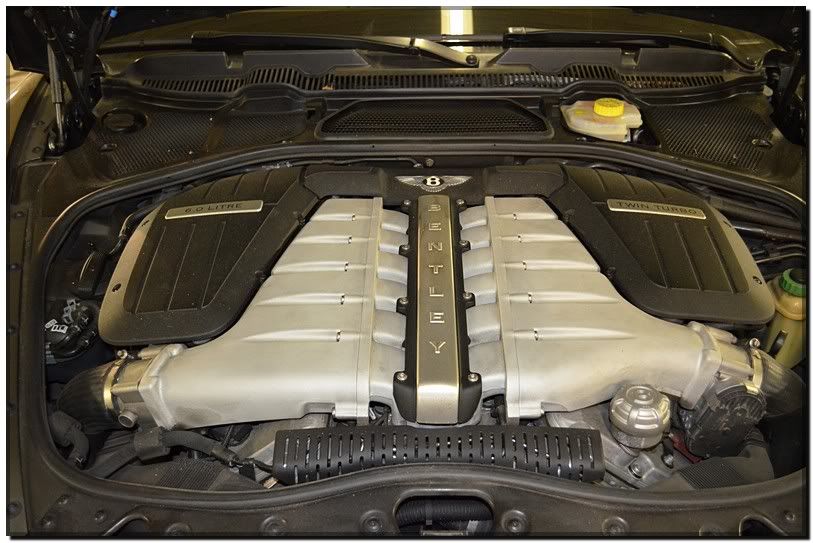
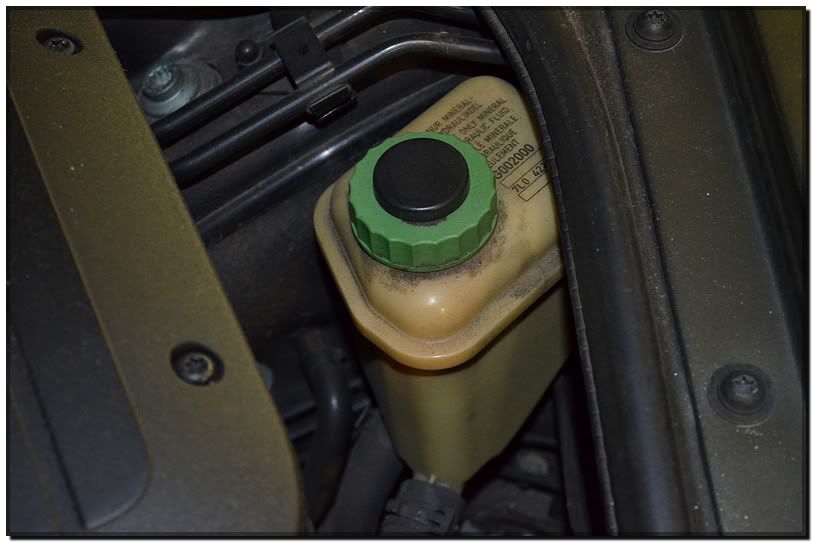
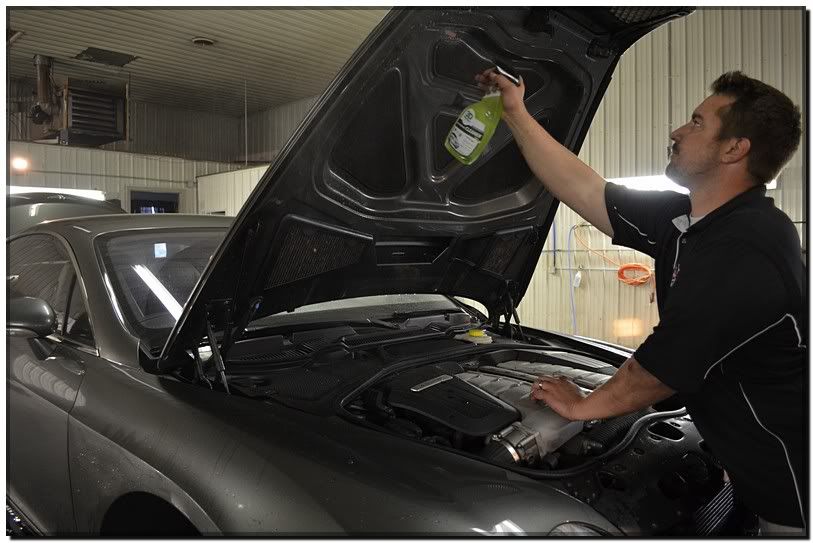
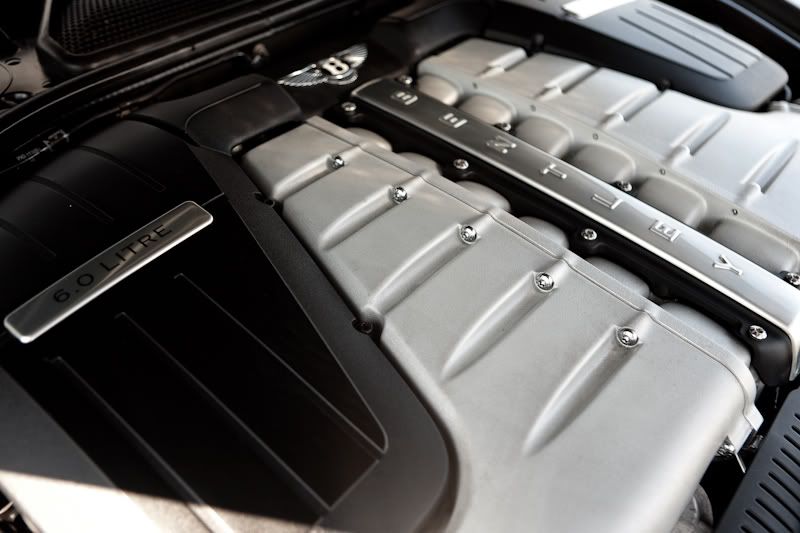
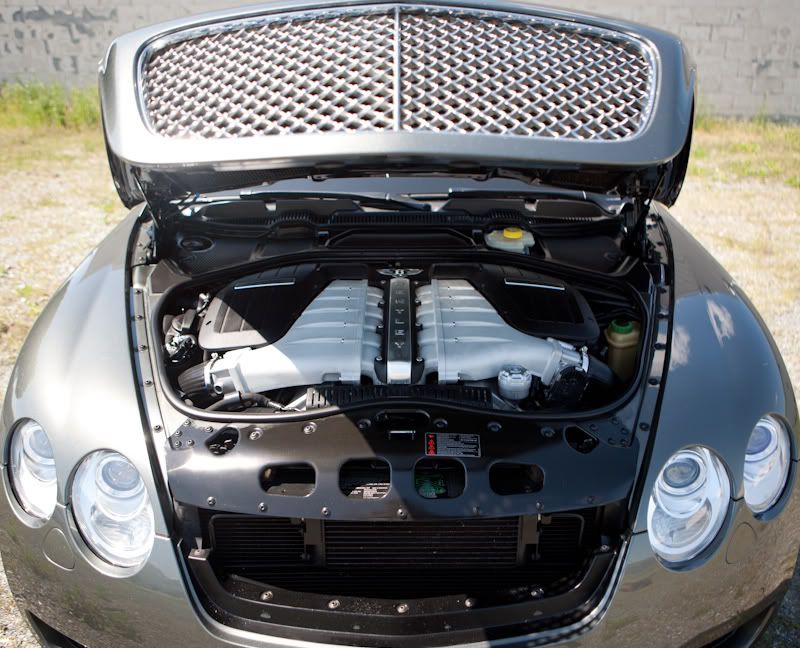
Next I turned my focus to the engine bay area. This area of the vehicle had a high amount of loose dirt and grease build up. It took some time, but well worth it in the end.
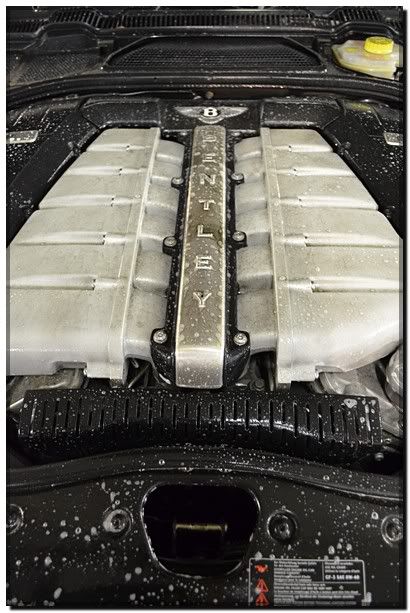
Below are a few pictures of what it looked like prior to decontamination. The overall shot, followed by a few close ups.
 May 11, 2011 | 10:06 AM
#2
Thread Starter
| TS Detailing Sponsor | Northeast
Joined: Oct 2009
Posts: 70
From: Lancaster PA
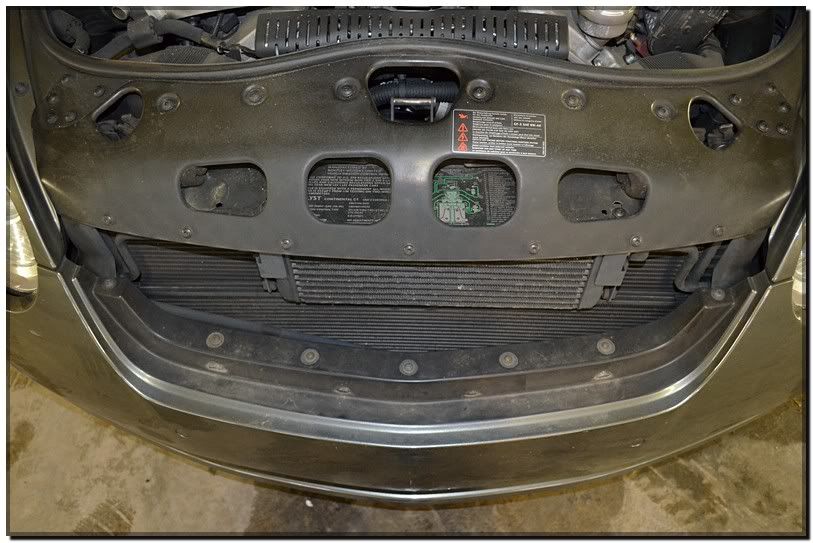
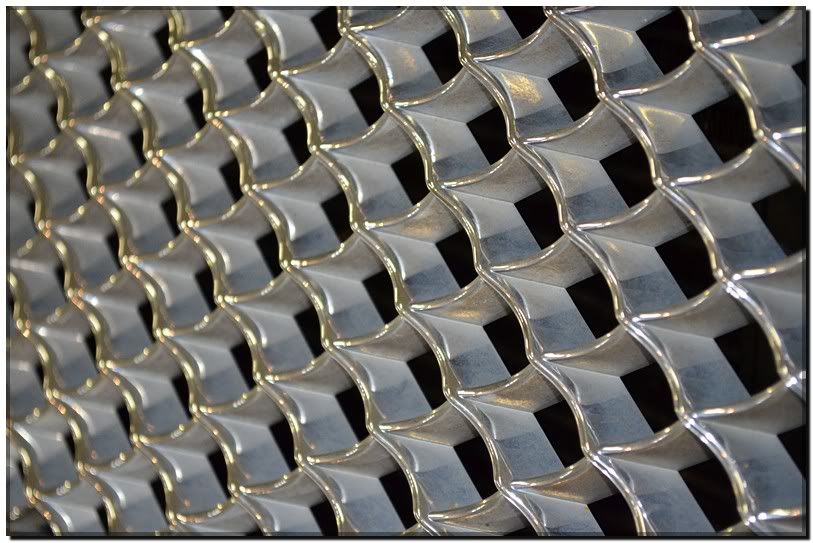
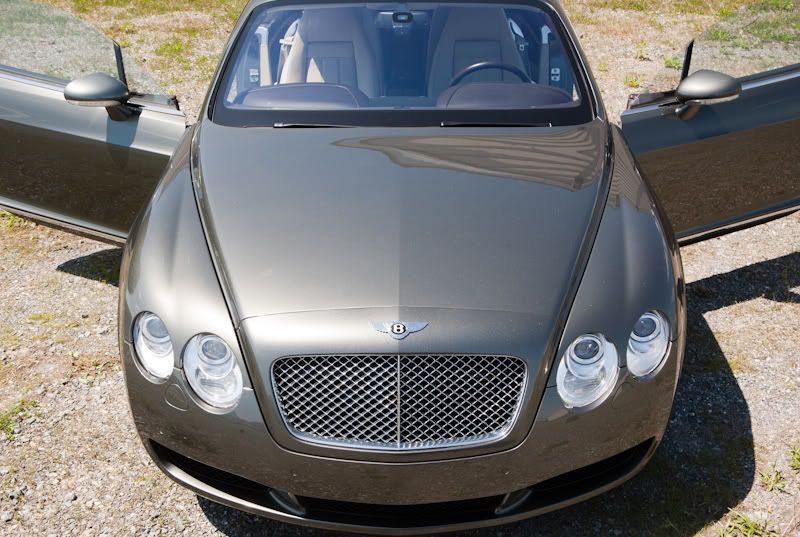
And while I�m at it, here is a shot of the grill! I hate these grills. Way to much time can be spent on them . Then when you think you�re done, you see something else.
The entire motor was first rinsed to remove any loose dirt then sprayed using 3D international all purpose cleaner.
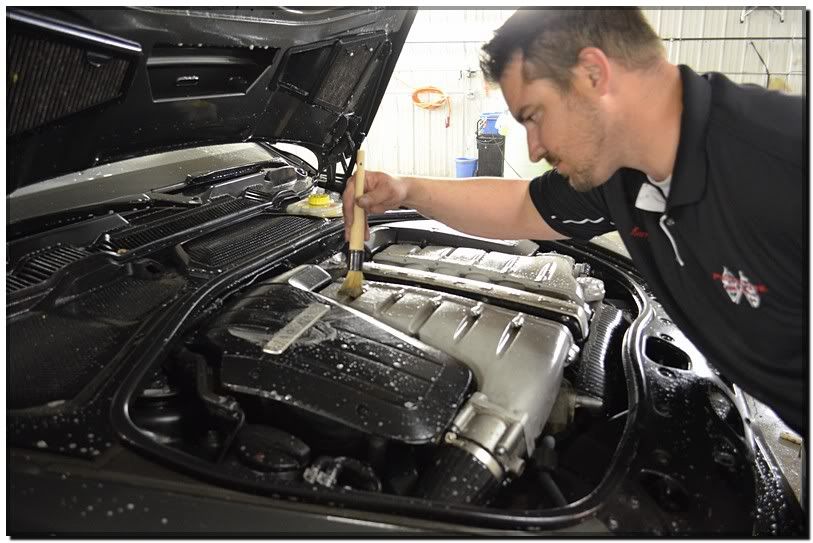
Once sprayed it was left to dwell and then agitated. In the below photo you can see it working into the grease.
Once worked in I used a boars hair brush to aid in the break down process by agitating everything!
Once completed the motor was rinsed down and blown dry with an air compressor. Next it was time to move on to the paint.
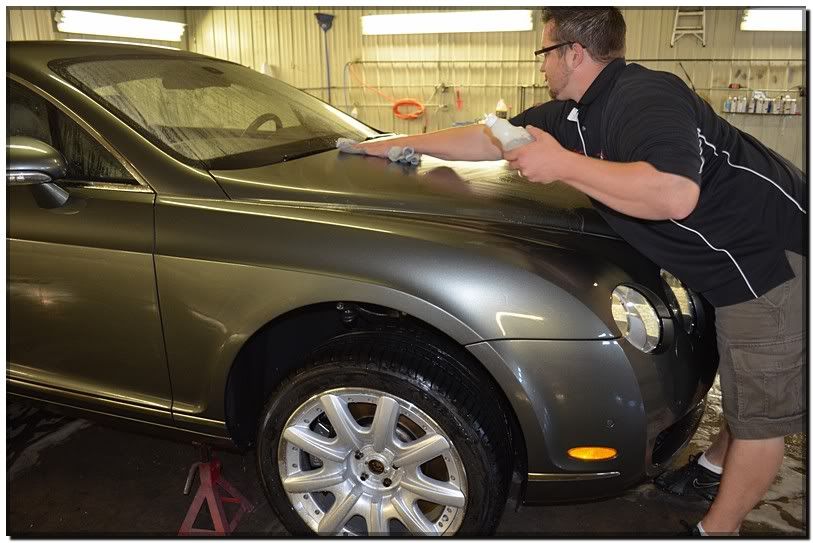
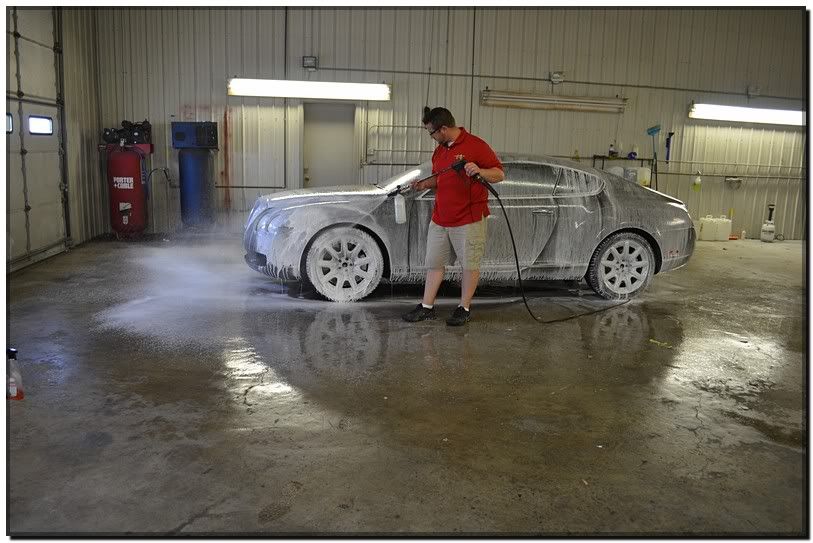
First I gave it a good solid rinse with just water from the pressure washer to try and remove as much loose debris as possible. Then I followed with a good foam wash to aid in even further breakdown of any remaining loose dirt.
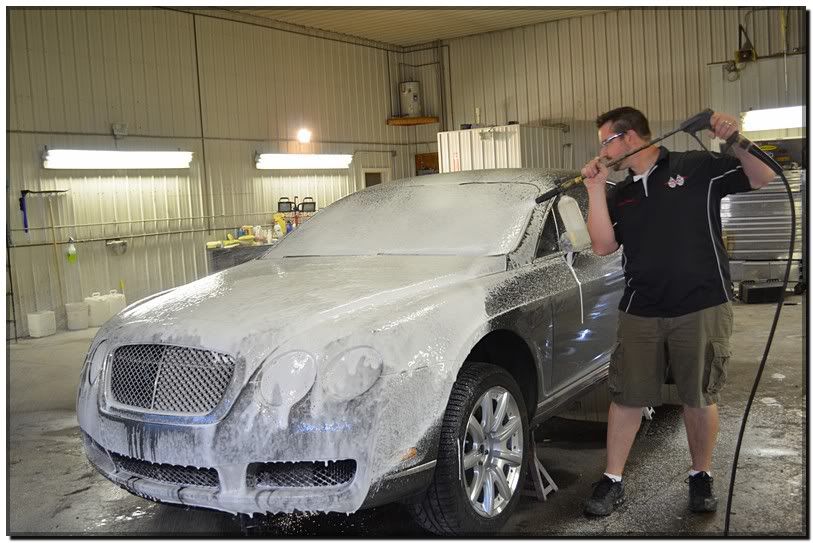
I was always taught to let the suds do the work! Letting the suds breakdown.

Once I had everything broken-down and massaged clean with a wash mitt I turned my focus to the clay bar. The paint surface at this point still had a rough texture to it. There were a lot of embed contaminants that needed to be removed. The clay bar is the tool of trade for this. In order to provide a good lubricant. I sprayed the surface then came back over it with a clay bar to make the paint clean and contaminant free.

The paint had lots of tar on it. Often I see this on the lower sides of vehicles, But
in this case it was all over. Here is my clay bar after the top half of the deck lid only. It certainly did its job very well. Notice this particular clay bar was blue. It did a great job showing the tar present with such a light colored clay bar. The black is the removed contaminants from just the deck lid. The clay bar was needed every half panel and then reused for the entire vehicle. Total process time was about two hours.

Following this step I wiped all painted surfaces down with laquer thinner to remove and remaining tar that could have been left behind.
Following this step the entire car was sprayed with degreaser to remove any remaining particles left behind. Also another keys reason I did this is because laquer can leave behind a film and I wanted the paint squeaky clean.
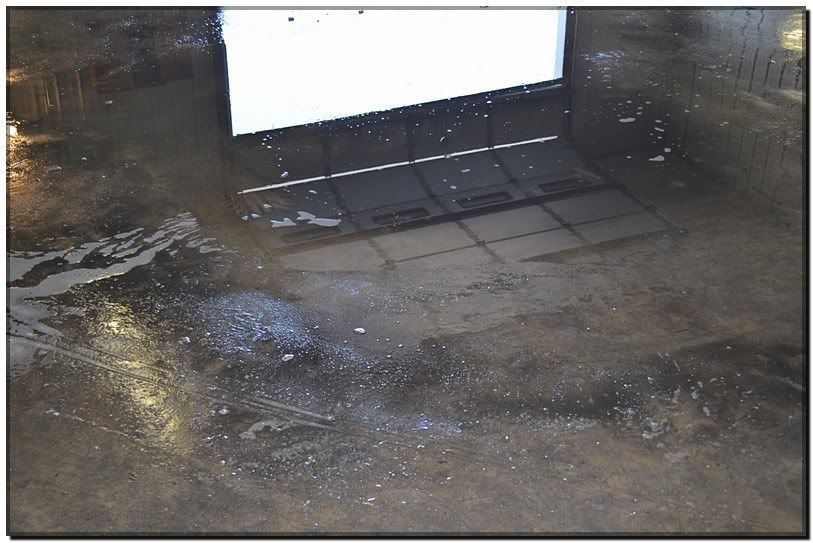
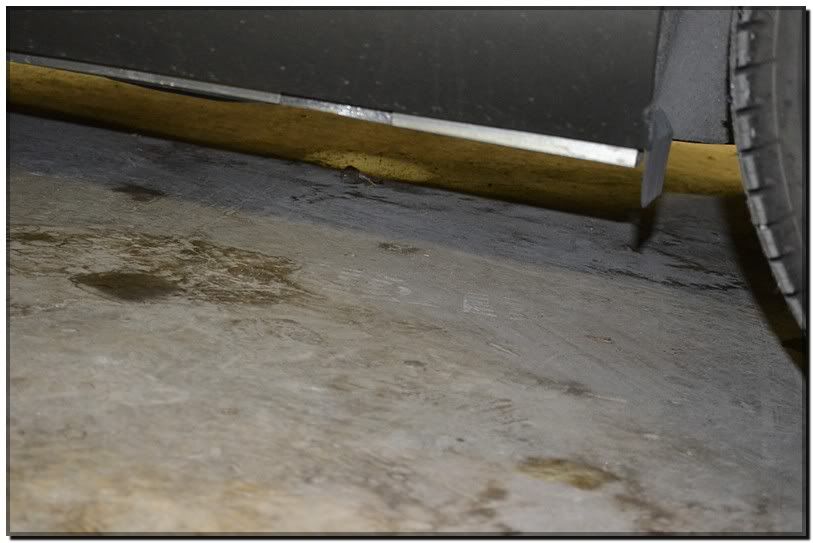
Followed by a good rinse The car was dried using compressed air and micro fibers. Here is a picture of my floor showing the after math of several hours of degreasing. I actually had to pull the car out and re-clean my working area after this one! It was disheartening to see the amount of filth. Usually I was in the designed area with a drain ,but due to the over abundance of dirt, grease, and grime on this one I wanted the extra room so I pulled it into the middle of the shop.
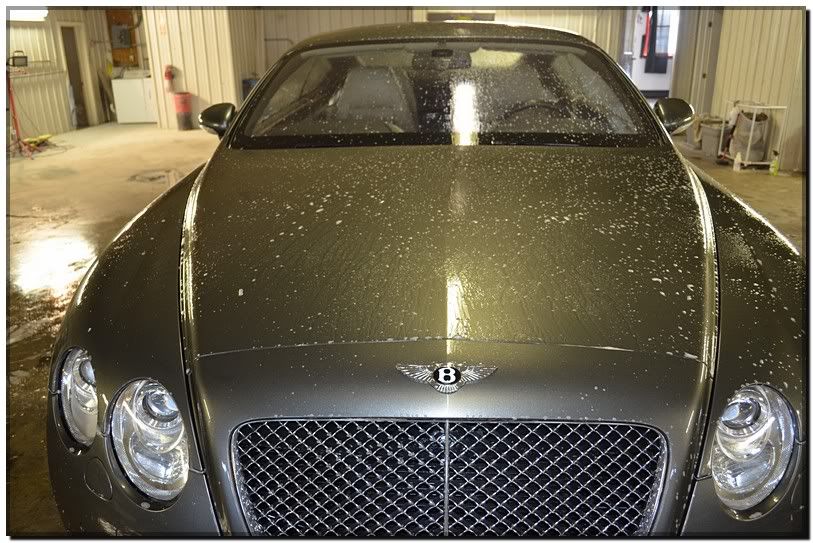
While the floor was drying I examined the paint directly under the sun. Finally had some. it seems like all it has been doing for the last few months here in Lancaster County is raining. Great for my Amish neighbors, but not good for me.
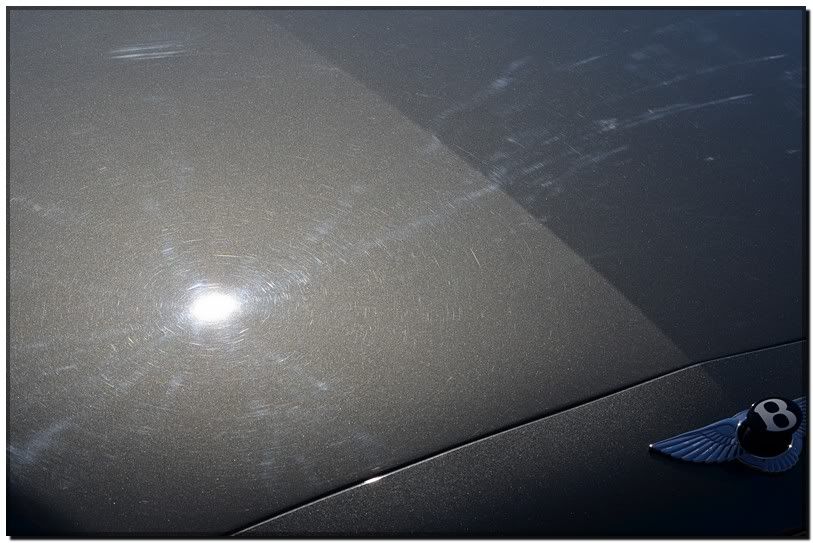
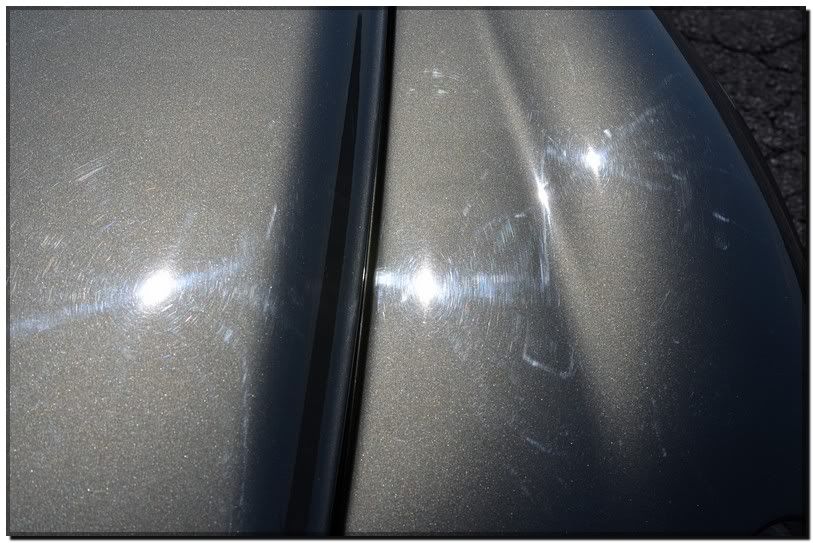
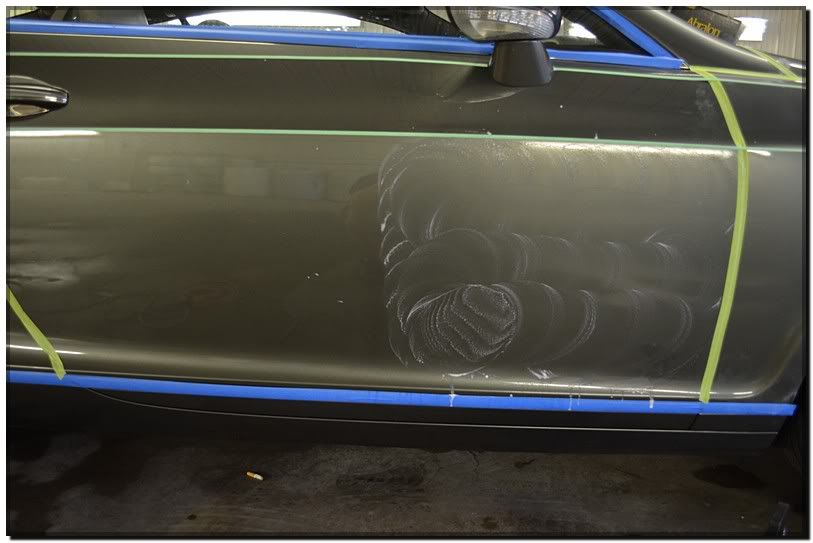
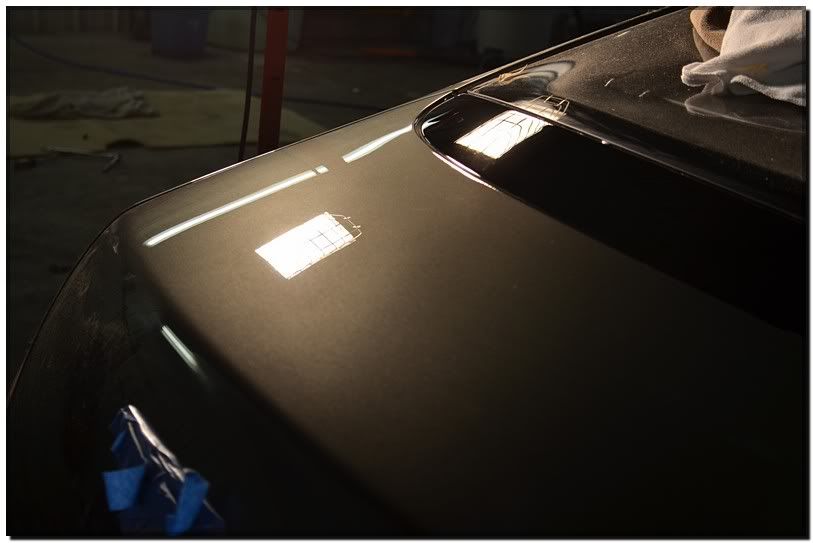
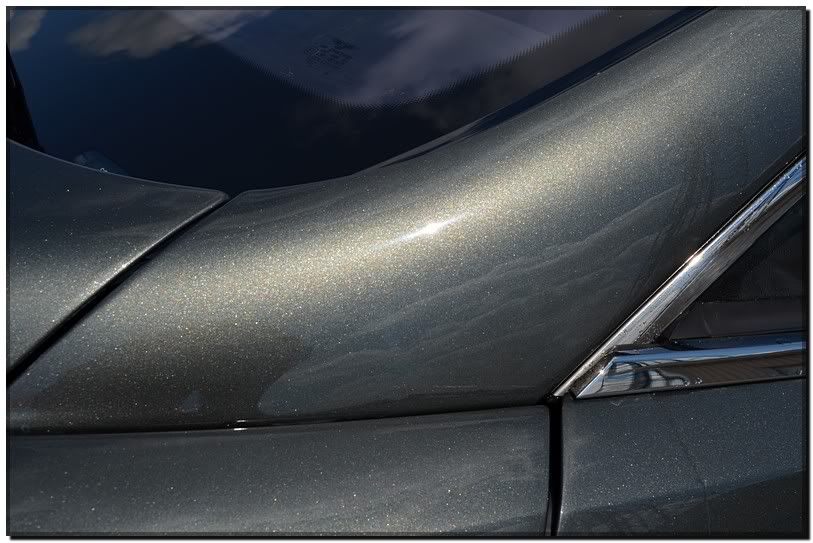
Here is how the paint looked in direct sun light. This finish has seen better days, I was hoping to make it see great days from here on out. The metallic in the paint needed to pop and it was obviously lacking that. The swirls and holograms created an unsmooth texture to the paint. This causes paint to refract light instead of reflecting it. It definetly takes away from the over all finish of the vehicle.
Here in this photo of the left hand side of the hood, you can clearly see some holograms and a good case of swirls.
This shot of the fender was pretty rough as well.
Anyway while still waiting on the floor to dry. I decided to do some spot sanding outside. My main goal here was to level some of the smaller defects. Here is a prime example.
This scratch was on the left quarter panel. It was fairly deep so my goal was to minimize it. Luckily being an experienced color sander I was able to remove it using 800 grit paper from 3m. This was hand sanded. In the below picture you can see the scratch right above the paper.
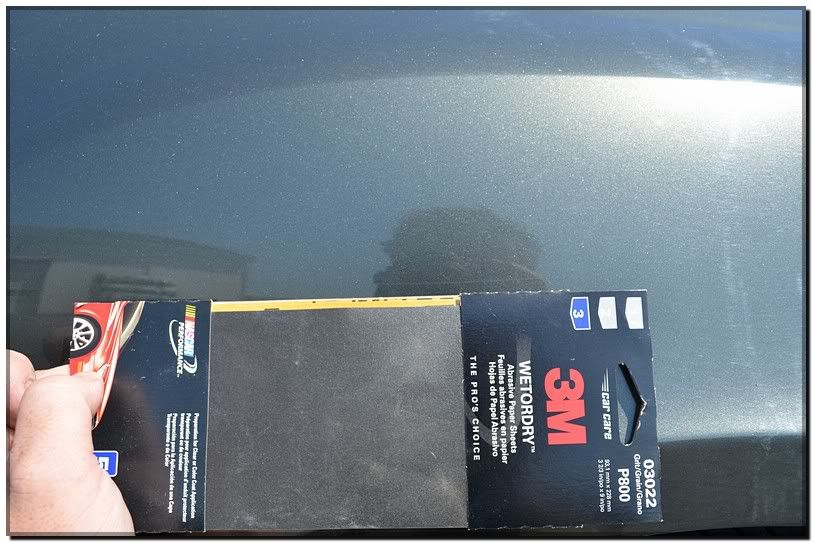
When hand sanding its always good to use a lubricant to ensure the paper to slide across the paint as opposed to digging into it.

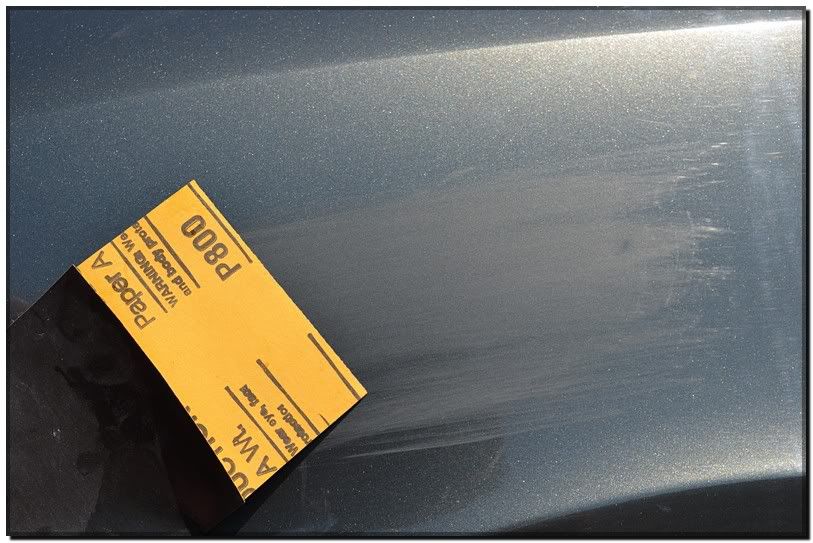
Here you can see the scratch has been removed. What was left was finer scratches from the paper. A total of 4 areas on the car received the same treatment.
 May 11, 2011 | 10:06 AM
#3
Thread Starter
| TS Detailing Sponsor | Northeast
Joined: Oct 2009
Posts: 70
From: Lancaster PA
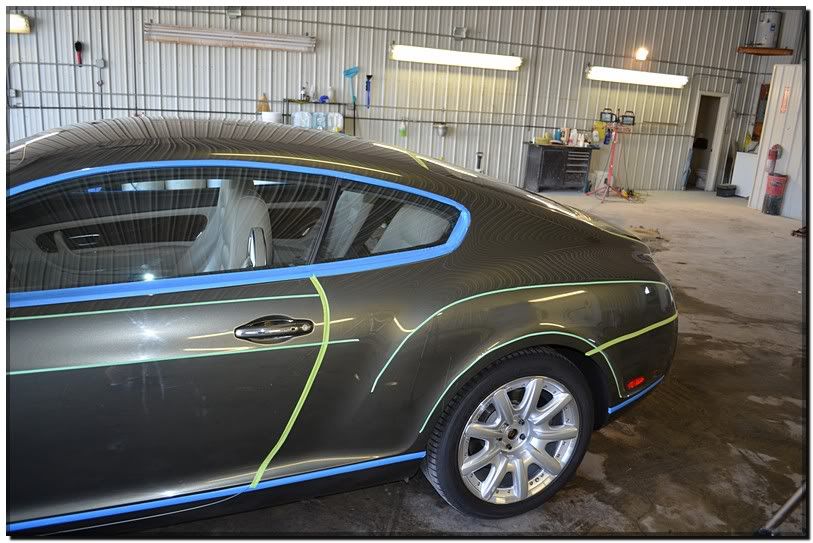
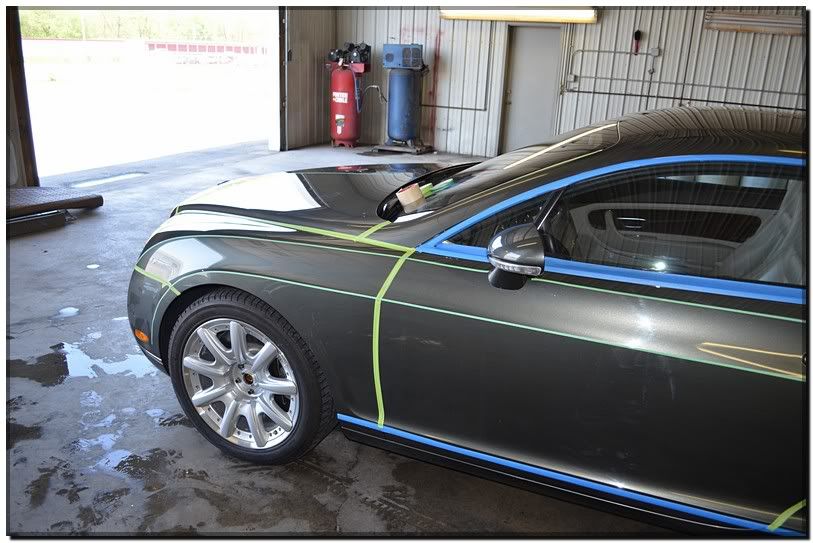
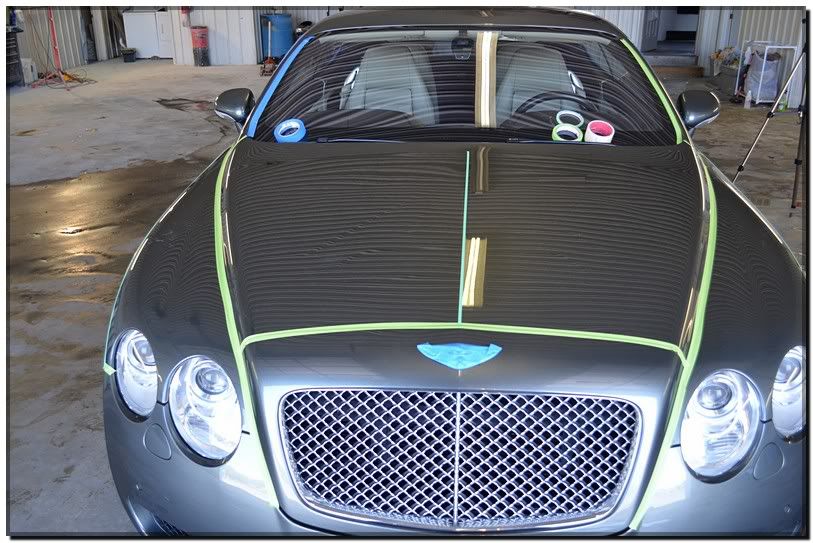
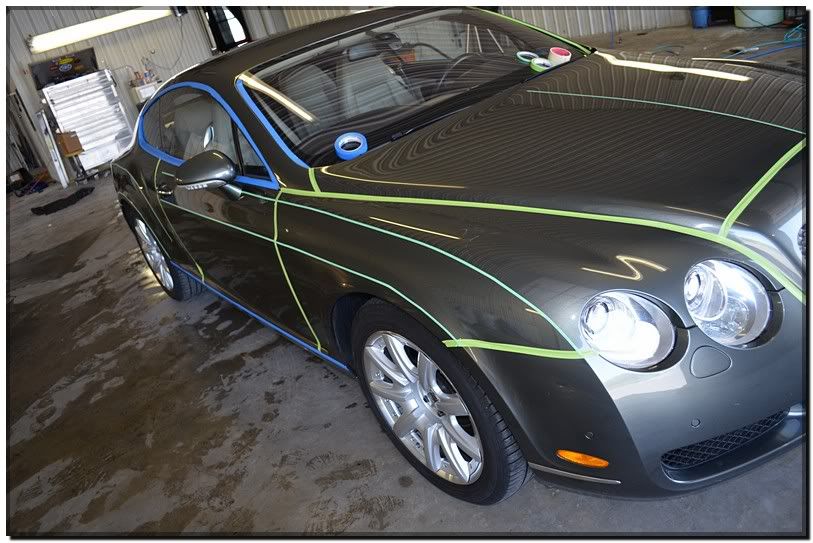
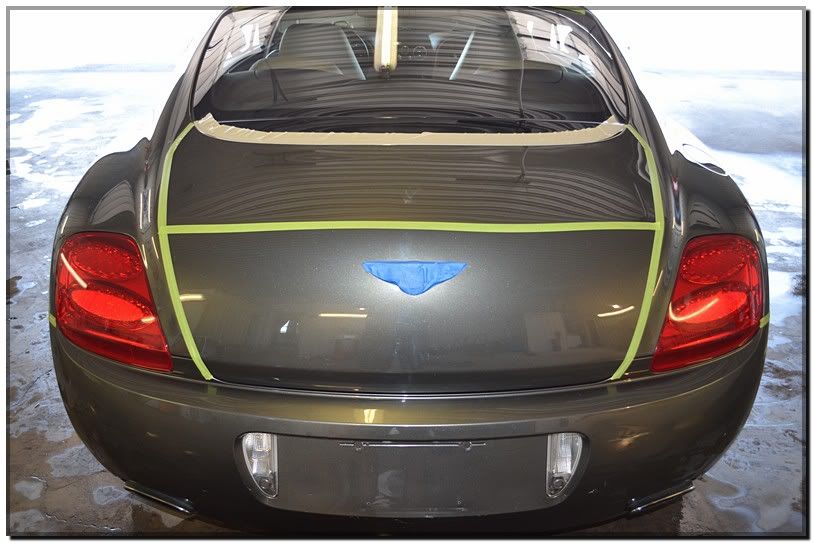
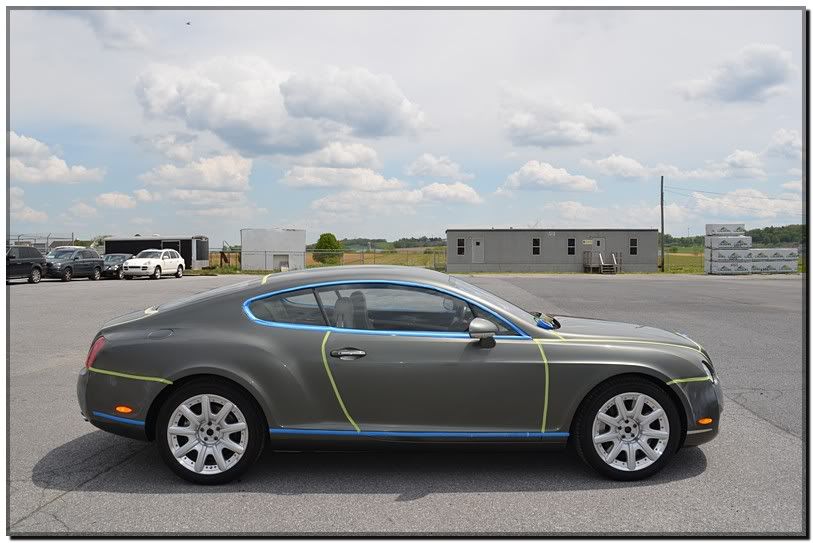
Finally onto the masking. This took a little bit! Often you will see detailers masking cars. Myself personally I mask cars for prevention. In this case it would be from the sanding and polishing. It also helps in the aid of clean up later down the road. Here I was masking the all the body molding edges.
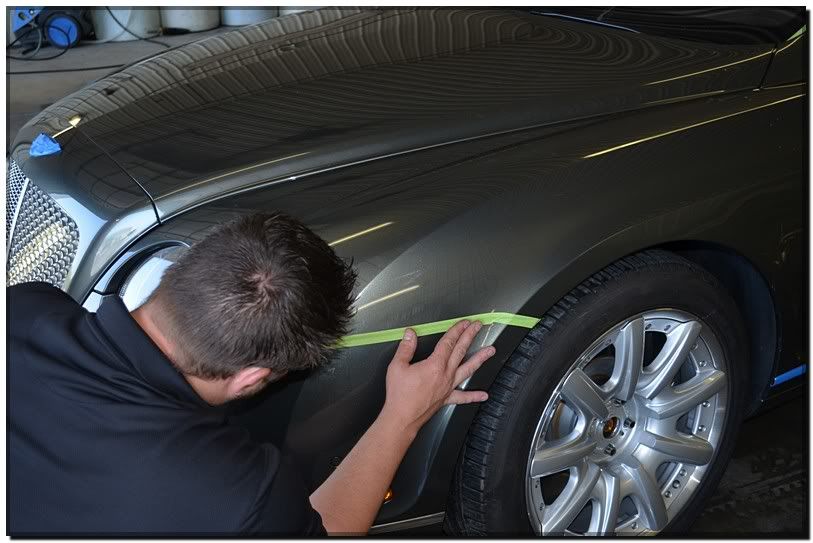
Then the finer edges got masked as well.

Here is how the car looked when finished. Kinda funny looking, but you can�t put a price tag on safety! Well maybe you can, but a burnt edge can ruin a mans career or severely hurt his pocket. Some of the exotics and highline vehicles that I have been graced by God to work on, it could also diminish the value highly of a vehicle. One of the rules I live by is trust is earned and not given. Here is a prime example. Taking the proper time to do it right!
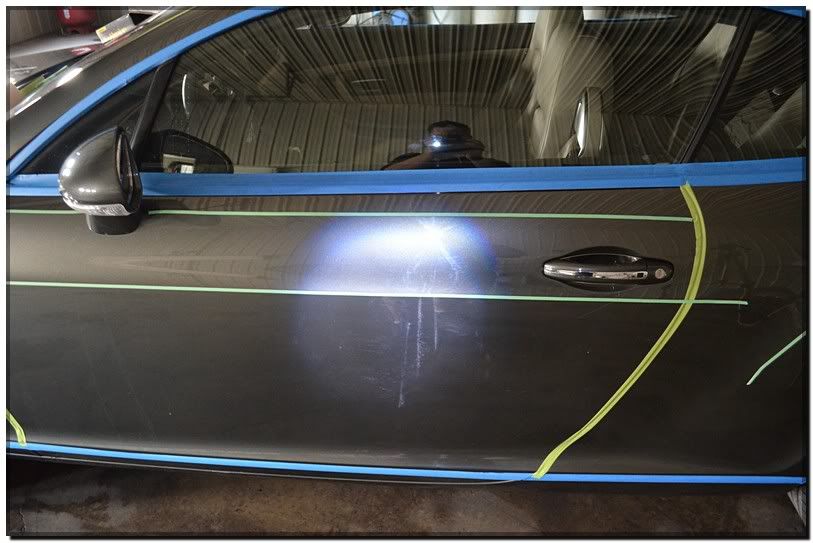
Next I went around to examine the paint. After taking paint thickness readings, I used a tactical light to see the defects. Here is some of what it looked like. More holograms and swirls. I enjoying watching movies in 3D, but hate to see a cars paint have holograms with this 3D effect. Horrible huh?
Now the fun begins. Keep in mind that clear coat is about as thin as a sheet of notebook paper when sprayed. That�s pretty thin to say the least. Now many exotic companies like Ferrari and such will wetsand the paint down at factory OEM levels to smooth out orange peel. Some are better than others at finishing them out. Bentley is one of them that does a great job at what they do. From my experience anyways. So with the obvious here, the paint has already been sanded once. I�m sure the car was detailed once as well by judging from the holograms from an inexperienced detailer. As deep as the swirls were, I wanted to approach them in a safe manner without jeopardizing a burn through. So the plan of attack was to level the paint with sand paper. Seems kinda strange, but when you look at it, there are many ways of paint leveling, and with new products and upgrades in technology, this business isn�t the same as it was 15 years ago when I first got into it. Now a days many will use foam pads to level paint. Which is great, but when using a direct drive machine like a rotary polisher. Foam pads can actually build heat and friction fast. Some may argue with me here, but heat is a byproduct that is not needed in polishing. . Depending on the abrasive used, a paint burn through can be quick without knowing it. So by sanding the paint smooth, it allowed me to level the paint entirely by removing all defects in a cool safe manner. This is what you would call Advanced Paint Correction and not detailing.
For this step I used several papers raging from 2000-4000 grit sand paper. Tighter area�s were sanded with 3 inch paper and larger panels were sanded with 6 inch paper.
Here is a picture Mirka abrolon paper used showing the grits.

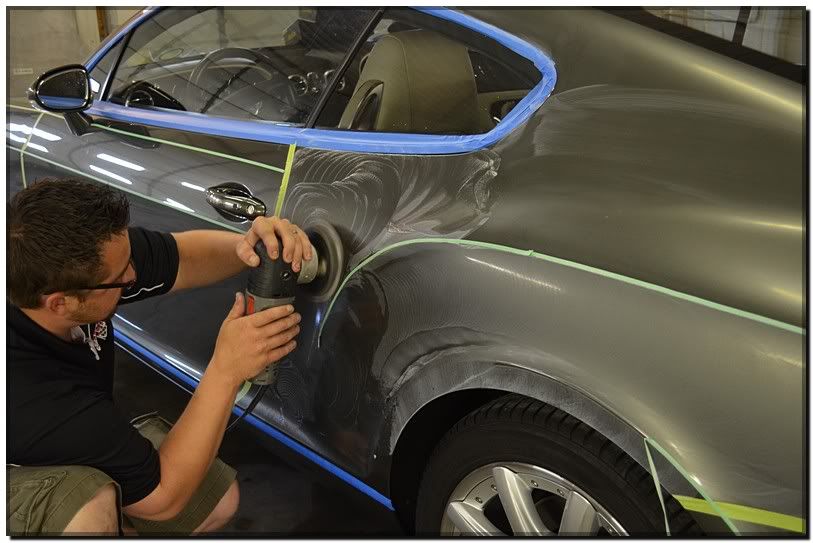
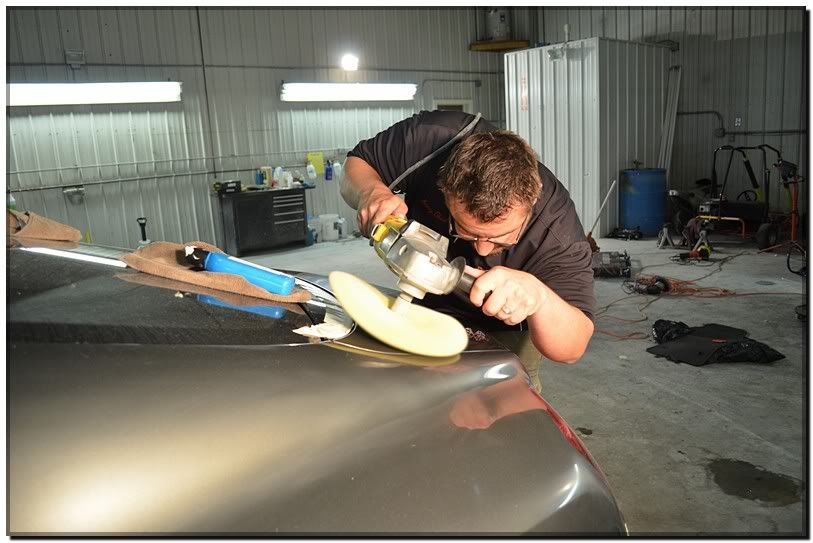
My snap-on pneumatic sander was getting rebuilt. That�s a sure sign I do way to much color sanding jobs. This time around I used an electric DA know as the Porter Cable 7424XP. It actually did a remarkable job for me.
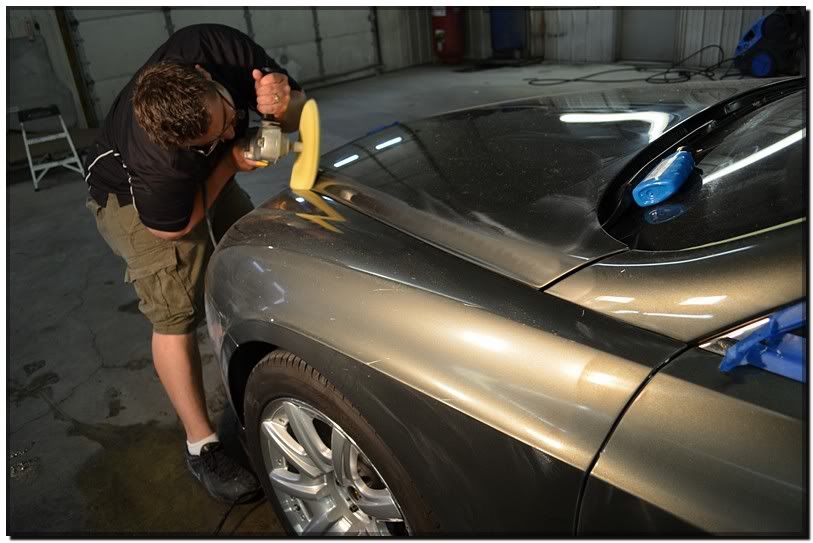
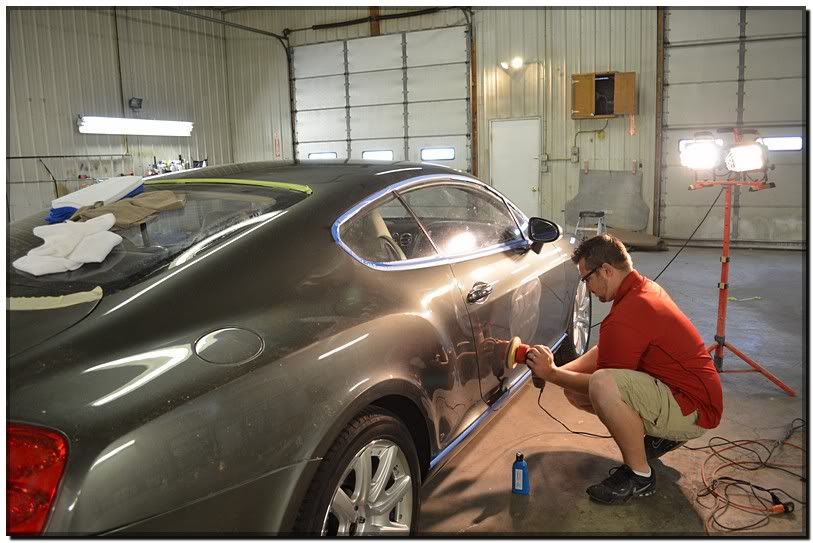
Here is a shot of me sanding the quarter panel on the Bentley.
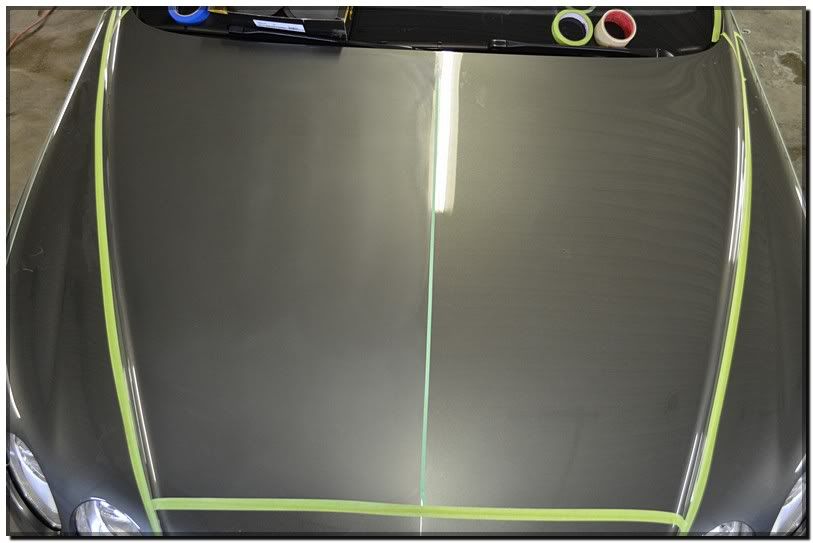
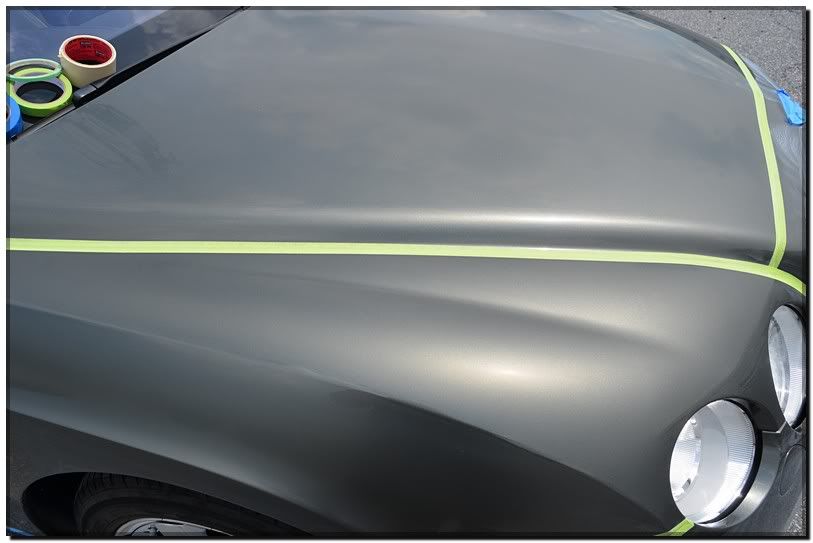
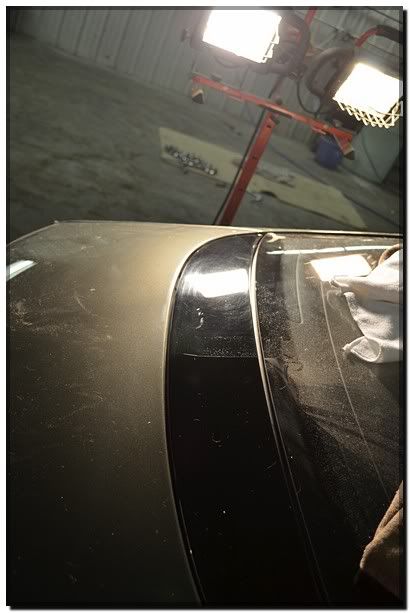
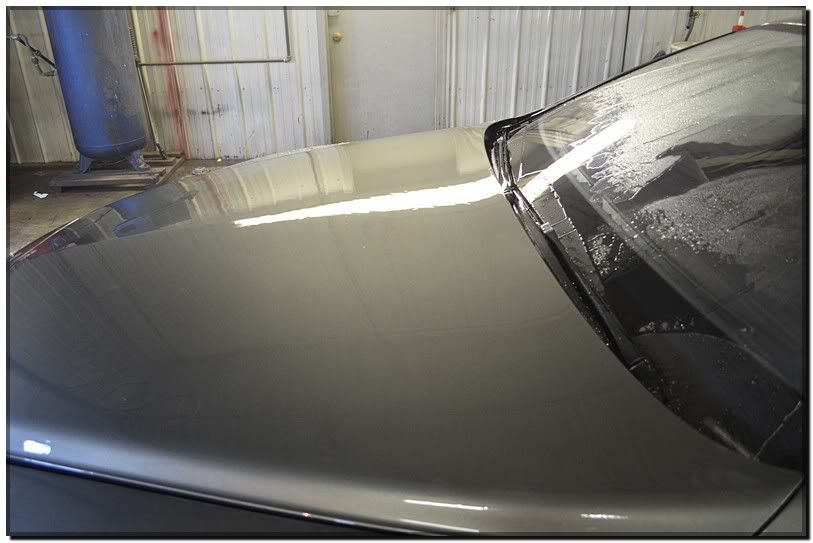
Here on the hood you can see a 50/50 shot the right side isn�t sanded and the left side is. You�ll notice the shine versus the matte finish. Obviously the matte finish side is sanded.
Here in this photo you can see the right side of the passenger door is sanded and left side isn�t, it was still damp though.
Here it is wiped clean. Again notice the matte look to it:
Yes sir even the bumpers got color sanded!
Wiping away some dried up excess of clear coat is always fun!
Once the 200 grit was done I removed some of the making on the bodylines to go over them with 4000 grit. The 4000 grit paper really made for a nice smooth surface. When using finer sanding paper like this it really leaves for a surface that is easily compounded out.
Here is how the paint looked when done. Take notice all body line edges were sanded as well. This is how nicely sanded paint should look. Nice even texture.
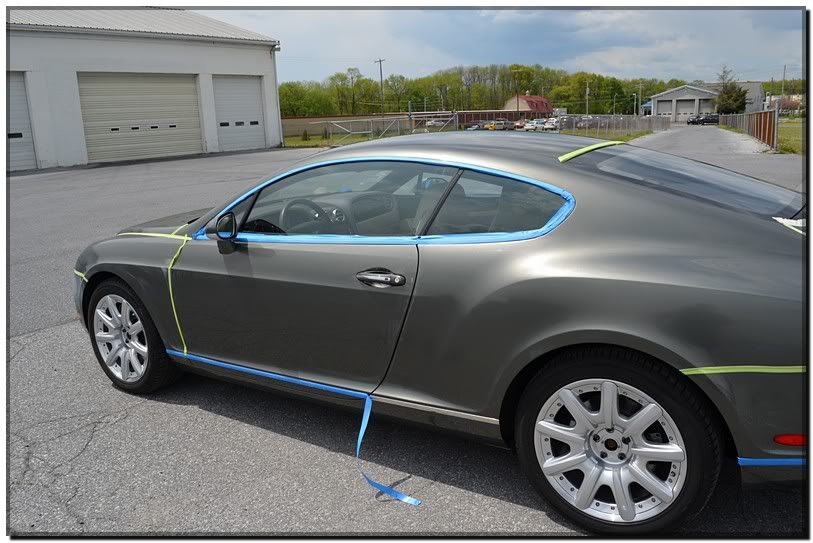
I think this car would look nice in a matte finish. Almost has a stealth look to it. LOL but this gentleman wanted gloss. The right side sanded down
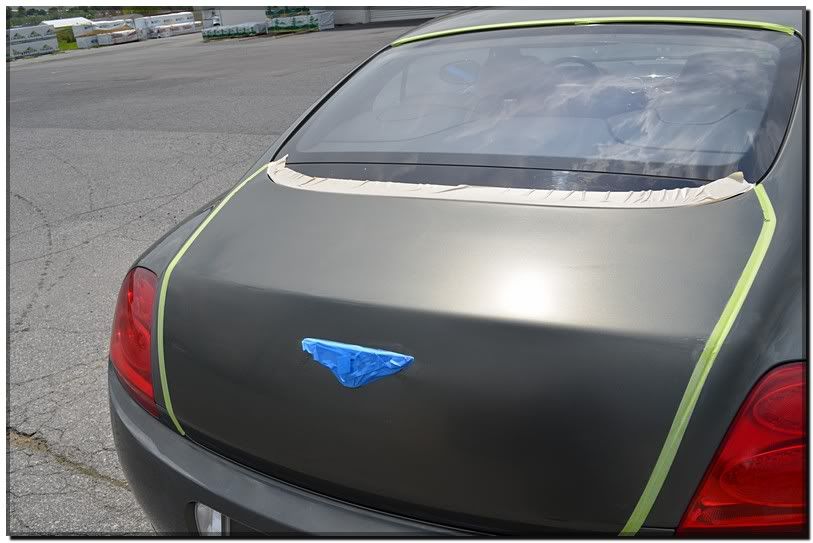
The back end of the car sanded:
And the whole left side sanded:
One last shot. Please ignore the cars in the background. Ive been a little busy these days. Lol
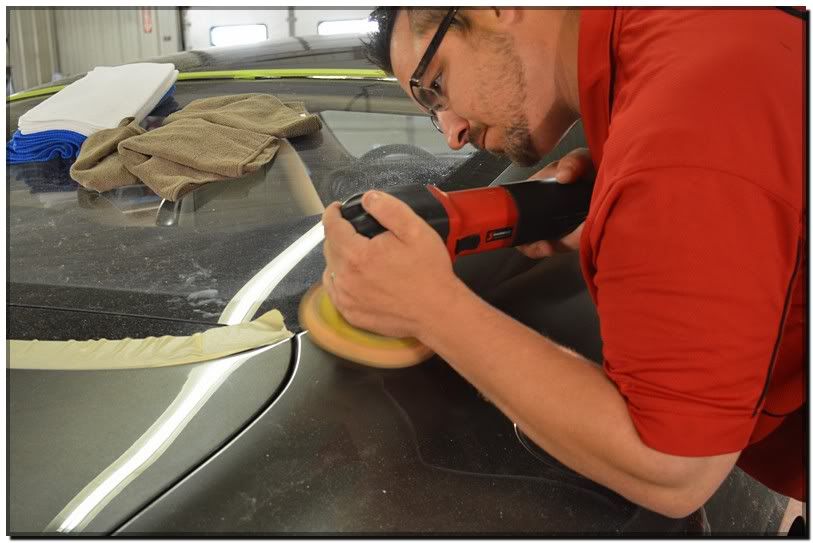
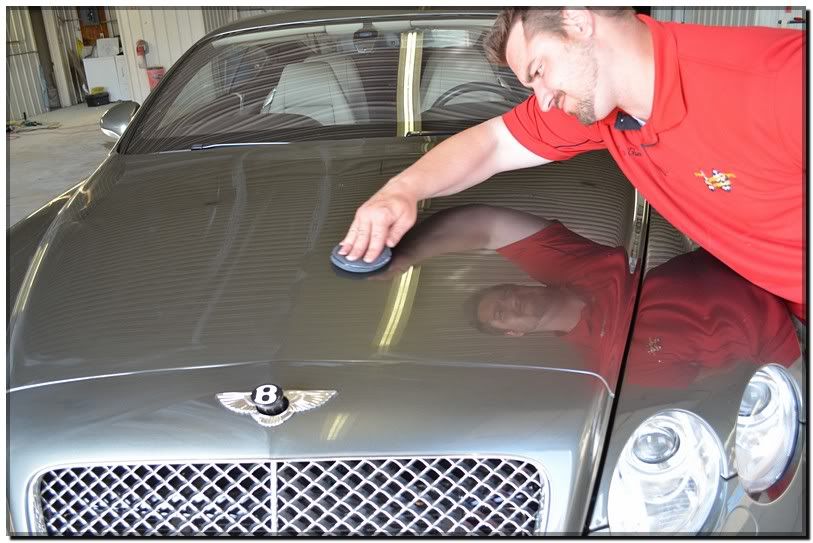
After inspecting the paint after sanding. I pulled the car in and started the machine polishing.
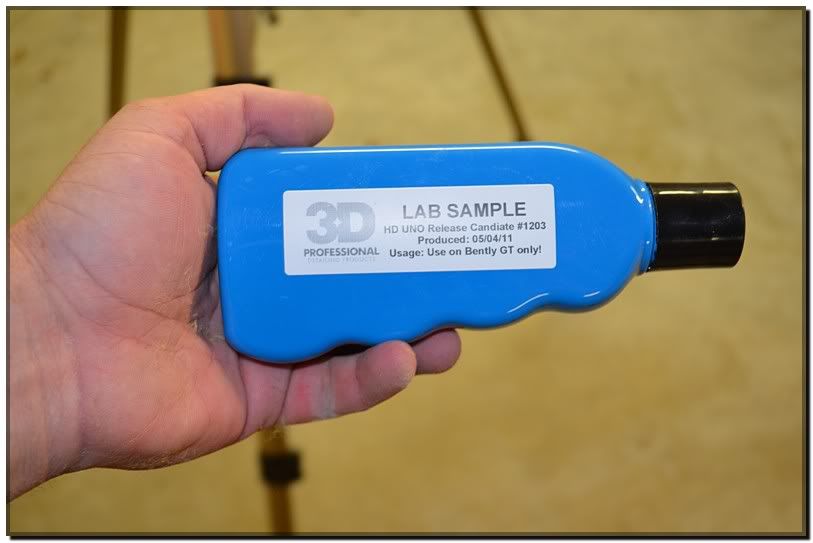
I was lucky enough to have a sample of HD Uno 3 to try out. The boys at 3D International asked me to give it a run. As you can see this sample was produced on 5/4/11 Overall in comparison for fellow detailers reading this thread. I found that is removed the sanding marks with ease. It was very easy to remove with very minimal dusting. I normally use M105 as my leveling compound so I compare it to that. Overall M105 has a stronger cutting ability as opposed to HD Uno 3. Considering the fact that I was able to remove sanding marks says something though. It has bite for sure. One of the major factors that I truly love is its finishing ability. It finished nice even after a wool pad. Ease of removal was amazing. To sum it up, this is the product I have been looking for. It�s versatile for sure. You can level paint and finish down with it as well, depending on pad and techinque. it�s a very simple working polish. After talking to the gentlemen over at 3D I�ll tell you first hand that they took detailers criticism and listened. A good company that works diligently to make things better. I think there�s 6 months of research to reformulate this product was well done!
The lab sample.
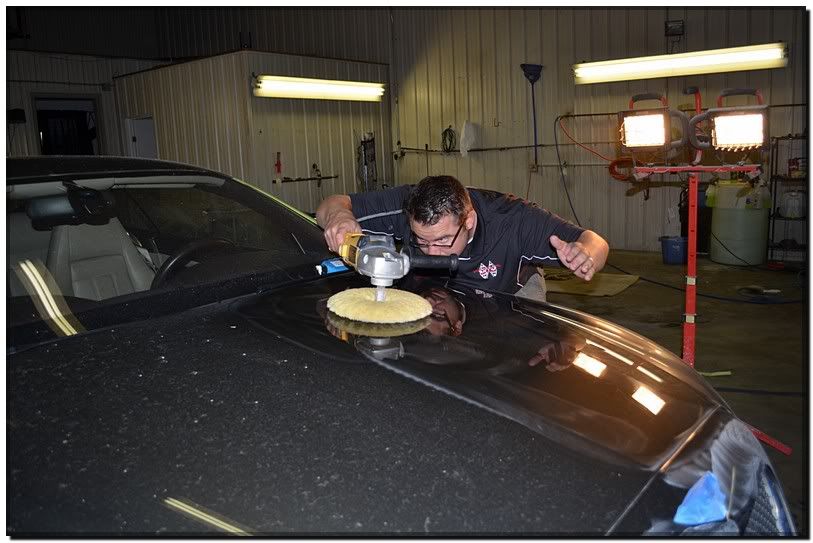
Here in this photo is a 50.50 of the sanding marks removed using a wool pad and HD Uno. Notice the reason for using wool was to be able to run at cooler temptaures.
You can see the depth and clarity restored back to the paint surface. Nicely leveled and crisp for one step.
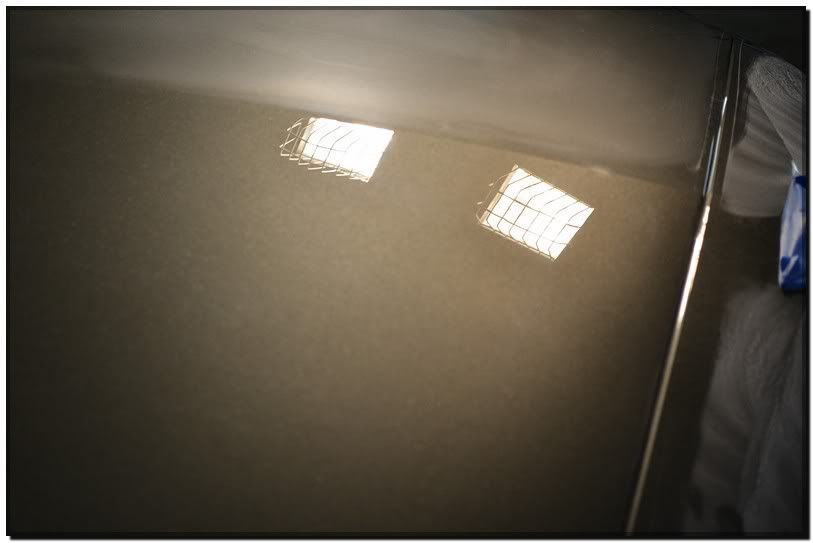
Another shot of the deck lid as well.
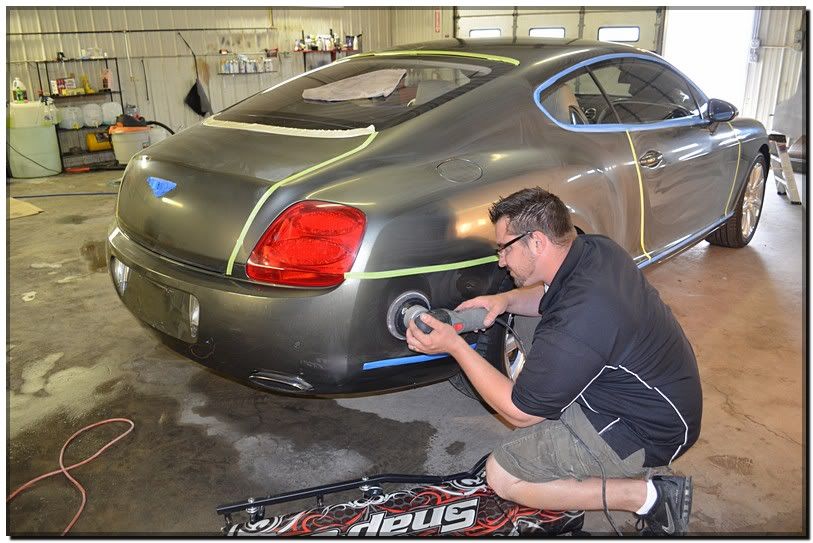
Here are a few shots of me making my way around the car:
Then the finer edges got masked as well.
Here is how the car looked when finished. Kinda funny looking, but you can�t put a price tag on safety! Well maybe you can, but a burnt edge can ruin a mans career or severely hurt his pocket. Some of the exotics and highline vehicles that I have been graced by God to work on, it could also diminish the value highly of a vehicle. One of the rules I live by is trust is earned and not given. Here is a prime example. Taking the proper time to do it right!
Next I went around to examine the paint. After taking paint thickness readings, I used a tactical light to see the defects. Here is some of what it looked like. More holograms and swirls. I enjoying watching movies in 3D, but hate to see a cars paint have holograms with this 3D effect. Horrible huh?
Now the fun begins. Keep in mind that clear coat is about as thin as a sheet of notebook paper when sprayed. That�s pretty thin to say the least. Now many exotic companies like Ferrari and such will wetsand the paint down at factory OEM levels to smooth out orange peel. Some are better than others at finishing them out. Bentley is one of them that does a great job at what they do. From my experience anyways. So with the obvious here, the paint has already been sanded once. I�m sure the car was detailed once as well by judging from the holograms from an inexperienced detailer. As deep as the swirls were, I wanted to approach them in a safe manner without jeopardizing a burn through. So the plan of attack was to level the paint with sand paper. Seems kinda strange, but when you look at it, there are many ways of paint leveling, and with new products and upgrades in technology, this business isn�t the same as it was 15 years ago when I first got into it. Now a days many will use foam pads to level paint. Which is great, but when using a direct drive machine like a rotary polisher. Foam pads can actually build heat and friction fast. Some may argue with me here, but heat is a byproduct that is not needed in polishing. . Depending on the abrasive used, a paint burn through can be quick without knowing it. So by sanding the paint smooth, it allowed me to level the paint entirely by removing all defects in a cool safe manner. This is what you would call Advanced Paint Correction and not detailing.
For this step I used several papers raging from 2000-4000 grit sand paper. Tighter area�s were sanded with 3 inch paper and larger panels were sanded with 6 inch paper.
Here is a picture Mirka abrolon paper used showing the grits.
My snap-on pneumatic sander was getting rebuilt. That�s a sure sign I do way to much color sanding jobs. This time around I used an electric DA know as the Porter Cable 7424XP. It actually did a remarkable job for me.
Here is a shot of me sanding the quarter panel on the Bentley.
Here on the hood you can see a 50/50 shot the right side isn�t sanded and the left side is. You�ll notice the shine versus the matte finish. Obviously the matte finish side is sanded.
Here in this photo you can see the right side of the passenger door is sanded and left side isn�t, it was still damp though.
Here it is wiped clean. Again notice the matte look to it:
Yes sir even the bumpers got color sanded!
Wiping away some dried up excess of clear coat is always fun!
Once the 200 grit was done I removed some of the making on the bodylines to go over them with 4000 grit. The 4000 grit paper really made for a nice smooth surface. When using finer sanding paper like this it really leaves for a surface that is easily compounded out.
Here is how the paint looked when done. Take notice all body line edges were sanded as well. This is how nicely sanded paint should look. Nice even texture.
I think this car would look nice in a matte finish. Almost has a stealth look to it. LOL but this gentleman wanted gloss. The right side sanded down
The back end of the car sanded:
And the whole left side sanded:
One last shot. Please ignore the cars in the background. Ive been a little busy these days. Lol
After inspecting the paint after sanding. I pulled the car in and started the machine polishing.
I was lucky enough to have a sample of HD Uno 3 to try out. The boys at 3D International asked me to give it a run. As you can see this sample was produced on 5/4/11 Overall in comparison for fellow detailers reading this thread. I found that is removed the sanding marks with ease. It was very easy to remove with very minimal dusting. I normally use M105 as my leveling compound so I compare it to that. Overall M105 has a stronger cutting ability as opposed to HD Uno 3. Considering the fact that I was able to remove sanding marks says something though. It has bite for sure. One of the major factors that I truly love is its finishing ability. It finished nice even after a wool pad. Ease of removal was amazing. To sum it up, this is the product I have been looking for. It�s versatile for sure. You can level paint and finish down with it as well, depending on pad and techinque. it�s a very simple working polish. After talking to the gentlemen over at 3D I�ll tell you first hand that they took detailers criticism and listened. A good company that works diligently to make things better. I think there�s 6 months of research to reformulate this product was well done!
The lab sample.
Here in this photo is a 50.50 of the sanding marks removed using a wool pad and HD Uno. Notice the reason for using wool was to be able to run at cooler temptaures.
You can see the depth and clarity restored back to the paint surface. Nicely leveled and crisp for one step.
Another shot of the deck lid as well.
Here are a few shots of me making my way around the car:
May 11, 2011 | 10:07 AM
#4
Thread Starter
| TS Detailing Sponsor | Northeast
Joined: Oct 2009
Posts: 70
From: Lancaster PA
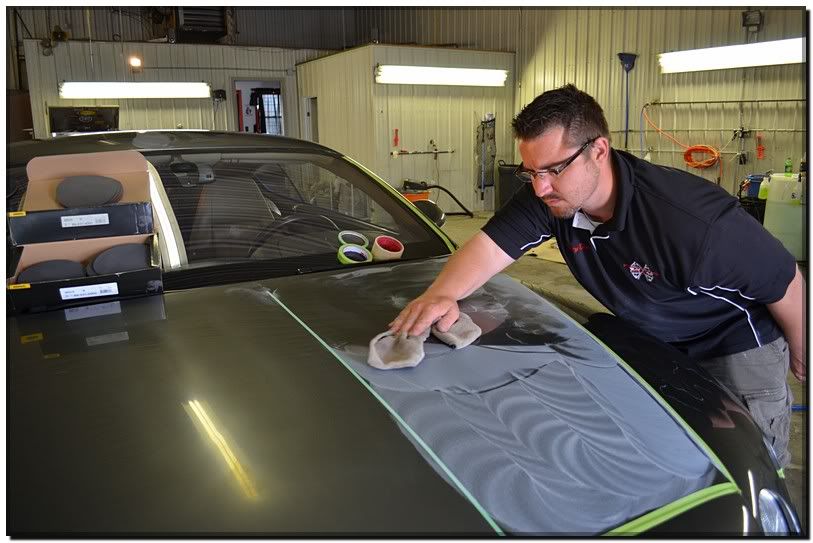
After the first step was complete I moved to a Griots random orbital machine and a foam pad to remove the holograms I created from the wool pad. It also help out smoothing paint.
Going at it I got around to the post and notice some sanding DA marks that I had missed during the compounding stages. Here below I was checking out my work,
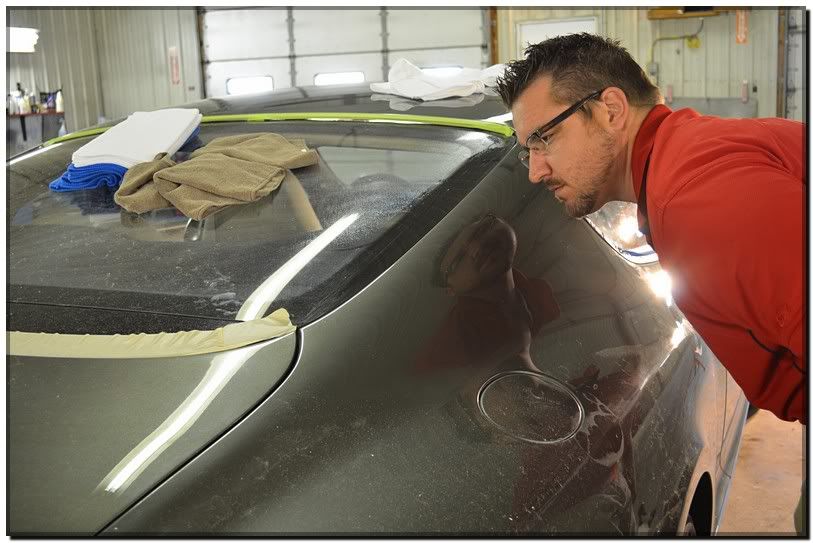
This is what I found. It just goes to show no one is perfect and double checking your own work pays off.
Normally I would go back and get the rotory and wool pad and rehit this spot< but because I was trying out this beta sample from 3D I thought why not try and remove the marks with a random orbital.
It did in fact remove them with ease and finished down perfect. Almost makes me wonder if I could have one stepped it after sanding? We will save that for later though. Hint Hint! Notice the paint was re-cleaned to remove all polishing oils to ensure the DA Marks were removed and not just filled in. You can tell this by the liquid on the glass that I didn�t wipe.
Making my way around the car:
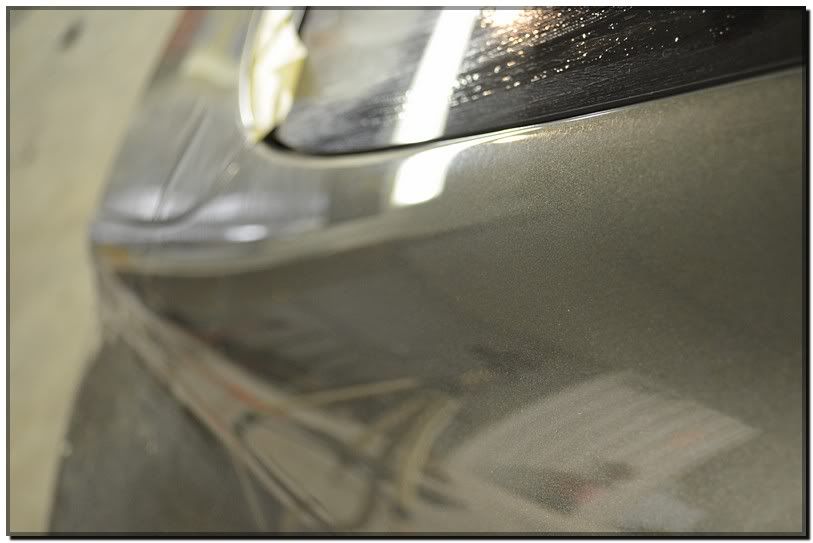
Here in the picture below I�m focusing on the before and after of the black plastic. Often you can find this material in between window post and other various places on vehicles. During the Bentley compounding stage. I did not use wool on it. This 50/50 shot is after the DA and HD Uno 3. Pretty remarkable huh.
Here is a shot of the Deck Lid and the black plastic all finished!
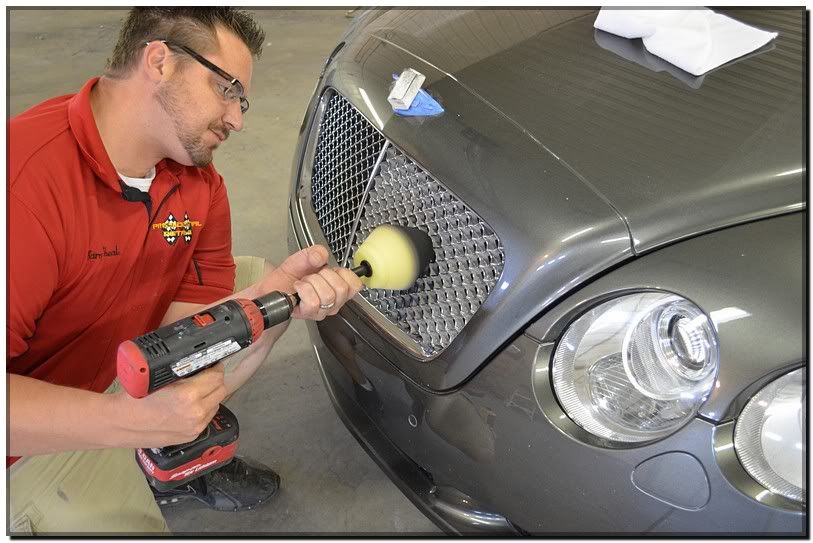
After polishing I turned to the grill. Didn�t I say earlier that I hate this thing. Lol to much work. I found that the Meguiars new wheel polishing cone. Fit perfect in there at the tip. So I used jewelers� rouge to make it shine. This polishing cone has fastly become a serious tool in my arsenal.
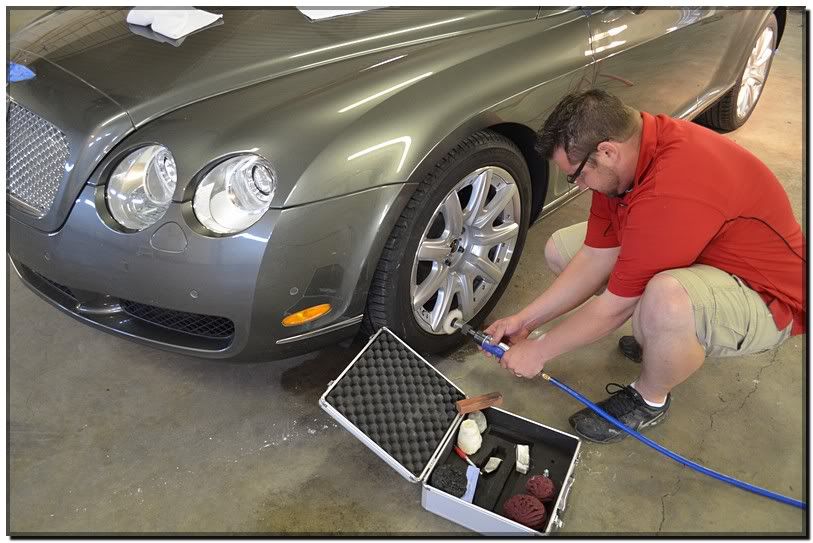
Next I turn my attention to polishing the wheels. Here you can see me using a wheel polishing kit a another form of jewelers� rouge to make the aluminum band around the wheel shine! Later the painted wheels were polished with HD Uno and sealed with HD Poxy.
At first I was planning on doing three steps to the paint, but after examining everything, I thought the paint looked perfect and there was no need to go further.
So now it was time to remove all polishing oils and make sure no polishing oils in the New HD Uno filled anything in. First I used an ammonia based window cleaner to remove everything by hand,
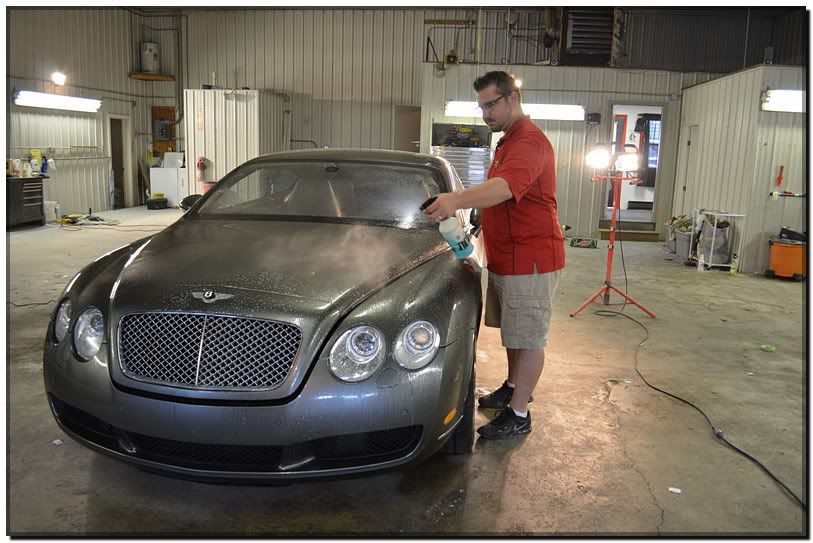
Then I used a degreaser to strip all the oils again. This time I wanted to ensure with out a doubt that nothing filled. The foam was left to dwell and then I mitted the car down.
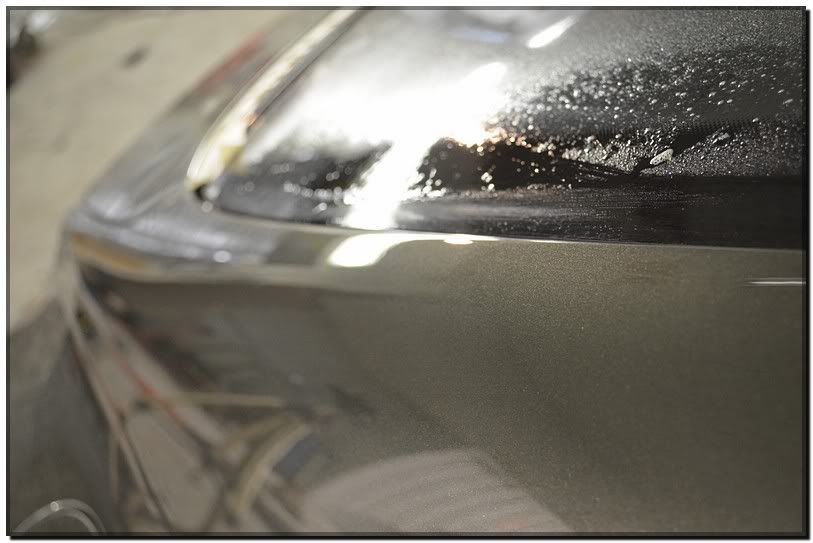
A good sign that the paint is clean and stripped is when there is no beading present on its surface. You want the car to hold water. One of the reason you will see a freshly waxed car have beading properties. It has protection. Now to truly see paint in its cleanest form. I wanted it to be stripped. This will also help with boding when laying down a final protection. Thus making it last longer. Also showing a true correction. Many guys I see using products with glazes and such. Often I here guys saying or discussing on forums that these glazes will nourish the paint with polishing oils. Some claim to say that it cleans polishing oils off then nourishes the paint. I laugh hard when I see people using stuff like this. How can a product truly clean paint then leave an polishing oils behind to promote bonding? Waxes and sealents can only bond to a clean surface. Not a oil filled surface. There�s no Easy Cr�me Glaze out there that will show a truly clean surface.
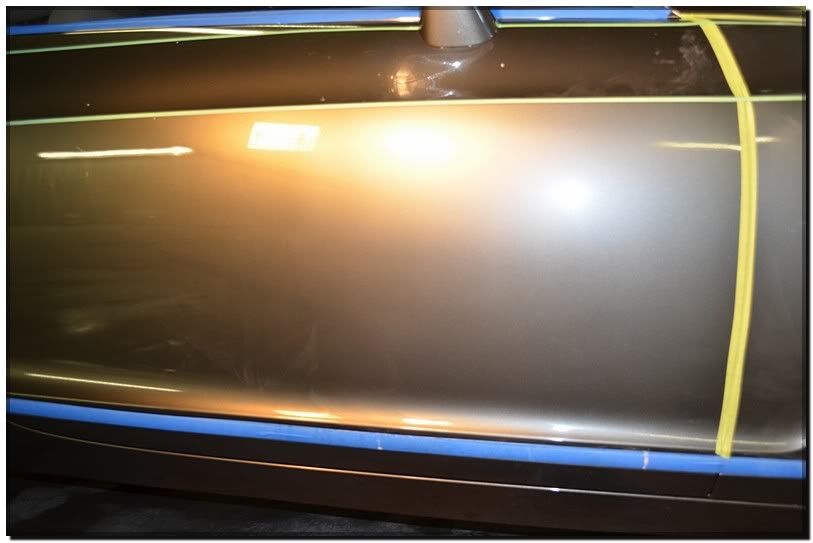
Anyways here is how paint should look stripped holding water:
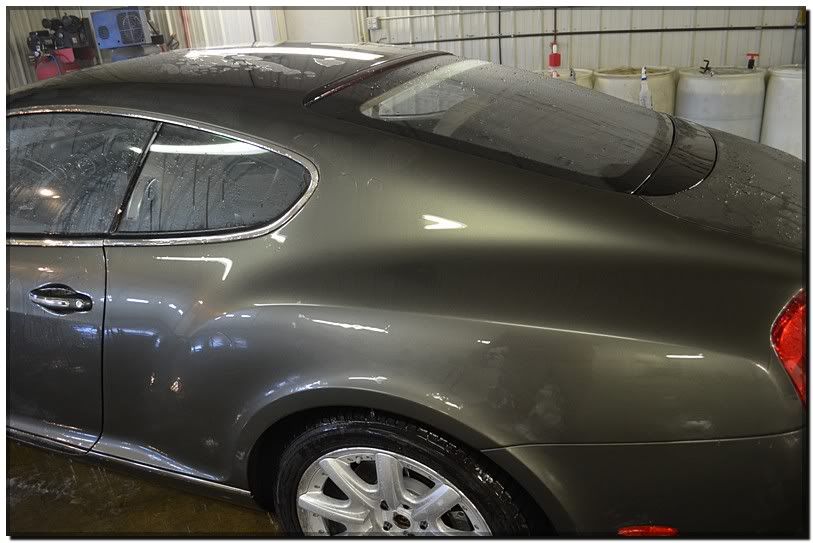
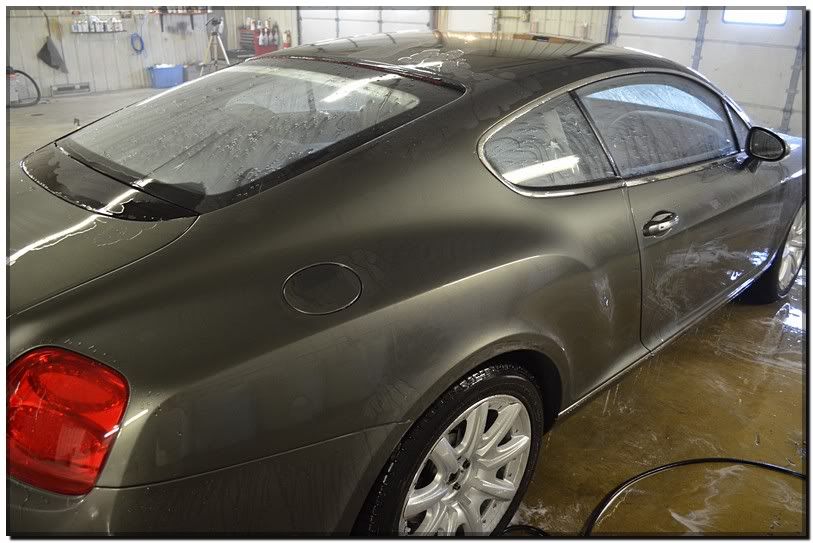
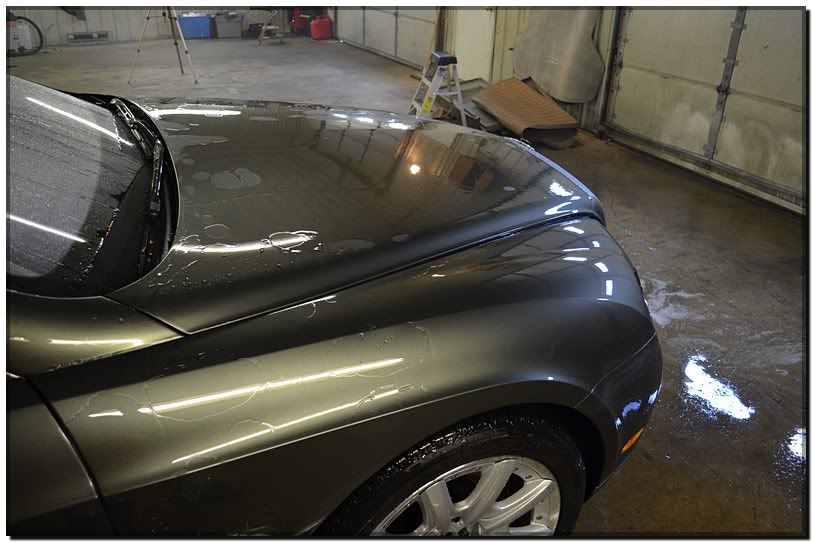
Now Since the sun was with me on day 3 of this project I pulled the car out and examined the paint. Notice in the pictures the car still has some water remaining for proof.
Here is how the paint looked:
 May 11, 2011 | 10:08 AM
#5
Thread Starter
| TS Detailing Sponsor | Northeast
Joined: Oct 2009
Posts: 70
From: Lancaster PA
Below is a link to a quick video I made to show the paint correction on video.
http://<iframe width="560" height="3...reen></iframe>
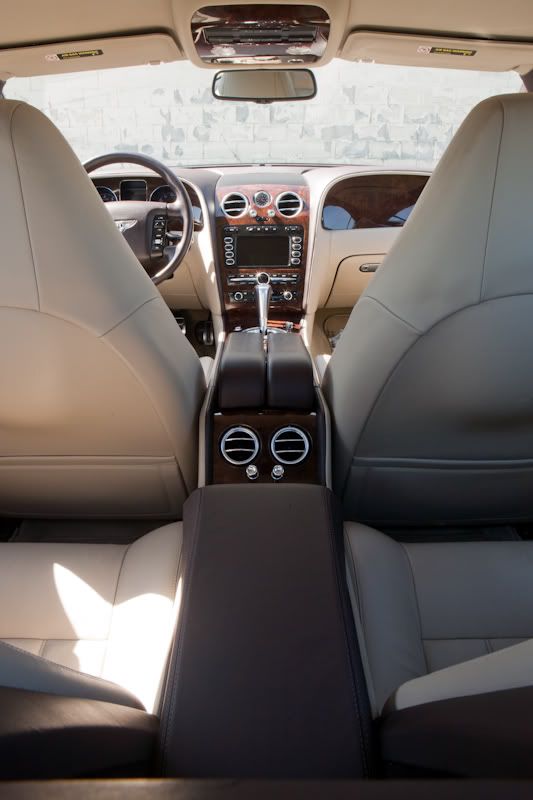
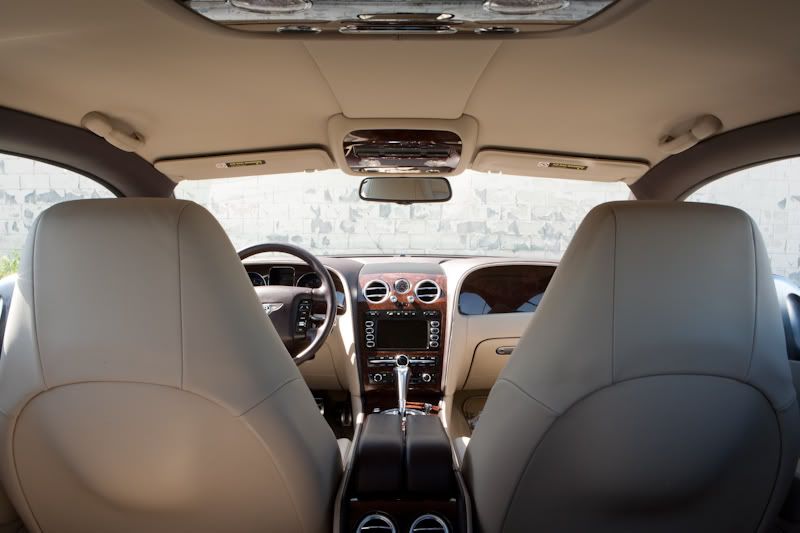
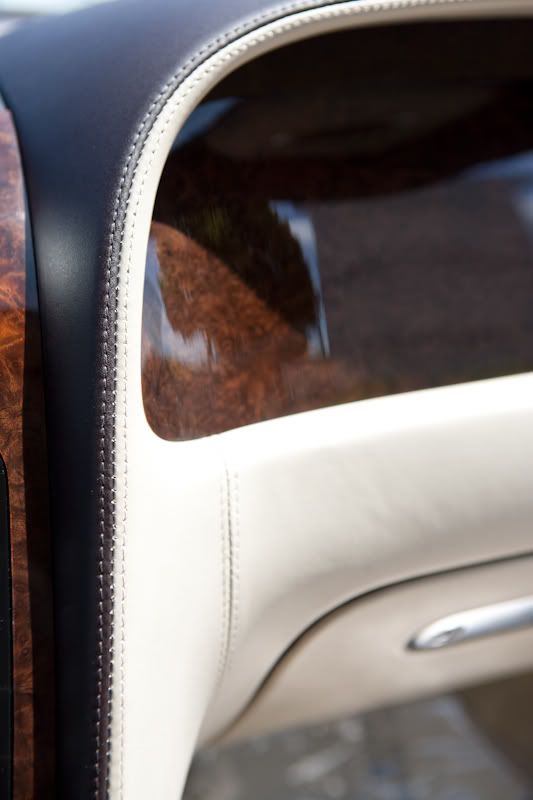
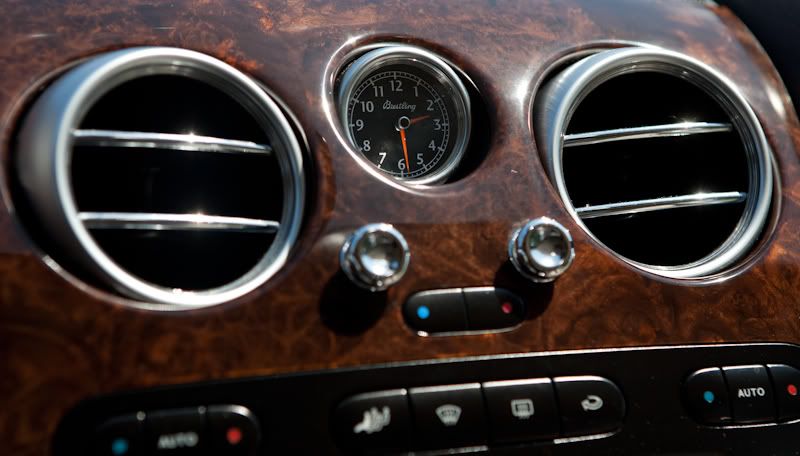
After seeing the paint. It reach its fullest potential so I turned to the interior. Omg this was bad.
Here is a few before pictures. I thought my wife�s minivan gets trashed with 3 kids. Boy this one was rough. You wouldn�t think this was a Bentley for sure. Well at least this exotic vehicle was driven you could say.

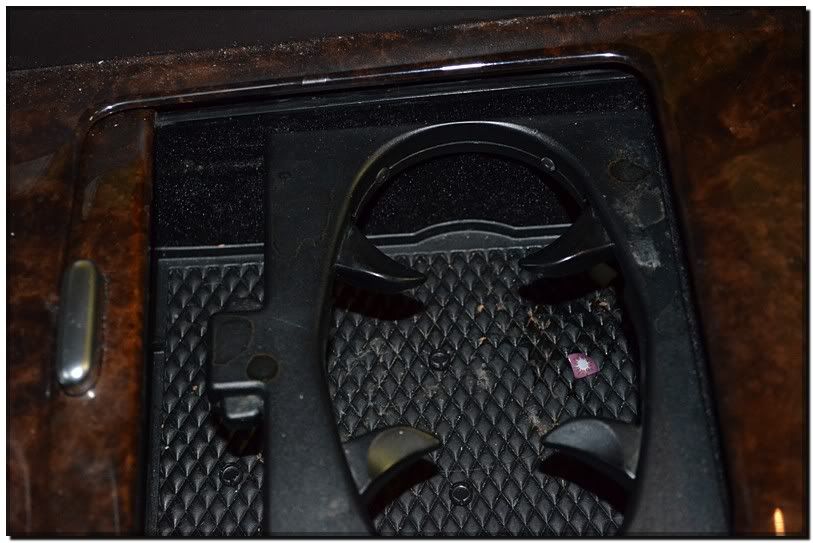
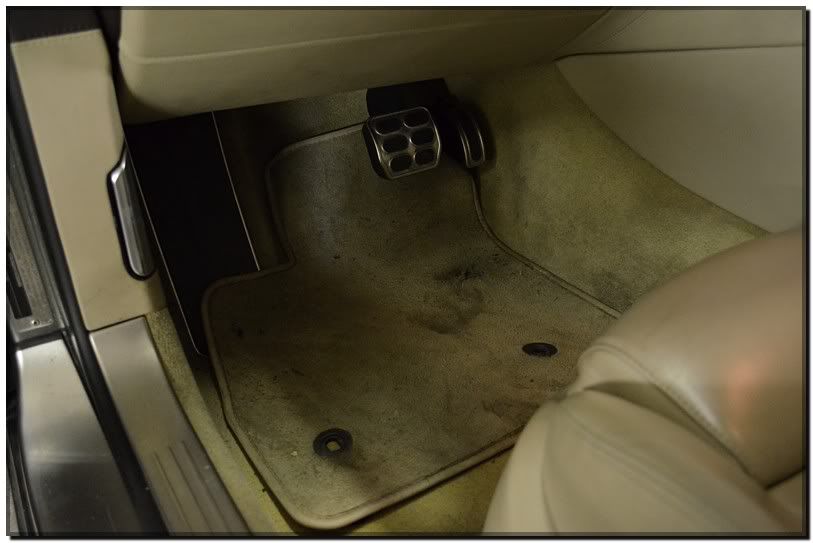
Well I first started with a good pressure blowing using the air compressor to lift all the dirt out of the seems and crevices.
Next I proceeded to give the car a vac to remove all the loose dirt then moved onto the cleaning aspect. Here are some examples below of what was involved.
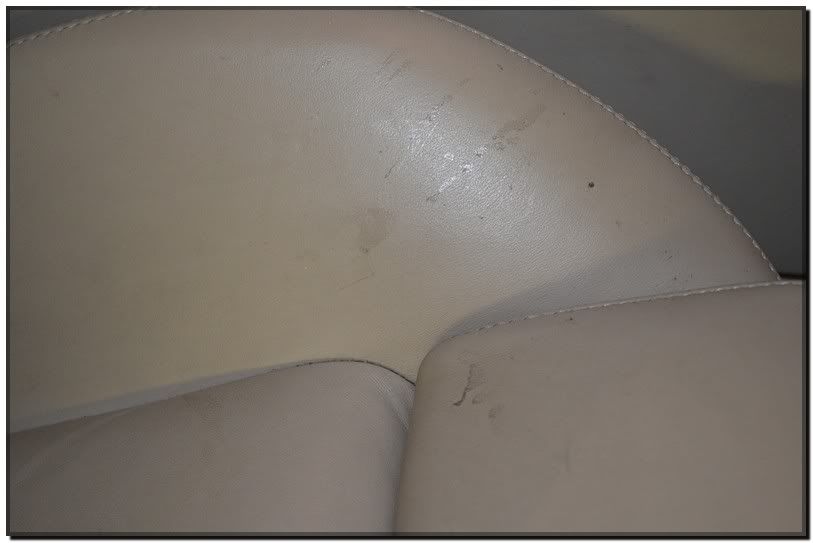
Here is a picture of the rear right seat. Notice the dirt and filth build up on it. The seat looked worn and dirty for sure.
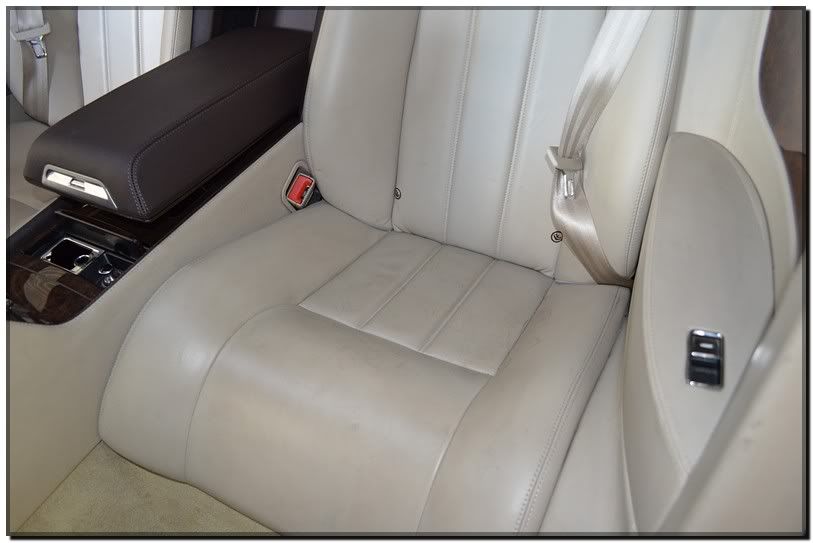
After using 3D interior cleaner and and a toothbrush style brush. This shows you the difference between a dirty seat and a clean one.
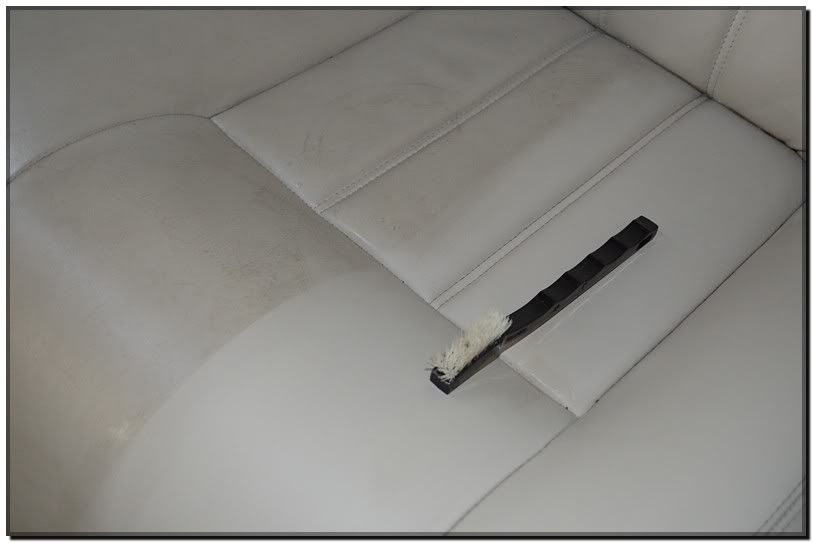
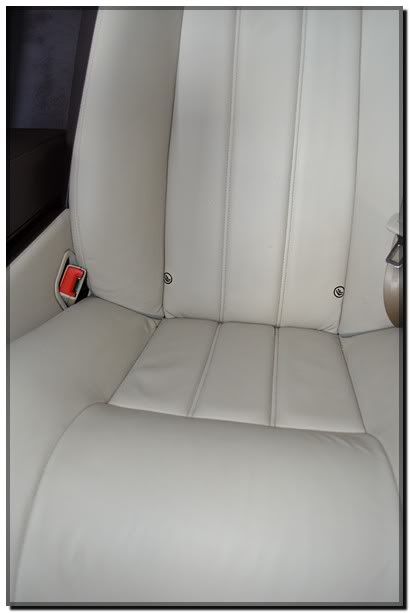
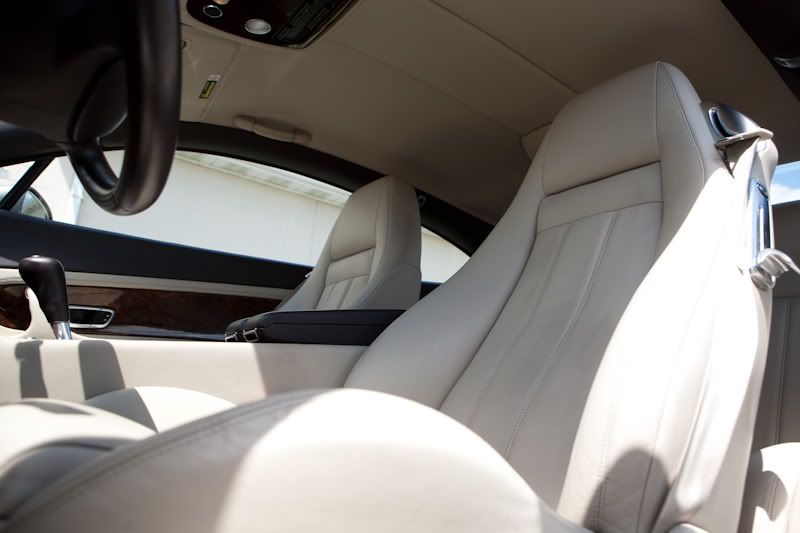
Here is the seat finished. Looking much better and very clean.
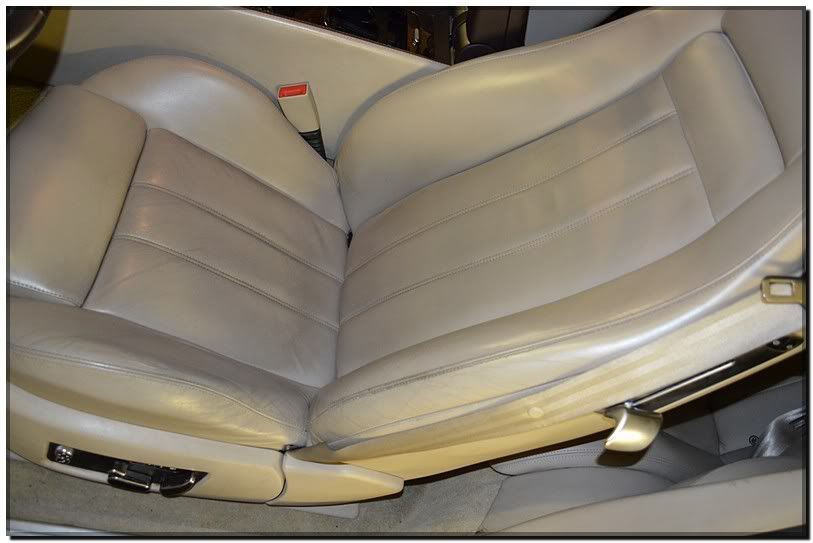
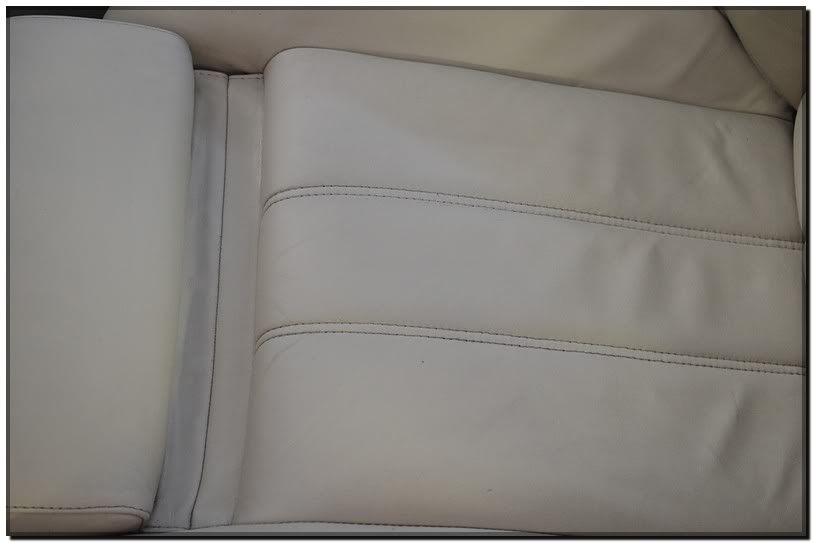
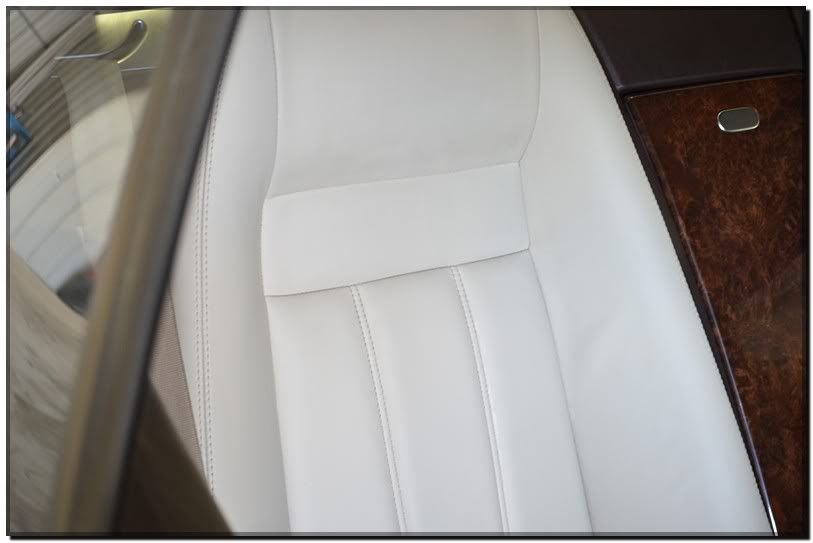
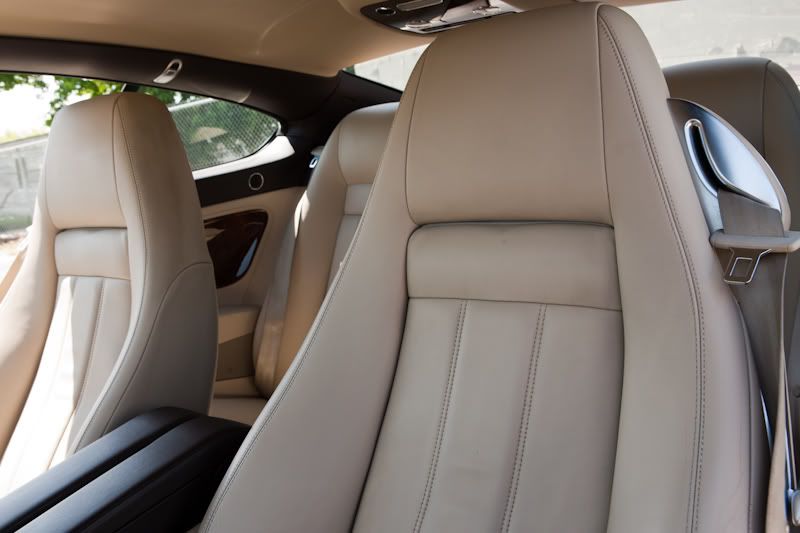
Here is a picture of the front seat this was probably the worst of all them. The same process as above was used to clean them.
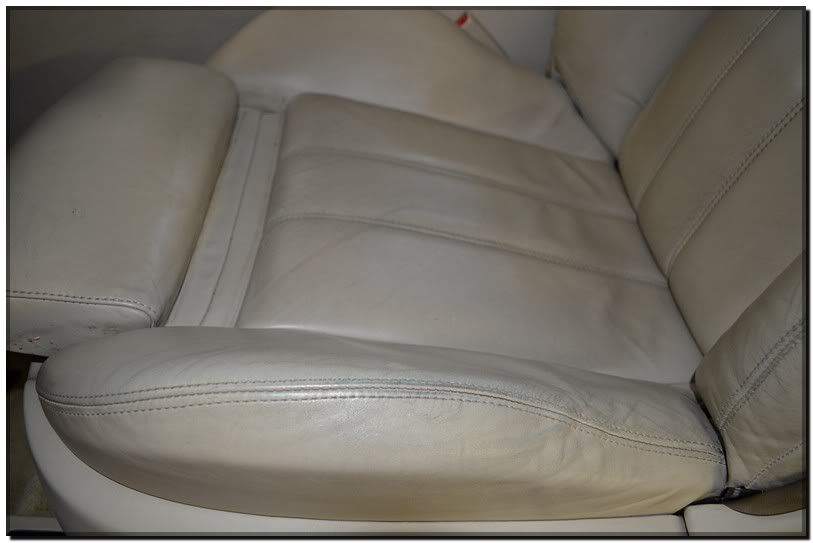
The center portion was cleaned and the rest wasn�t to show the difference:
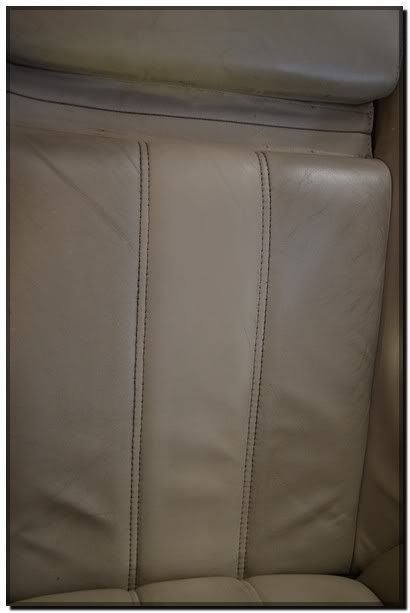
Pretty much all finished here:
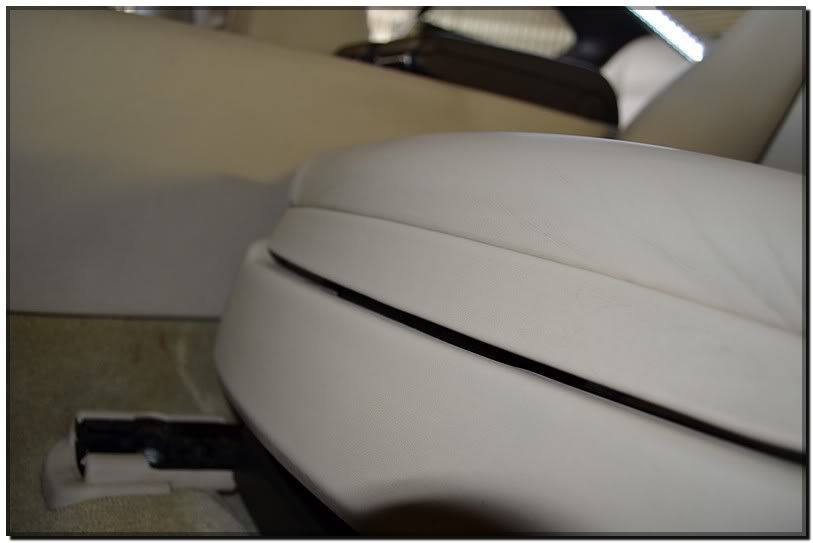
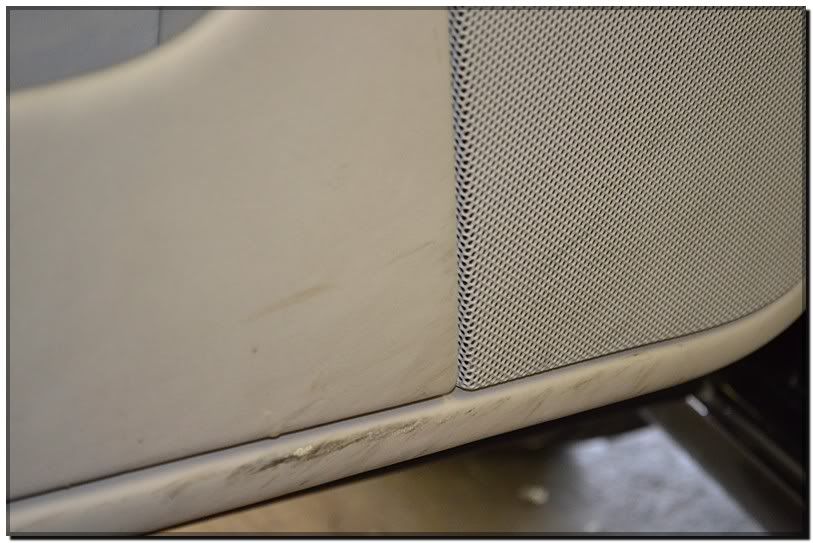
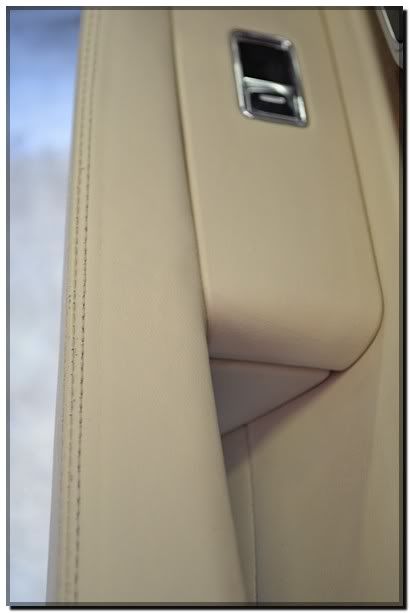
In this picture you can see the lower cladding and how bad it was scuffed
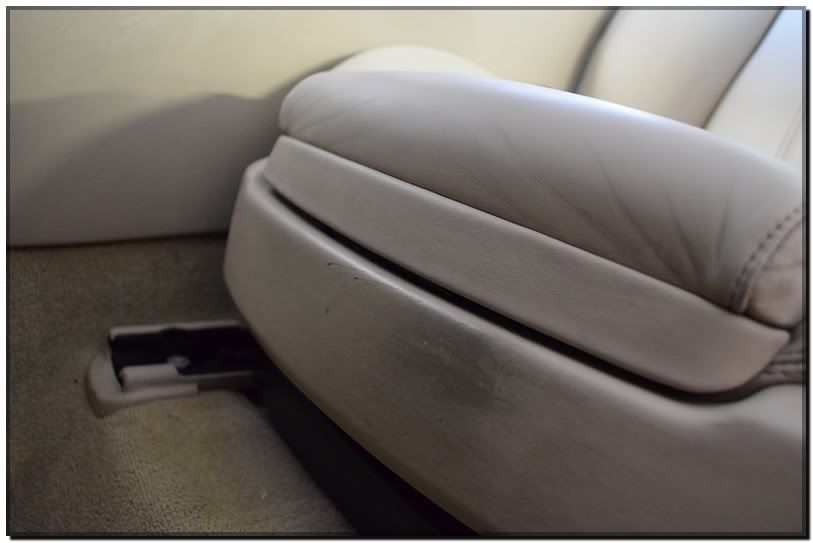
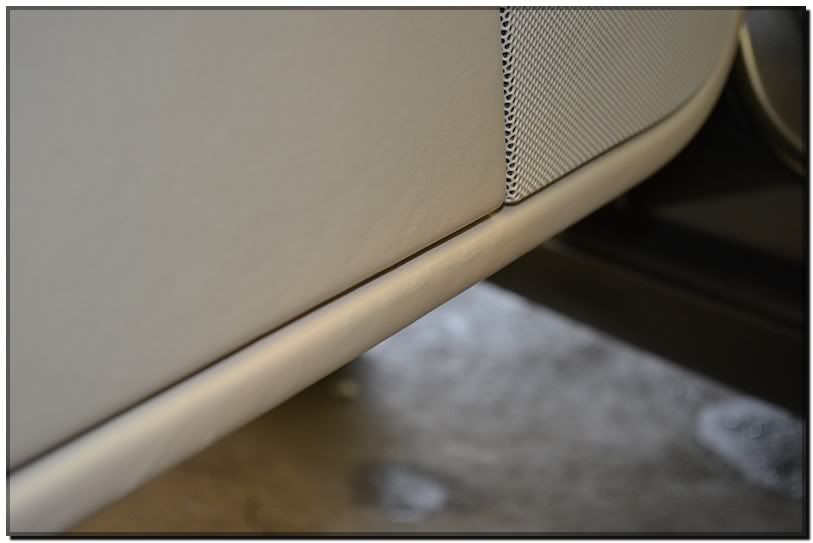
Here it is look a lot nicer.
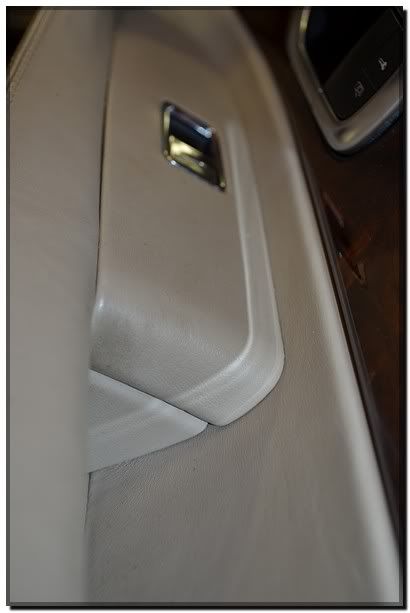
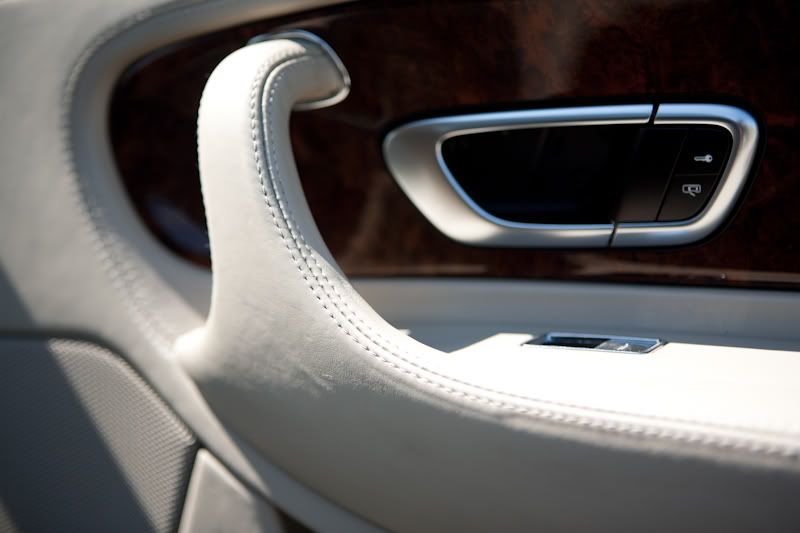
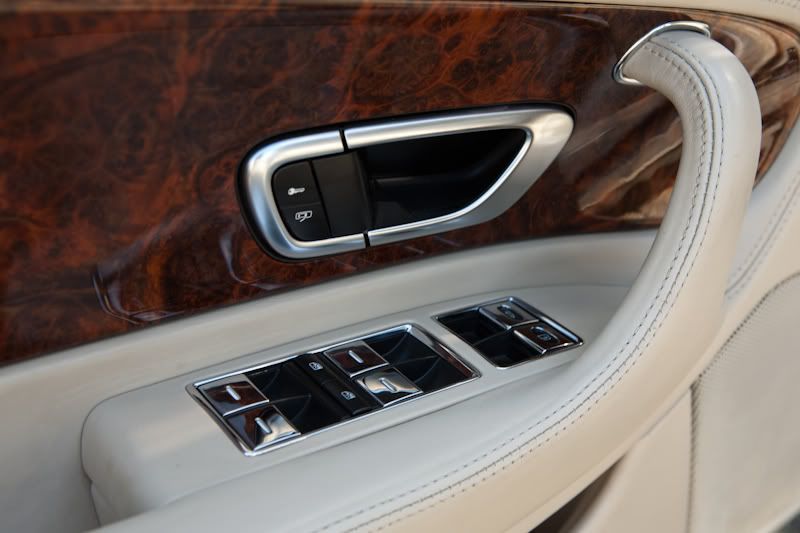
The drivers door had its fair share of abuse to.

This lower part took some work, but was made right.
Aside from cleaning the passenger rear seat a scuff was also removed.

The passenger wasn�t that nice either, but cleaned up nicely!
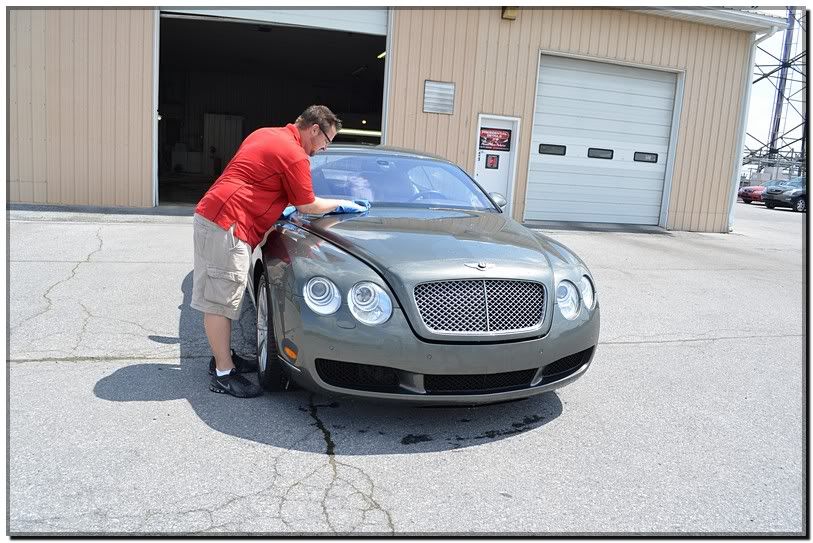
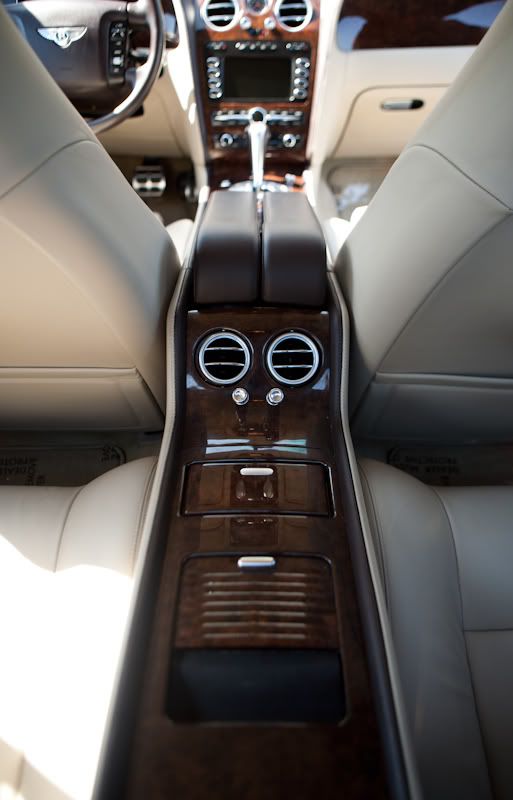
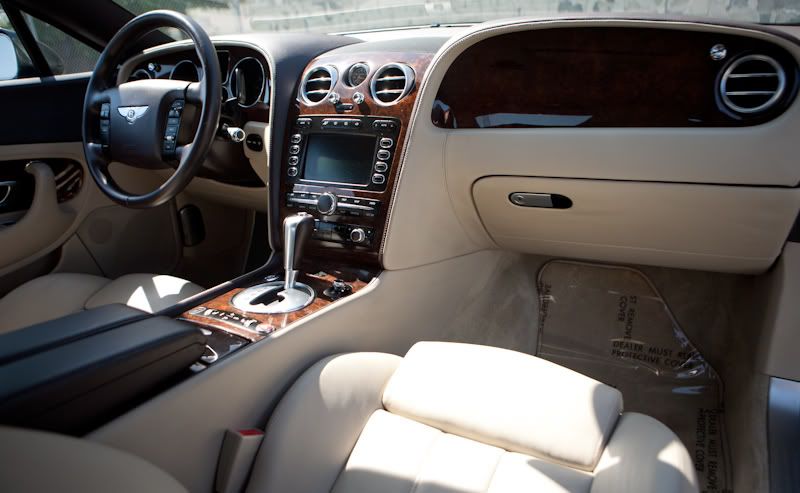
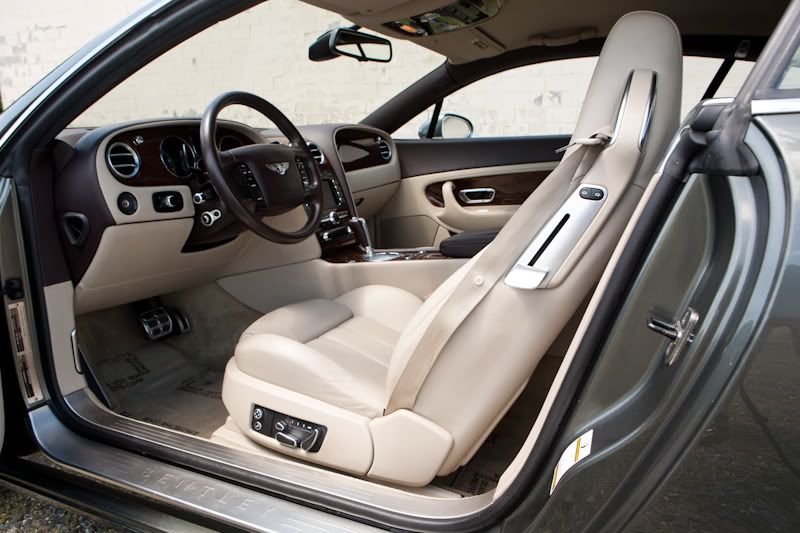
Once this was completed I did some final detailing and waxing.
Some things not mentioned in the detail. The tires were dressed with 3D ultra protect ant as well. The exhaust tips were cleaned with steel wool and the then polished by hand. Overall the car kicked my butt! It was a job that was tiresome, but rewarding on a personal level.
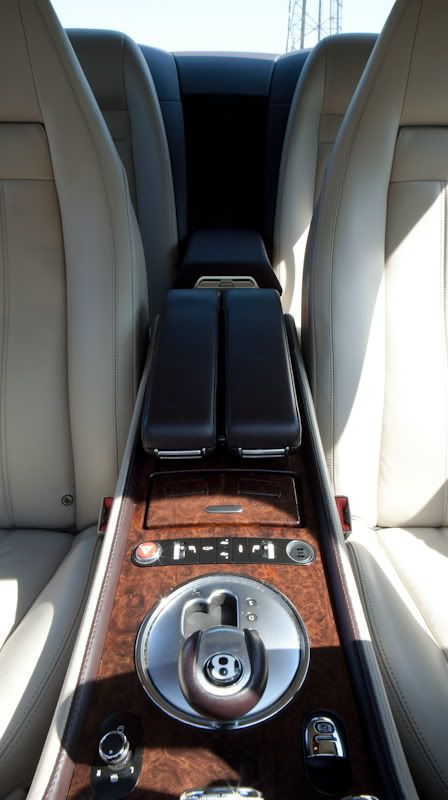
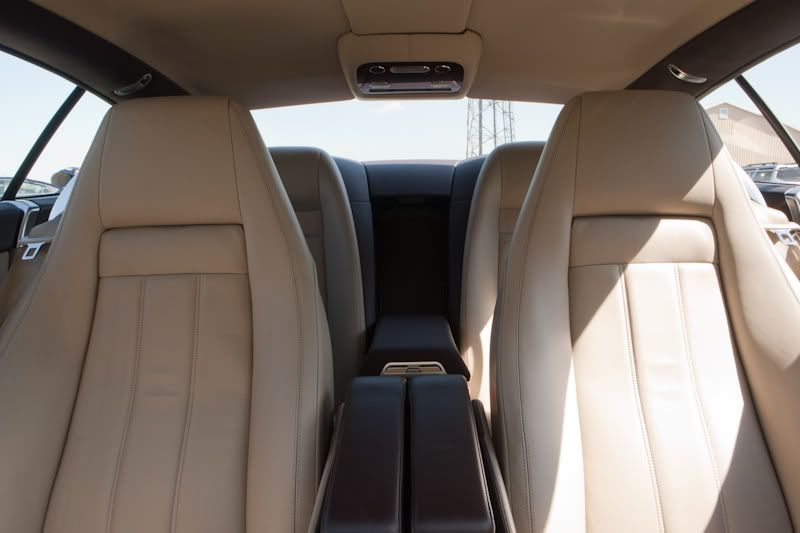
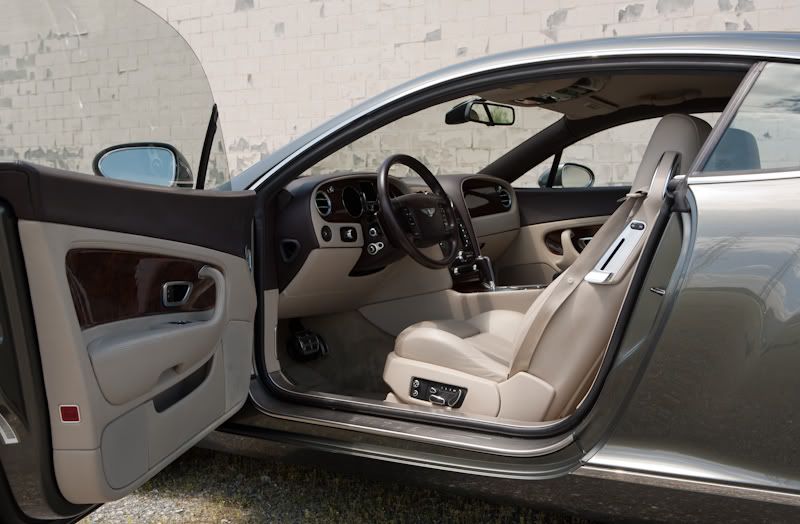
Now for some after pictures. These pictures were taken by Brett West.
Last edited by PresidentialDetails; May 11, 2011 at 10:13 AM.


 May 11, 2011 | 10:09 AM
#7
Thread Starter
| TS Detailing Sponsor | Northeast
Joined: Oct 2009
Posts: 70
From: Lancaster PA
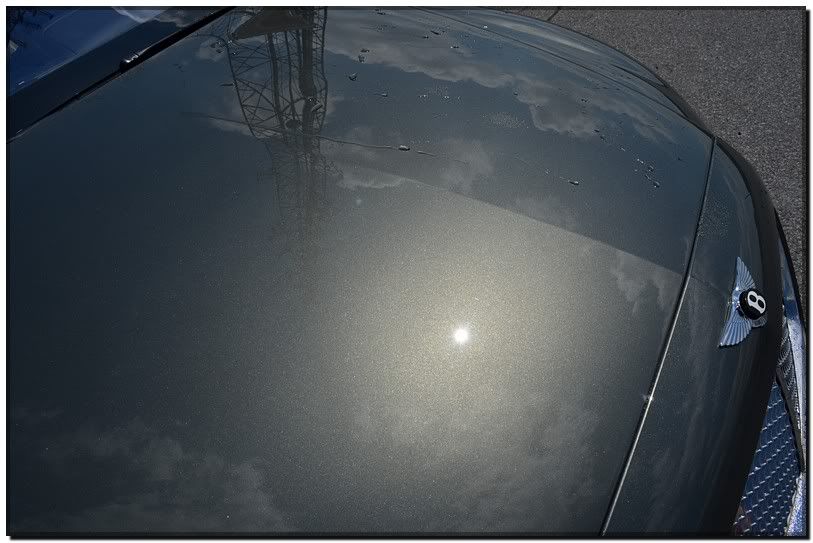
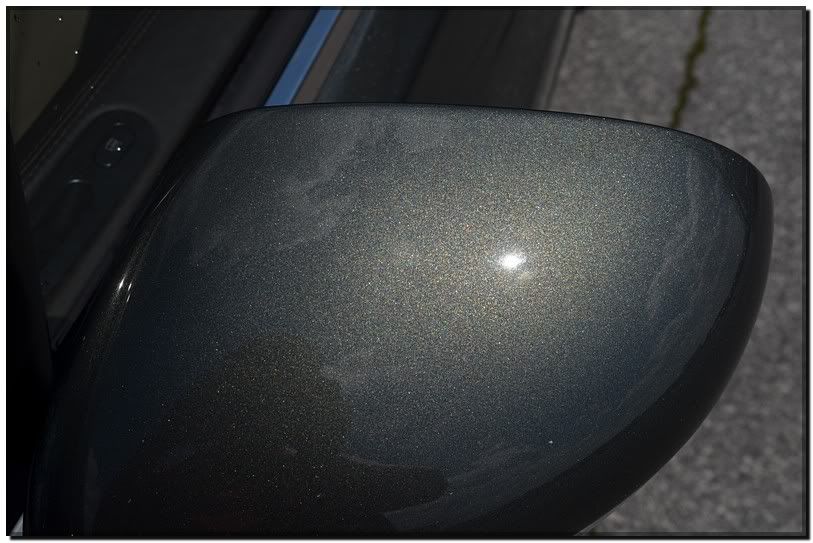
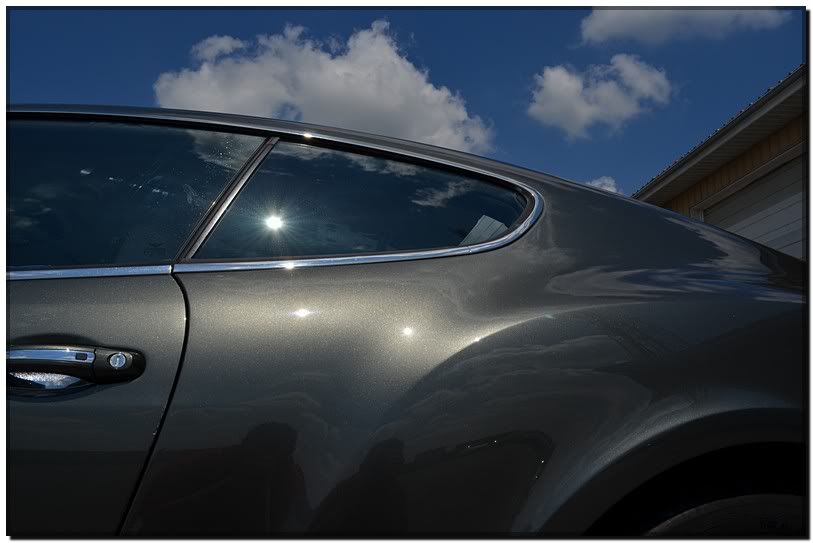
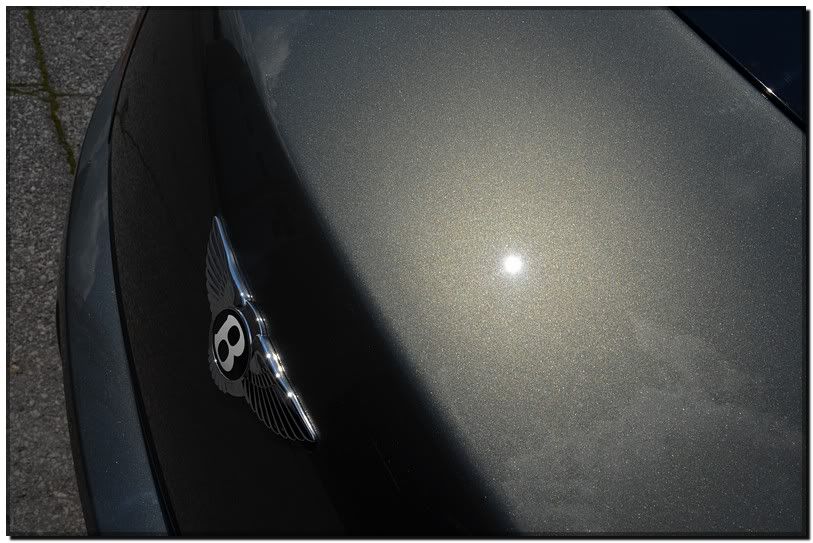
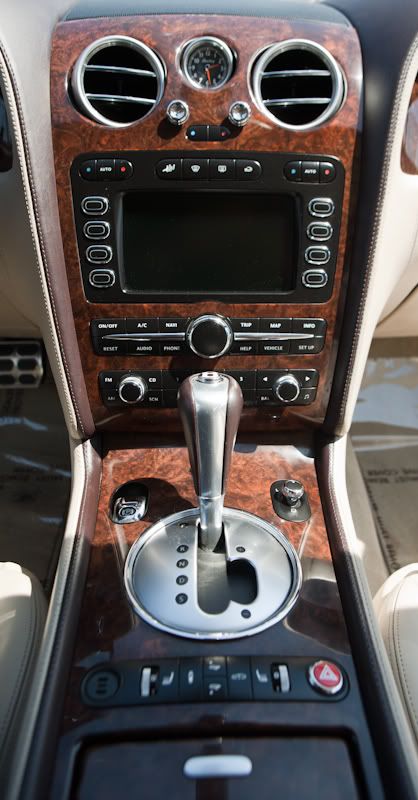
Now for the exterior pictures!
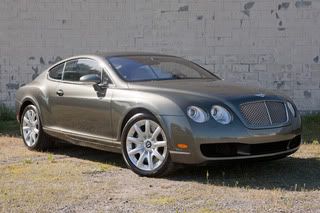
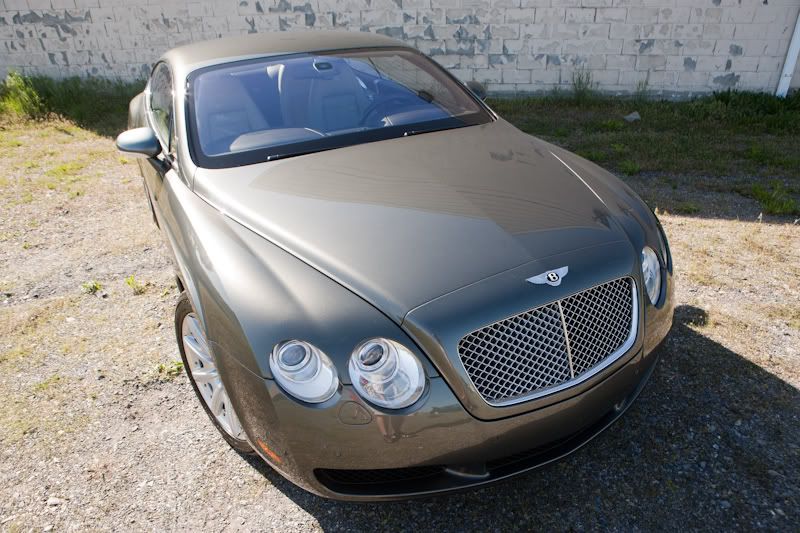
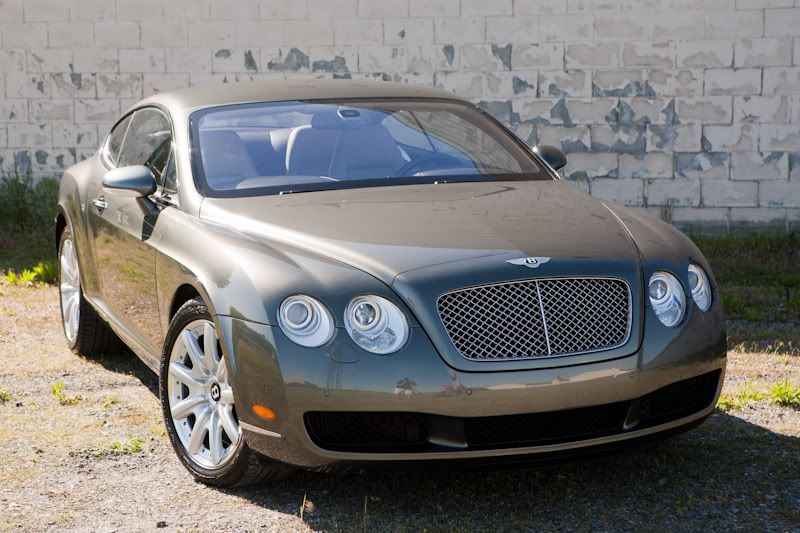
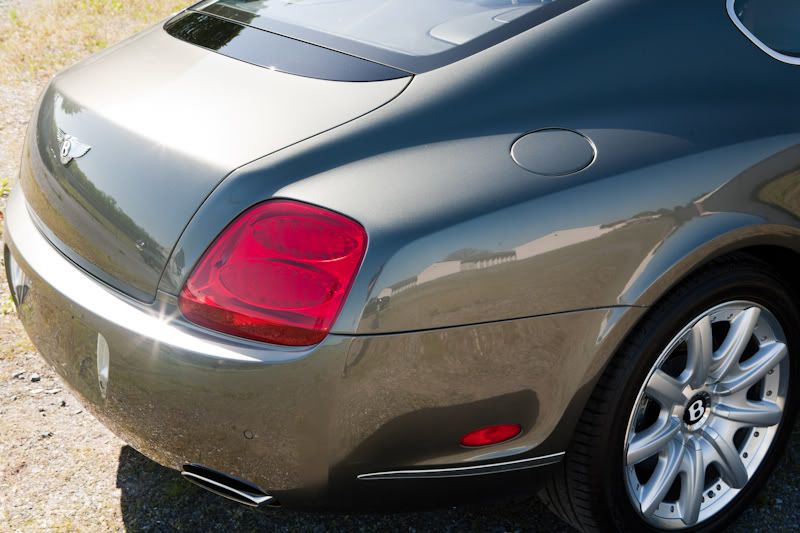
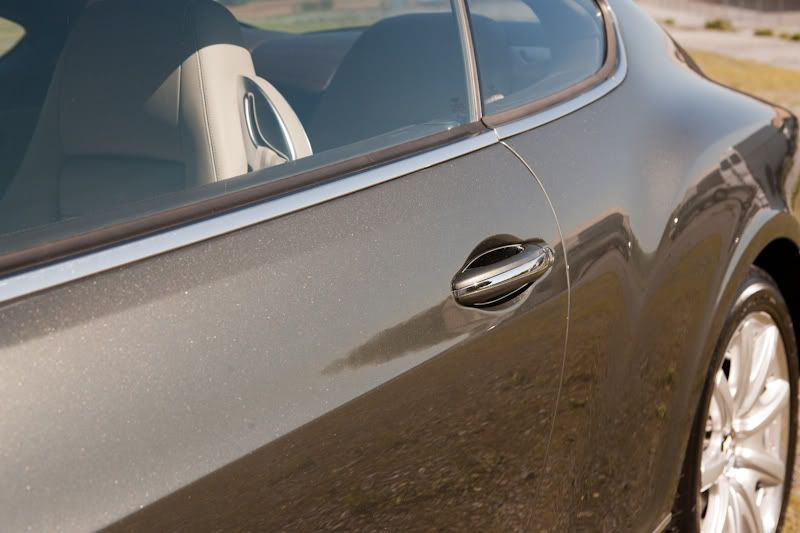
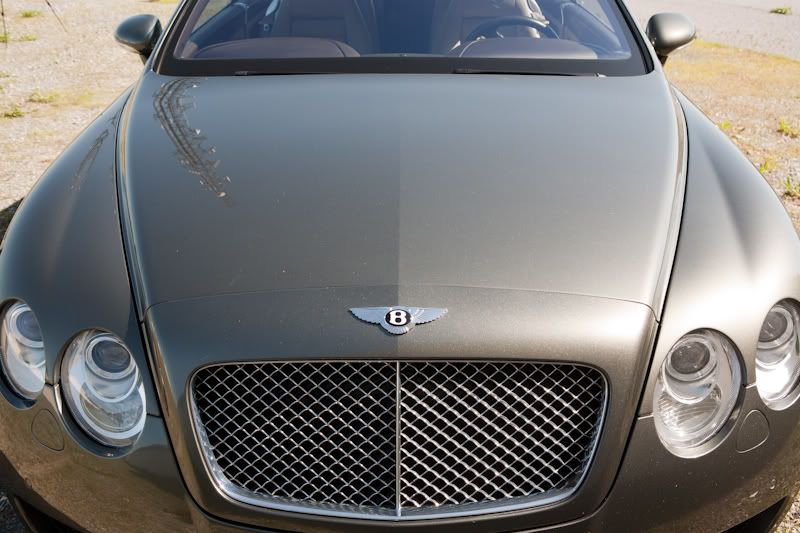
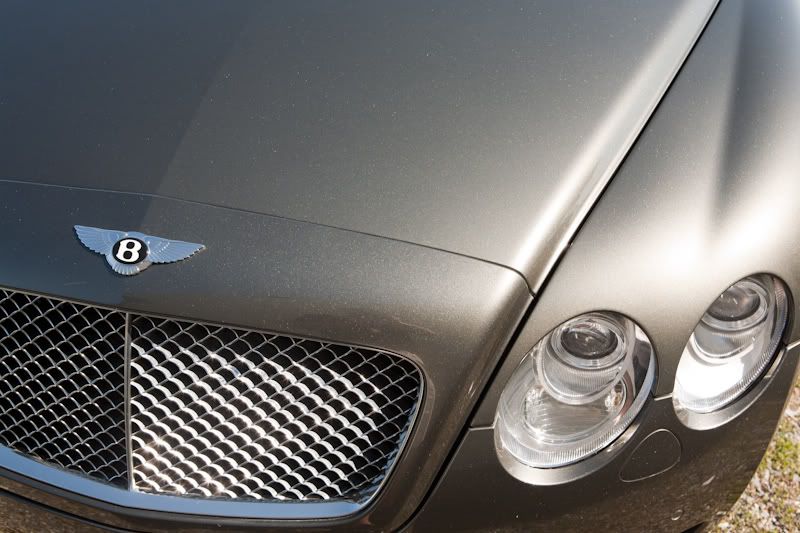

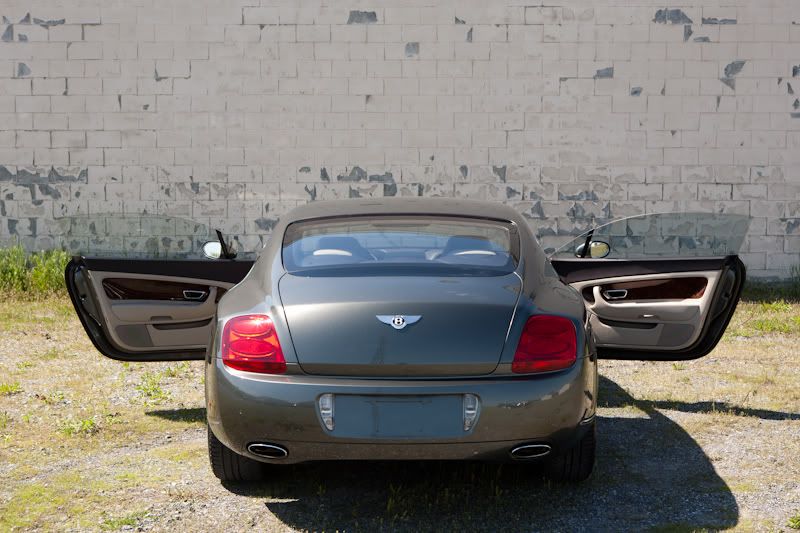

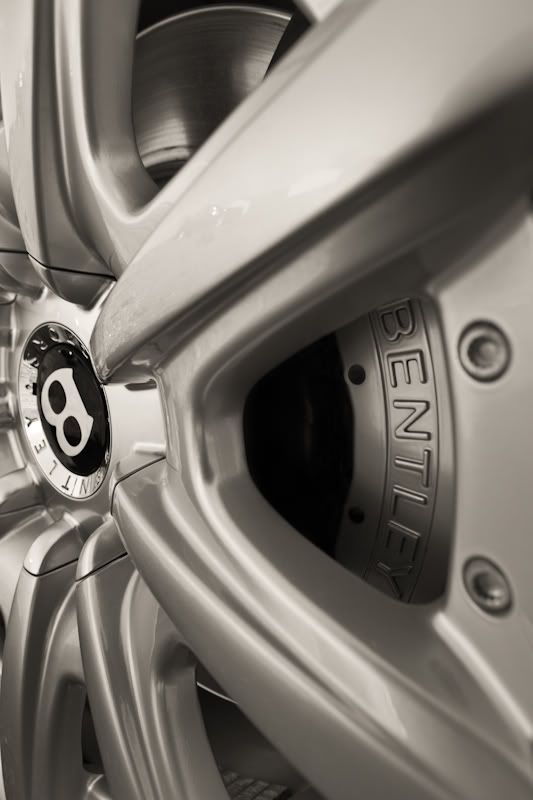
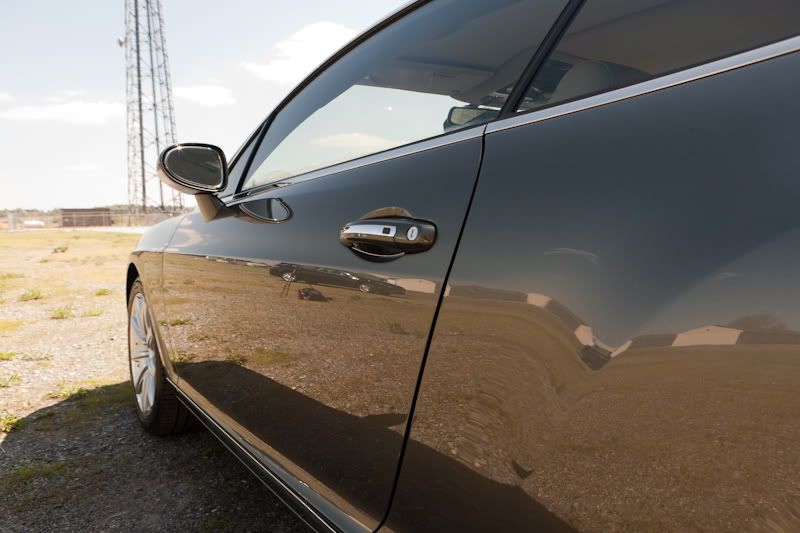
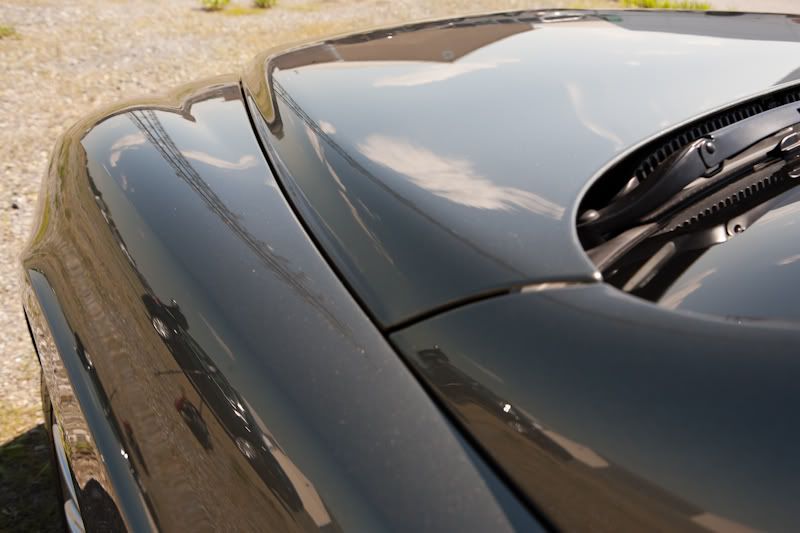
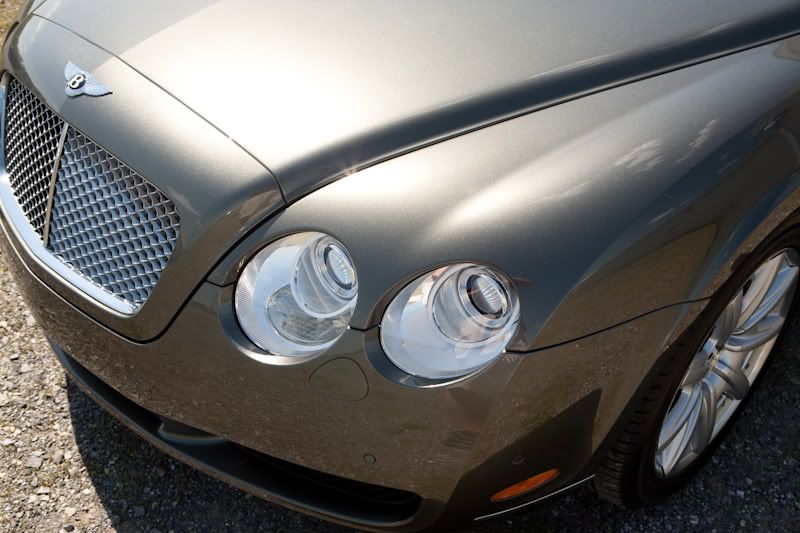

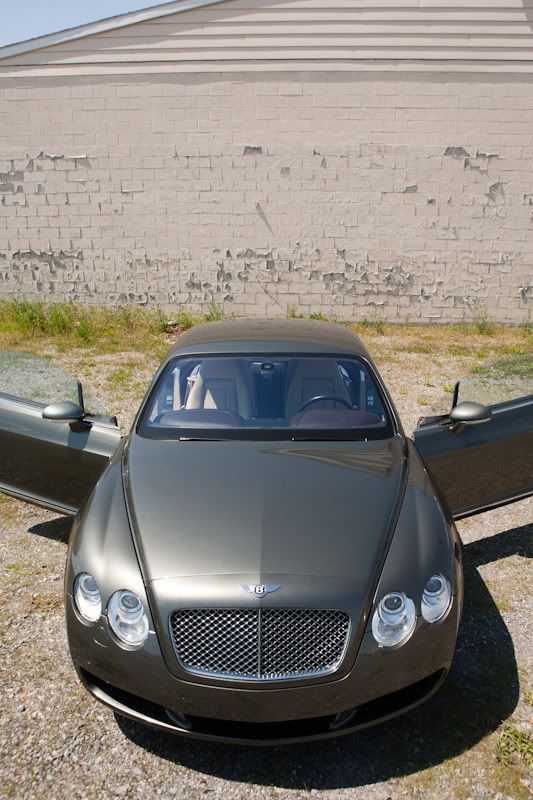
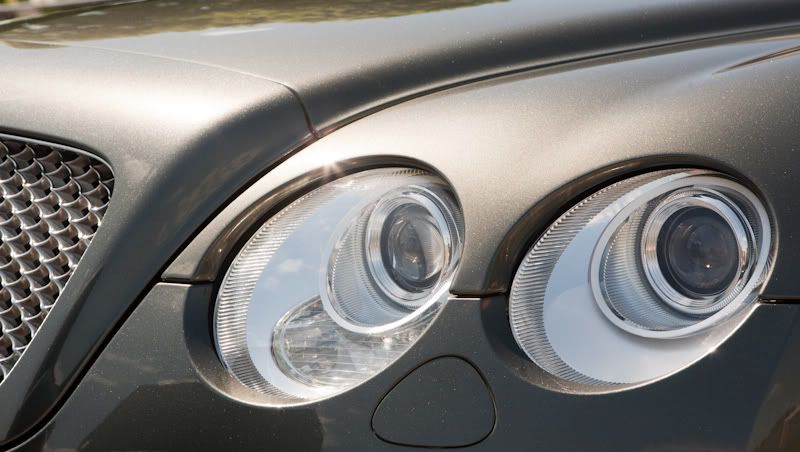
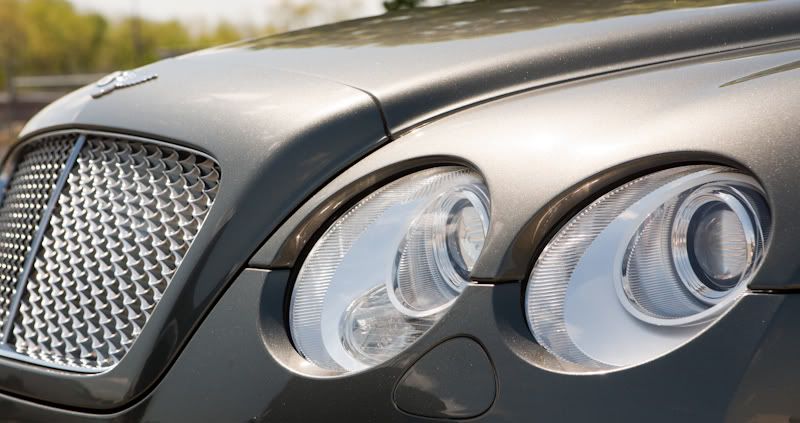
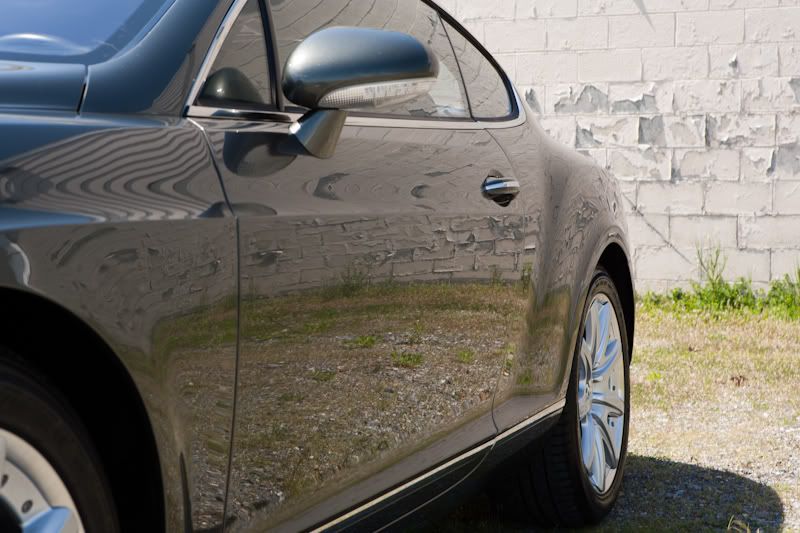
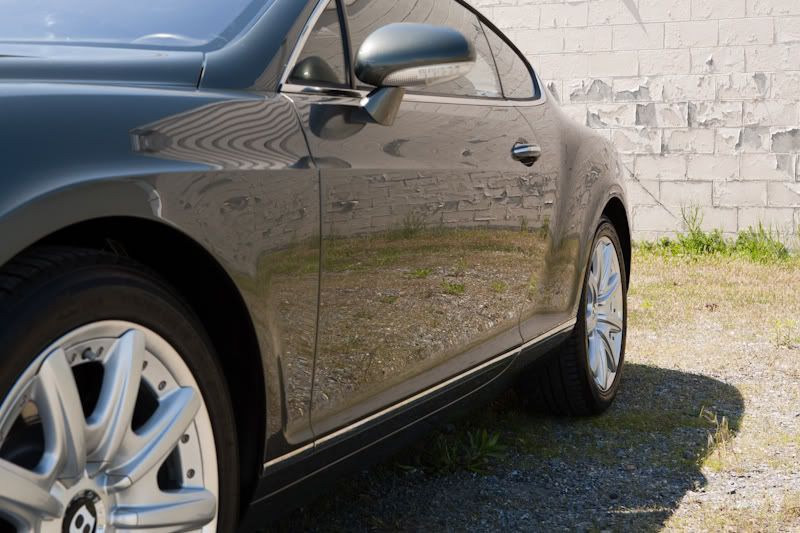
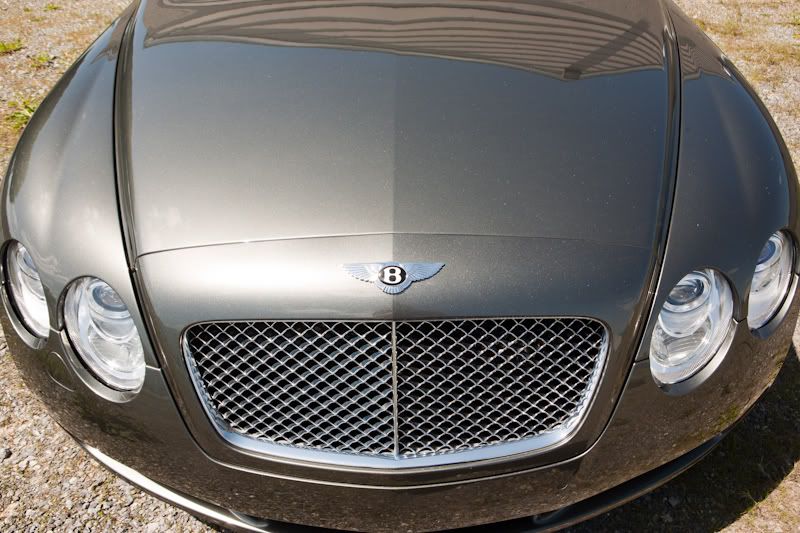
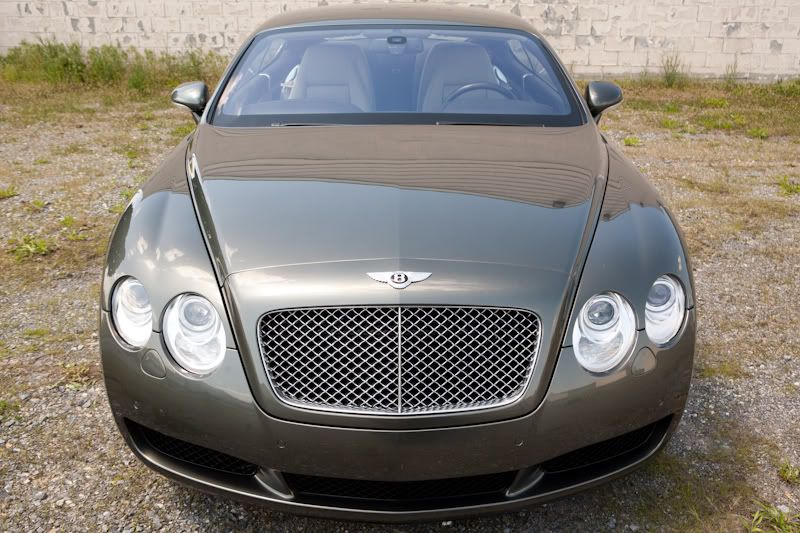
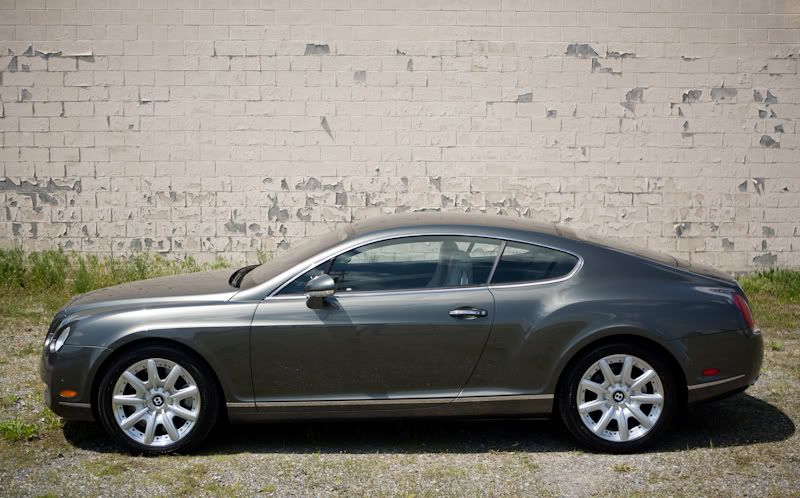
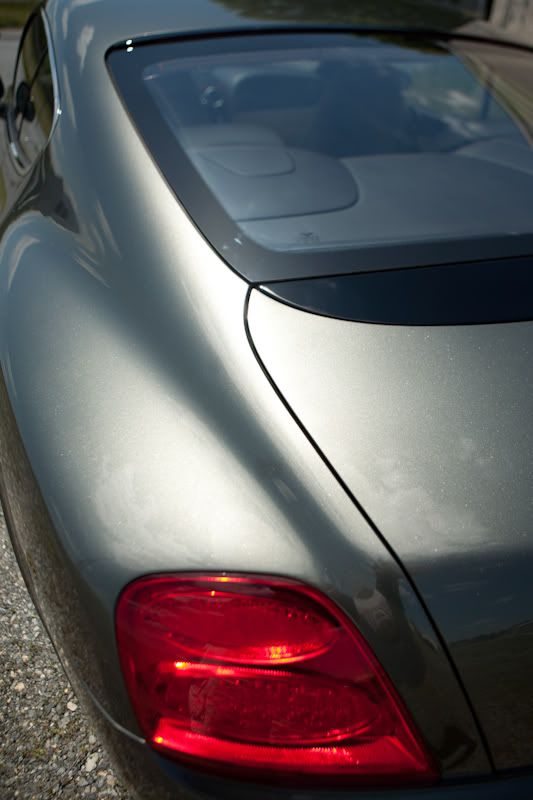

Once again Brett thanks again for all yor hard! I really loved these shots.
For those of you who would like to veiw more of Bretts work Please check out his homepage.
Brett West Digital
As always thanks for looking I hope you enjoyed the write up. This one took a while. Stay tuned for more from Presidential Details!:xyxthumbs
May 11, 2011 | 10:24 AM
#10
Thread Starter
| TS Detailing Sponsor | Northeast
Joined: Oct 2009
Posts: 70
From: Lancaster PA
Elbow grease DJ. It works wonders lol. I actually used a product from 3D international. Its there interior cleaner. I used that with a toothbrush style brush. Ans just cleaned it. They I came back over it with a leather conditioner to restore the hide to a soft feel. Thanks!